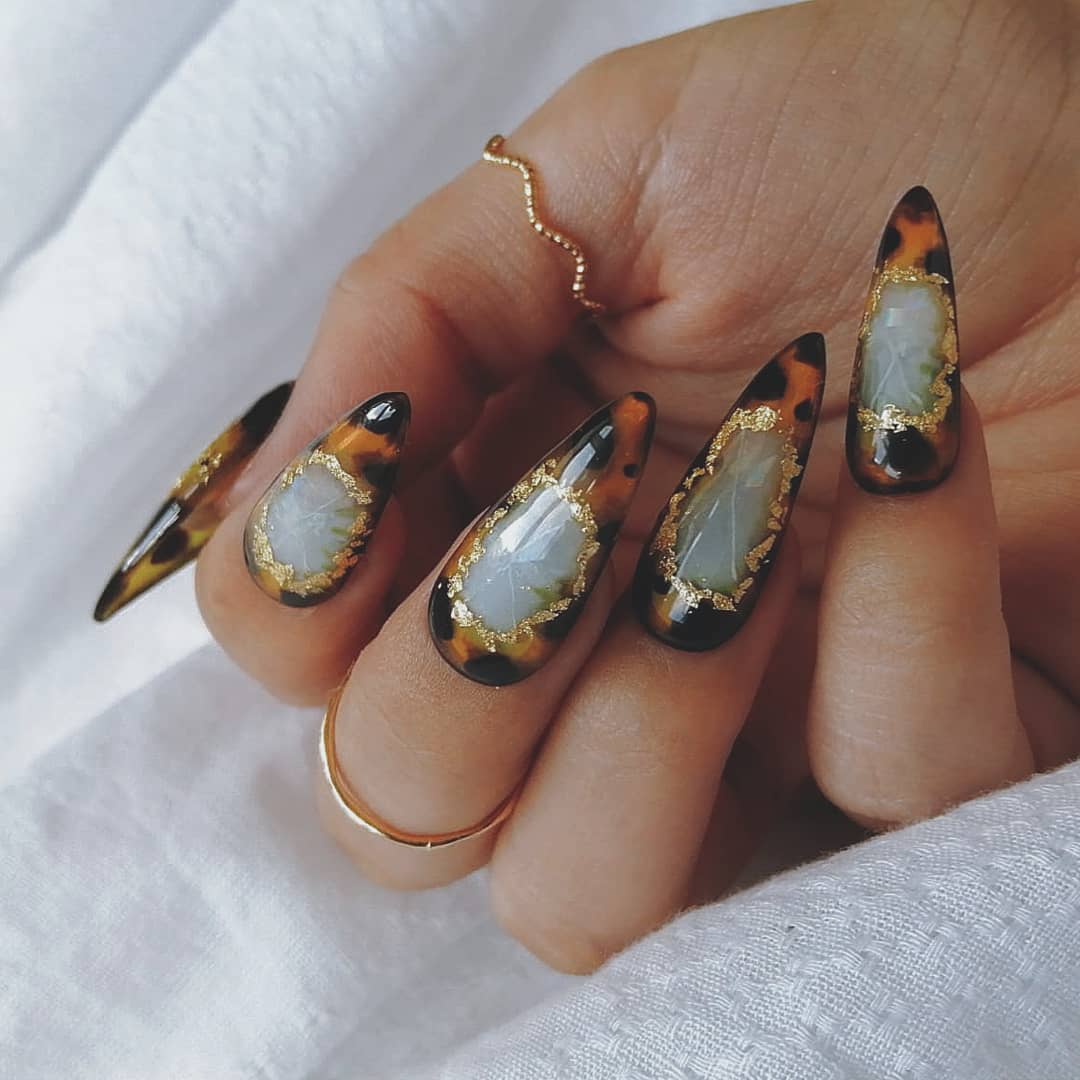
Did you know that geode nails have taken the nail art world by storm, with a 320% increase in searches over the past year? These mesmerizing designs mimic the intricate patterns and vibrant colors found inside geodes, creating a stunning and unique look for your nails. Whether you’re looking to add a touch of glamour to your everyday style or make a bold statement for a special occasion, geode nails are the perfect choice. Get ready to elevate your nail game with these eye-catching and trendy designs that are sure to turn heads wherever you go.
Unveiling the Geode Nail Trend
Origins
Geode nails, inspired by the natural beauty of geodes, originated from the art trend of mimicking geological formations on nails. This unique style involves creating designs that resemble the intricate patterns and colors found in geodes.
Popularity

The geode nail trend has surged in popularity within the beauty industry due to its striking visual appeal and versatility. Nail artists and enthusiasts alike have embraced this trend for its ability to create eye-catching and mesmerizing designs that stand out.
Unique Features
Geode nail designs are characterized by their use of vibrant colors, swirling patterns, and crystal-like textures that mimic the look of real geodes. By incorporating a mix of metallic foils, glitter, and translucent polishes, these designs create a captivating illusion of depth and dimension on the nails.
Step-by-Step Geode Nail Tutorial
Materials Needed
To create stunning geode nails, gather the following materials:
- Base coat
- Nail polish in desired colors
- Clear nail polish or topcoat
- Small paintbrushes or nail art brushes
- Nail tape or liquid latex
- Makeup sponge
- Nail polish remover and cotton pads
Creating Geode Nails

- Prepare Your Nails: Start by applying a base coat to protect your nails.
- Paint the Base Color: Apply a base color of your choice and let it dry completely.
- Create the Geode Effect: Use different colored nail polishes to create the geode effect. Dab the colors onto your nails using a makeup sponge.
- Add Details: Use a small brush to add intricate details like lines and swirls to mimic the look of real geodes.
- Seal with Topcoat: Once satisfied with the design, seal it with a clear topcoat for a glossy finish.
Tips for Beginners

- Start with lighter colors for a more subtle geode effect.
- Experiment with different color combinations to find what works best for you.
- Practice on fake nails or nail swatches before trying it on your own nails.
Gemstone Inspired Designs
Gemstone Colors
Experiment with a variety of gemstone colors like amethyst, red, and gold foil to create stunning nail art. Incorporate shades that mimic the natural hues found in geodes.
Textured Designs
Utilize glitter and acrylic to add texture resembling the intricate patterns seen in geodes. Use a fine brush to delicately apply details that imitate the unique formations found in nature.
Combine different techniques such as light-reflecting polishes and layered colors to achieve a multi-dimensional look that captures the essence of geodes. Incorporate rings or other accessories to enhance the overall aesthetic.
Healing Powers Fusion

Infuse your geode nails with elements symbolizing healing powers associated with specific gemstones. Create designs inspired by the calming properties of amethyst or the energizing effects of red stones.
- Experiment with acrylics for added depth
- Use light-reflecting polishes for a shimmering effect
Tips for Perfect Geode Nails
Choosing Colors
When selecting colors for geode nails, opt for a blend of shades that mimic the natural hues found in geodes. Consider using deep purples, blues, and greens to create a realistic and visually appealing design.

Product Selection

To ensure longevity and durability of your geode nail art, invest in high-quality products such as gel polishes and top coats. These products not only enhance the overall look but also help in maintaining the design for an extended period.
Troubleshooting Tips
If you encounter issues like air bubbles or uneven layers while creating geode nail art, try applying thinner layers of polish and curing each layer properly under a UV or LED lamp. This technique helps in achieving a smooth and flawless finish.
Summary
You’ve learned all about the captivating geode nail trend, from its origins to how you can recreate stunning gemstone-inspired designs at home. With our step-by-step tutorial and expert tips, achieving flawless geode nails is within your reach. Let your creativity shine as you experiment with colors, textures, and techniques to craft your unique geode masterpiece.
Now it’s your turn to unleash your inner artist and rock those geode nails with confidence. Share your creations, inspire others, and keep exploring new trends in the world of nail art. The possibilities are endless when you dare to push the boundaries of beauty. Get ready to show off your gorgeous geode nails and let your style speak volumes!


