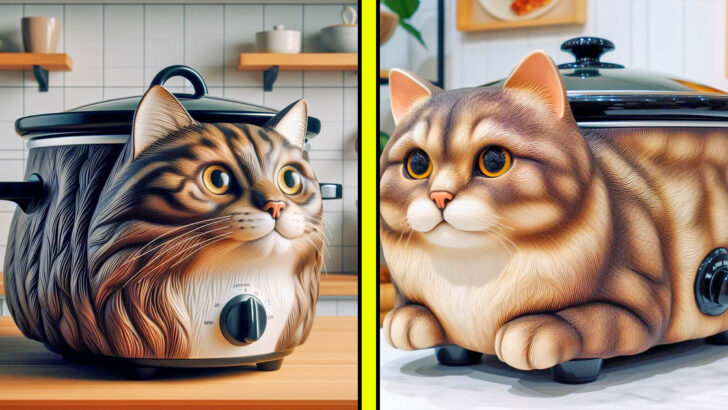
Ever wondered about the convenience of preparing delicious meals for your feline friend effortlessly? Imagine combining the ease of a crockpot with the love for your cat. With the trending concept of “Cat-Shaped Crockpot,” you can now whip up nutritious and tasty dishes for your beloved pet without breaking a sweat. Curious to explore this fuss-free cooking trend that keeps your cat purring with delight? Dive into our guide, where we unravel the secrets behind this innovative way of pampering your furry companion with wholesome homemade meals.
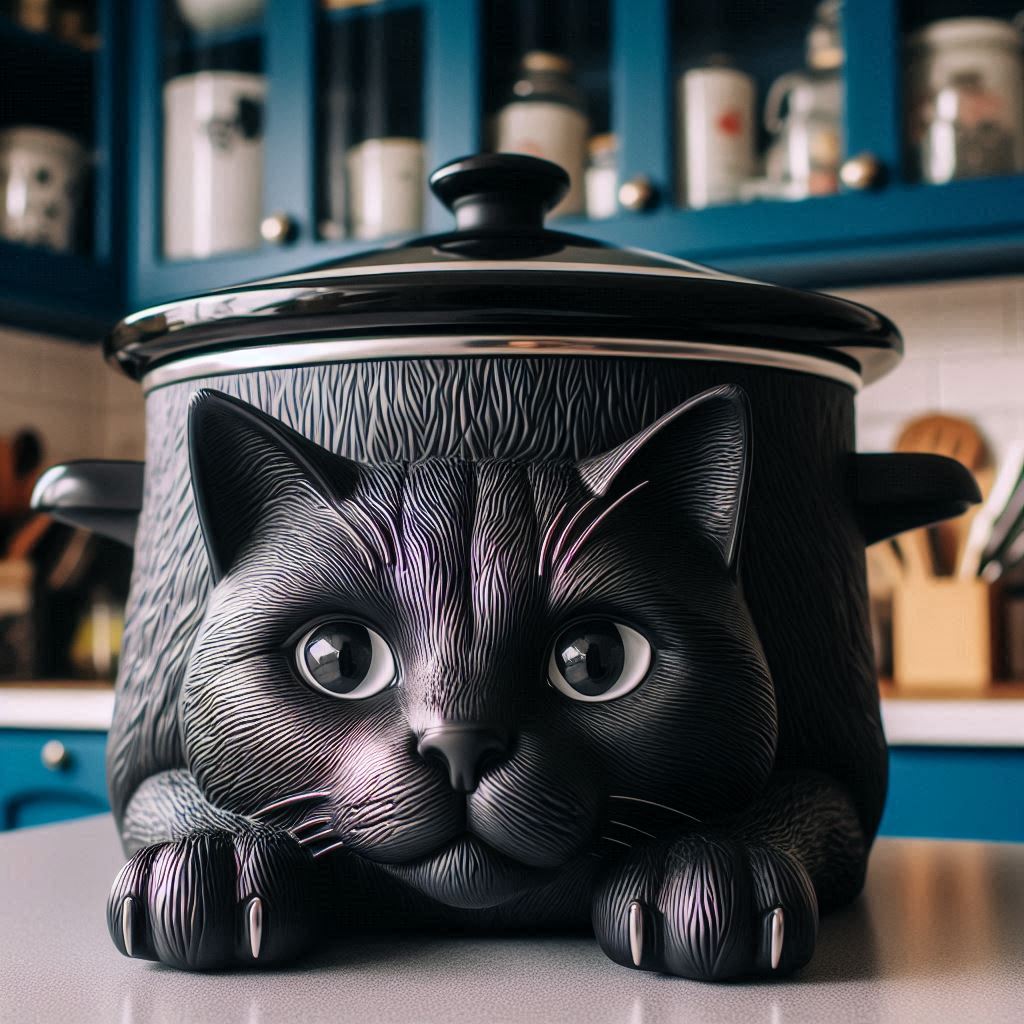
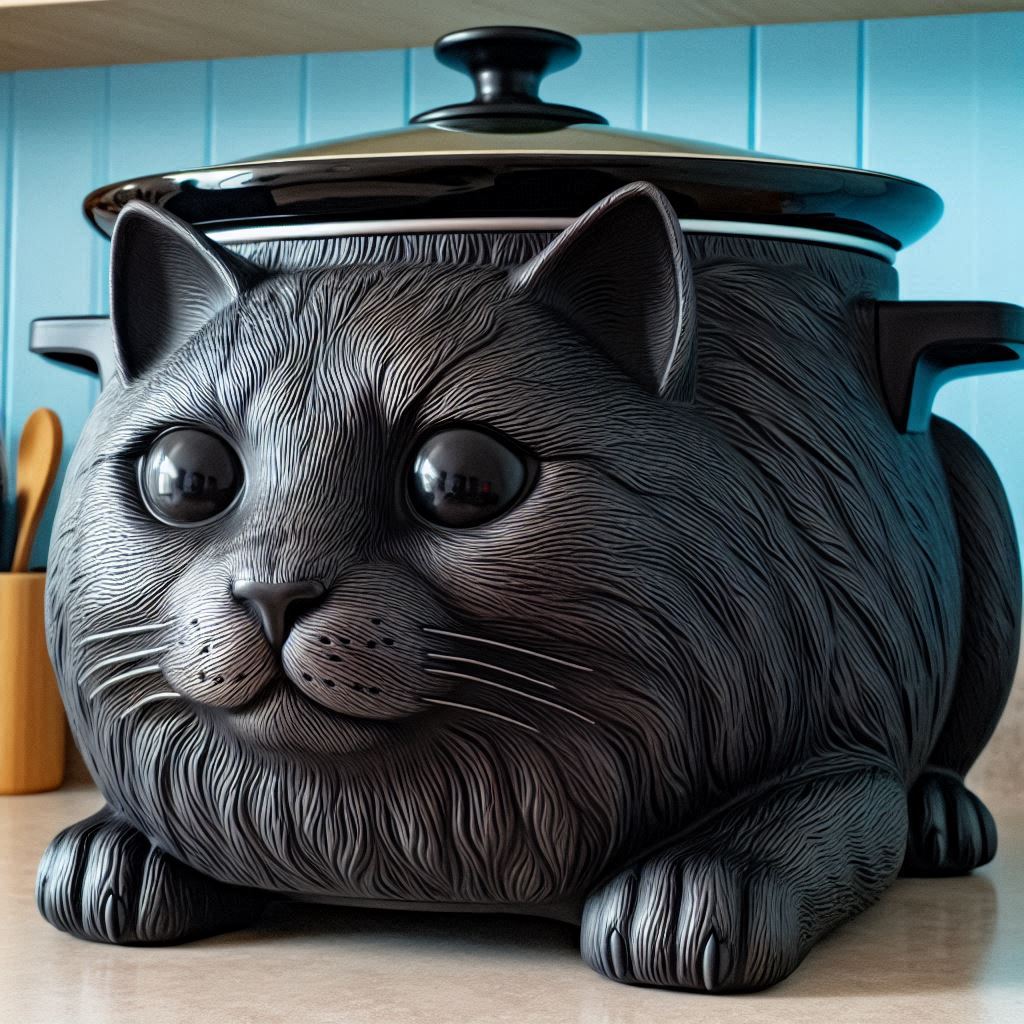
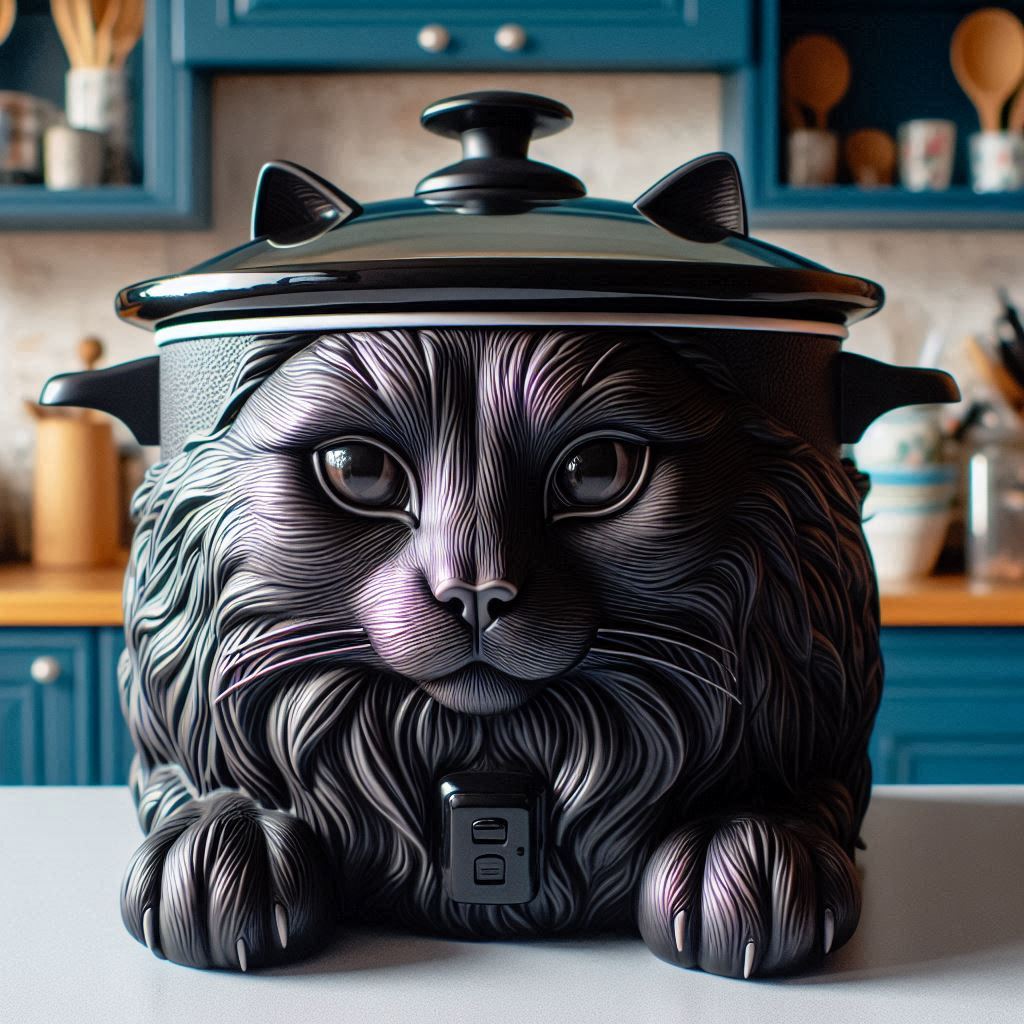
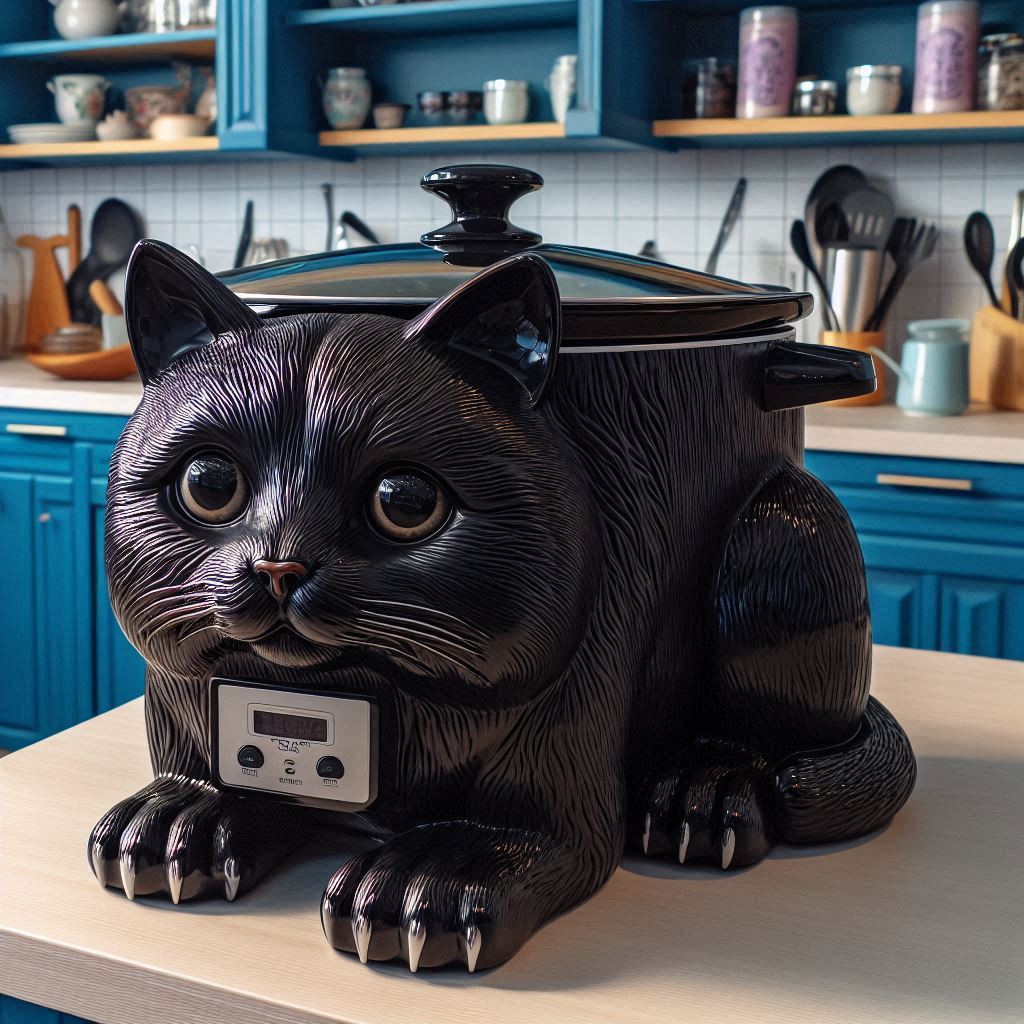
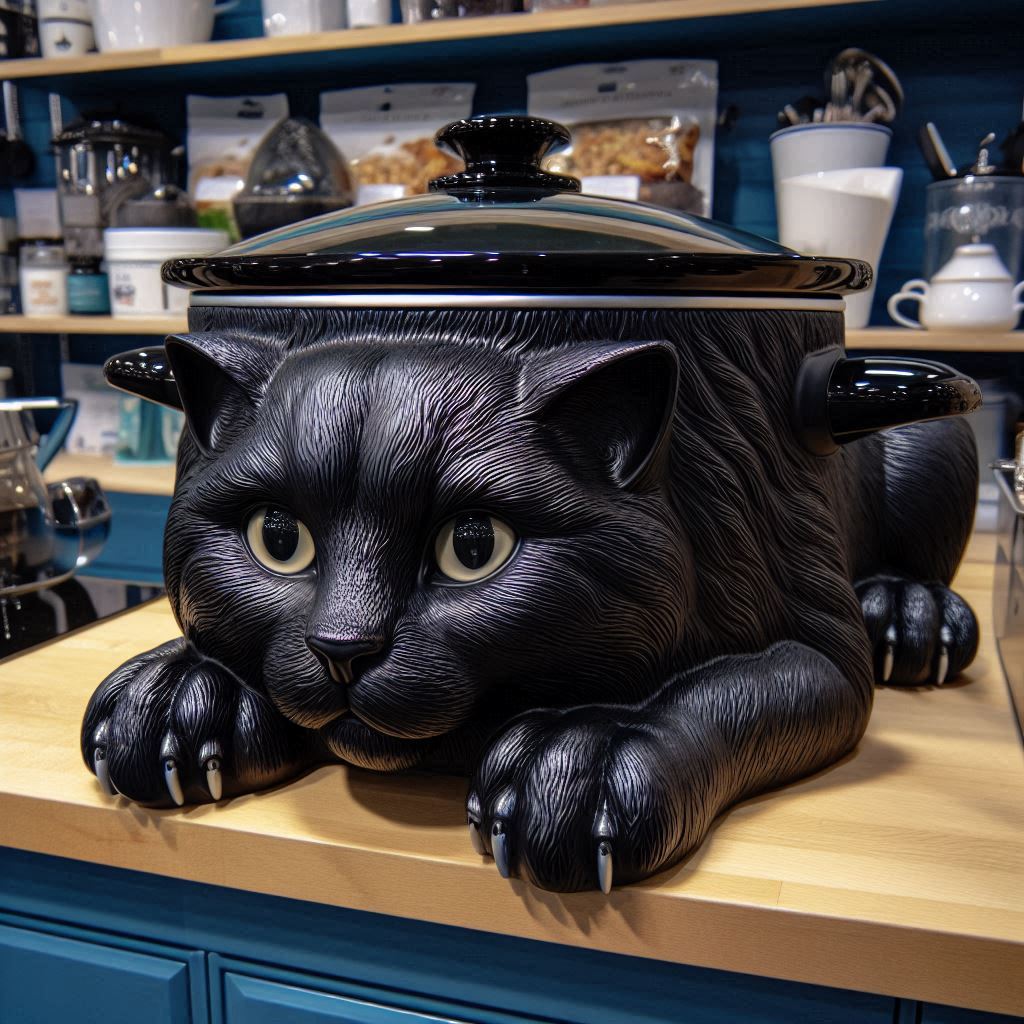
Cat-shaped slow cookers come in a variety of designs, ranging from cute and cartoonish to realistic feline shapes. These cookers often feature adorable cat ears and tails, making them a fun addition to any kitchen.
Design Features
The unique design features of cat crockpots include paw prints on the lid, whisker-shaped handles, and sometimes even meowing sounds when the cooking is complete. Some models also have LED eyes that light up while in use.
Color Options
When it comes to color options, cat crockpots are available in a wide range of choices. From classic black and white to vibrant hues like pink and teal, you can find a cooker that matches your kitchen decor or adds a pop of color to your countertop.
Creative Meals for Your Cat
Healthy Ingredients
When preparing meals for your cat, ensure to incorporate nutrient-rich ingredients like lean meats, such as chicken or turkey. These proteins are essential for your cat’s overall health and well-being.
Include vegetables like carrots and peas in their meals. Vegetables provide essential vitamins and minerals that contribute to a balanced diet for your feline companion.
Mealtime Enjoyment
Enhance mealtime for your purr-fect friend by introducing variety in their diet. Rotate between different proteins and vegetables to keep mealtime exciting and engaging for your cat.
Consider incorporating interactive feeders or puzzle toys during mealtime. These tools not only provide mental stimulation but also slow down eating, preventing digestive issues in cats.
Homemade Treats
Create homemade treats for your cat using simple recipes. Mix canned tuna with a small amount of mashed sweet potato, then shape into small balls as a tasty snack.
Experiment with making frozen treats by blending plain yogurt with a touch of honey and freezing the mixture in ice cube trays. These frozen treats can be a refreshing snack for your cat on hot days.
Homemade Cat Food Recipes
Fresh Ingredients
Prepare homemade cat food recipes by using fresh ingredients to ensure your feline friend receives the best nutrition. Opt for high-quality proteins like chicken, turkey, or fish.
Customize recipes with nutritious vegetables such as carrots, peas, and spinach. Incorporate whole grains like brown rice or quinoa for added fiber and energy.
Nutritional Balance
Maintain a nutritional balance in homemade cat food recipes by including essential vitamins and minerals. Ensure your cat’s diet covers all necessary nutrients for optimal health.
Avoid ingredients harmful to cats like onions, garlic, and chocolate. Consult with a veterinarian to create well-rounded recipes tailored to your cat’s specific needs.
Safe Cooking Tips for Cats
Hygiene Practices
Maintain cleanliness by washing hands thoroughly before and after handling cat food ingredients. Sanitize cooking utensils and surfaces to prevent contamination.
Ingredient Safety
Use fresh, high-quality ingredients to ensure your cat receives proper nutrition. Avoid seasonings like onion, garlic, and certain spices that can be harmful to cats.
Food Preparation
Cook all meats thoroughly to kill bacteria and parasites that may harm your cat. Avoid feeding raw meat as it poses a risk of bacterial infections.
Storage Guidelines
Store homemade cat food in the refrigerator for up to 3 days or freeze it for longer shelf life. Discard any uneaten food after this period to prevent spoilage.
Mealtime Precautions
Monitor your cat’s reaction to new foods for any signs of allergies or digestive issues. Serve food at room temperature to prevent mouth burns from hot meals.
Additional Tips:
Keep your cat hydrated by providing fresh water alongside meals.
Consult with a veterinarian for guidance on creating balanced homemade diets for your cat.
Nutritious Meal Planning
Consistency
Consistency in your cat’s diet is key to maintaining their overall health and well-being. Ensuring that they receive a balanced and nutritious meal every day can prevent health issues.
A consistent meal plan also helps in monitoring your cat’s food intake, making it easier to identify any changes in their appetite or behavior.
Variety
Introducing a variety of foods into your cat’s diet not only keeps mealtime exciting for them but also ensures they receive a wide range of nutrients.
Closing Thoughts
Incorporating cat-shaped slow cookers into your meal prep can add a fun twist to your cat’s dining experience. From creative recipes to nutritious meal planning, you have the tools to ensure your feline friend enjoys delicious and safe homemade meals. With these tips in mind, you can elevate your cat’s dining routine while maintaining their health and happiness.
Take the opportunity to experiment with new recipes and meal plans for your cat using the insights shared in this blog post. Your furry companion will thank you for the extra effort, and you’ll enjoy the satisfaction of providing them with wholesome and tasty meals. Embrace the joy of cooking for your cat and watch them savor every bite!
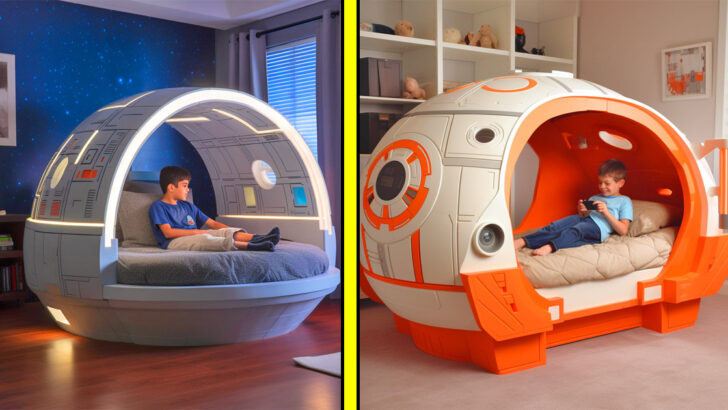
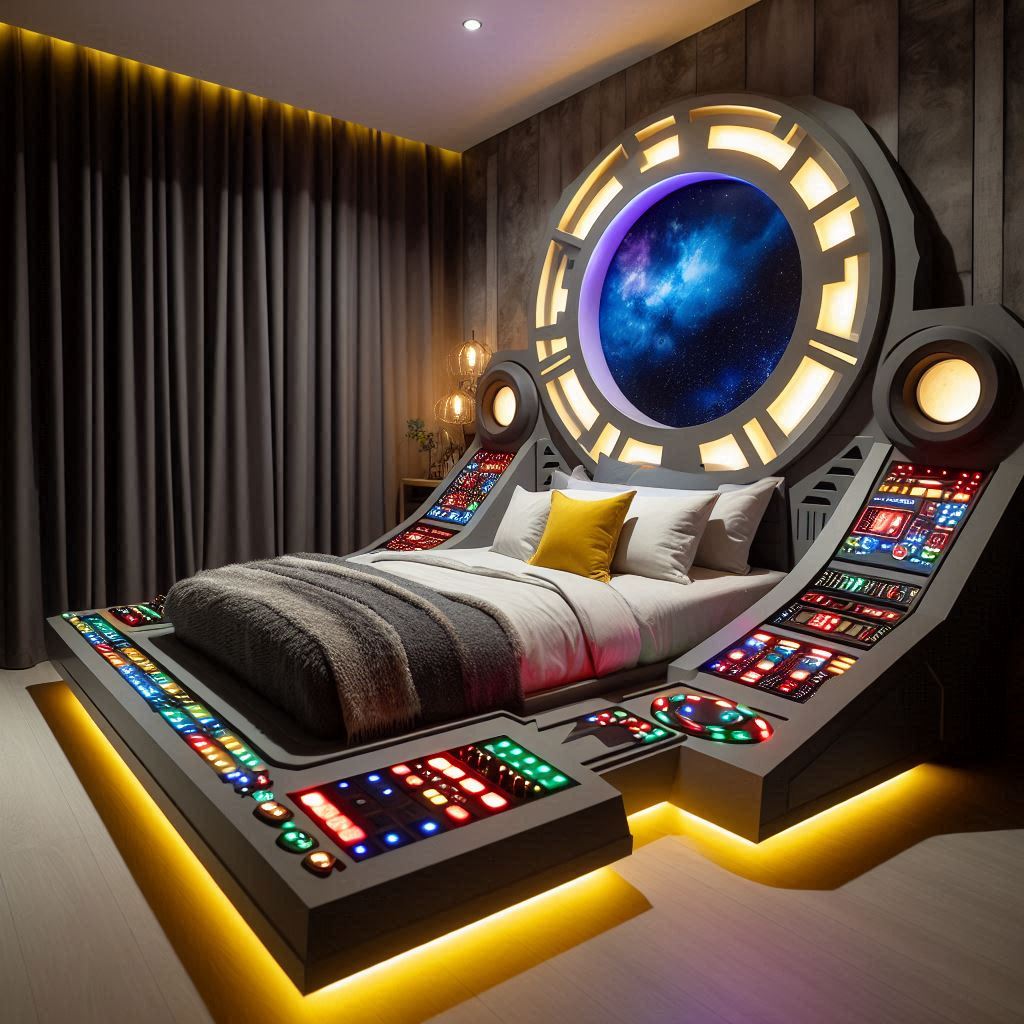
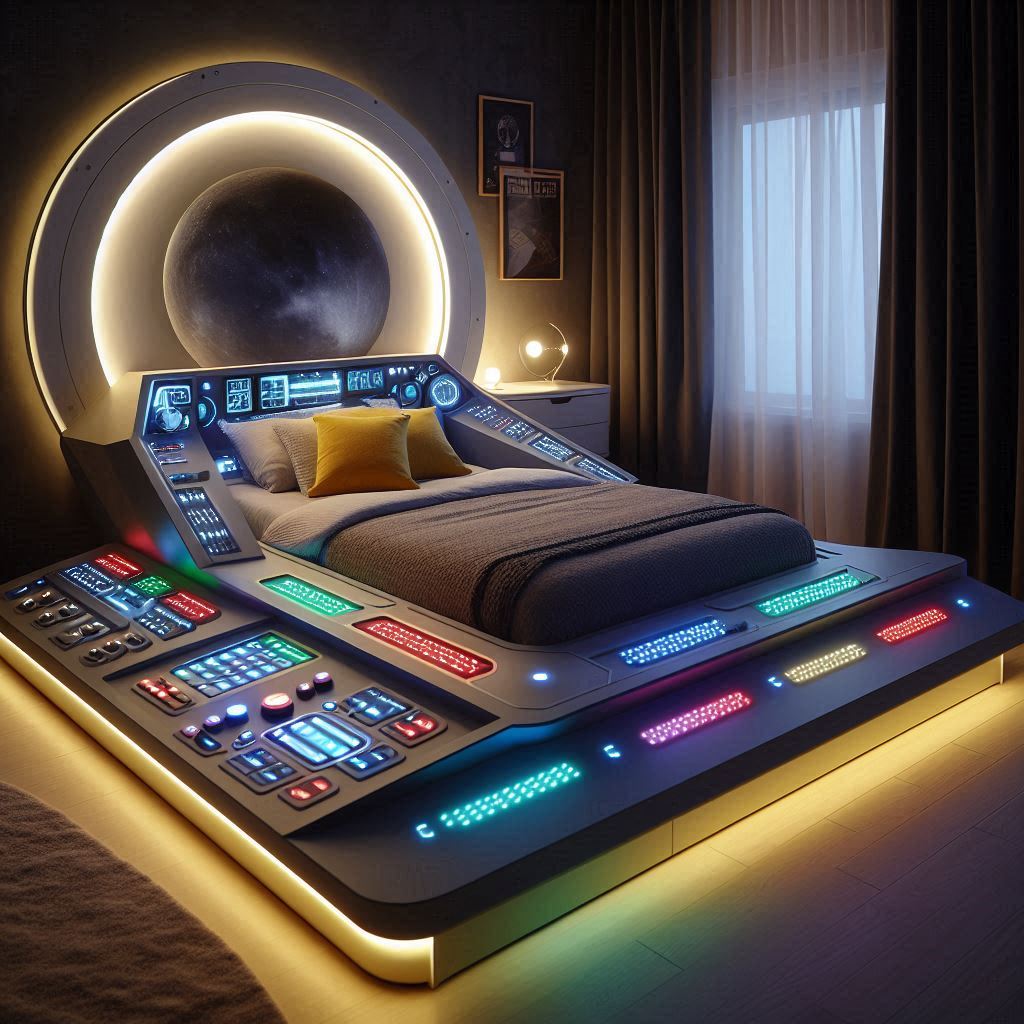
Ever wondered how to infuse your love for Star Wars into your bedroom decor? Adult Star Wars beds offer the perfect blend of comfort and fandom, allowing you to sleep in style. From Millennium Falcon-inspired designs to cozy Chewbacca-themed bedding, these beds cater to every Star Wars enthusiast’s dream. With options ranging from sleek and modern to fun and playful, you can transform your bedroom into a galaxy far, far away. Say goodbye to boring beds and hello to a sleep experience that is out of this world!
Adult Star Wars beds come in a variety of designs, catering to different preferences and room aesthetics. From sleek, modern styles to detailed replicas of iconic starships, there is a wide range to choose from.
e popular designs include:
Millennium Falcon bed with intricate detailing
X-Wing fighter bed for an immersive experience
Death Star bunk bed for a space-saving solution
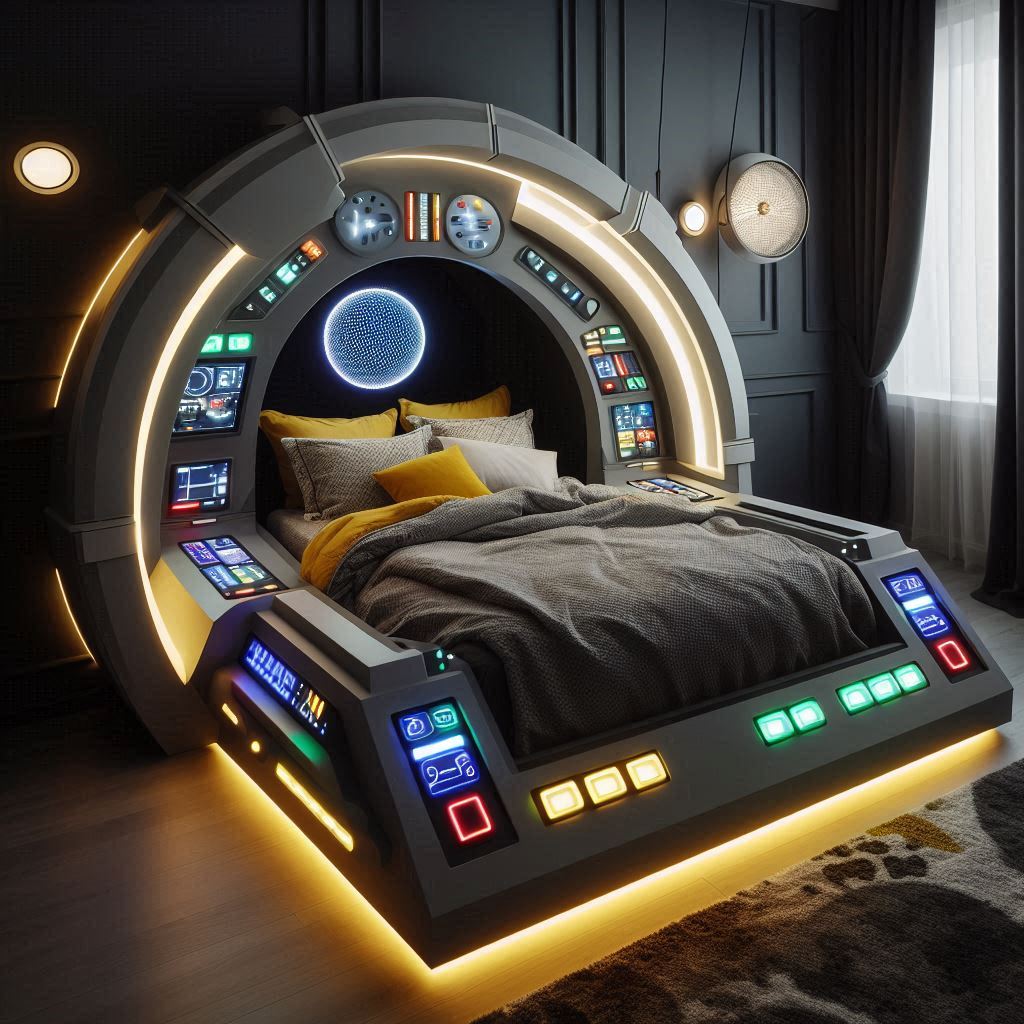
Customization Features
These beds often offer customization features such as LED lights, sound effects, and storage compartments. This allows fans to personalize their sleeping experience and create a truly unique Star Wars-themed bedroom.
Quality Materials
When it comes to construction, adult Star Wars beds are typically made from durable materials like wood or metal. The attention to detail in craftsmanship ensures not only an appealing design but also a sturdy and long-lasting piece of furniture.
From themed bedding sets to matching furniture pieces, the options are endless for creating a Star Wars-inspired bedroom that captures the essence of the beloved franchise.
Design and Themes
Popular Styles
Star Wars beds come in various popular styles, including Millennium Falcon, Death Star, and X-Wing designs. These iconic themes bring the galaxy far, far away into your bedroom.
Customization Options
With adult Star Wars beds, customization options are abundant. From choosing your favorite characters like Darth Vader or Yoda to selecting specific color schemes, you can personalize your bed to suit your preferences.
Material Quality
When it comes to material quality, Star Wars beds often feature sturdy construction using durable materials such as wood or metal. This ensures longevity and stability for a comfortable night’s sleep.
Interactive Features
e adult Star Wars beds even come with interactive features like built-in LED lights, sound effects, and storage compartments. These additions enhance the overall experience of owning a themed bed.
Comfort Meets Galactic Adventure
Space-Inspired Designs
Adult Star Wars beds are not just about comfort; they also bring the excitement of galactic adventures into your bedroom. The space-inspired designs transport you to a galaxy far, far away.
Embrace the force with beds featuring iconic symbols like the Millennium Falcon, lightsabers, or even the Death Star. These intricate details make every night feel like a journey through the stars.
Customization Options
Explore a range of customization options to tailor your Star Wars bed to your preferences. From choosing your favorite characters to selecting specific colors and patterns, the possibilities are endless.
Personalize your sleeping experience by creating a unique bedroom that reflects your love for the Star Wars universe. Whether you prefer a subtle nod to the franchise or a bold statement piece, there’s an option for every fan.
Immersive Sleeping Experience
Transform your bedtime routine into an immersive experience with an adult Star Wars bed. Imagine drifting off to sleep surrounded by familiar icons and symbols from your favorite movies.
The attention to detail in these beds creates a sense of connection to the beloved franchise, making bedtime feel like embarking on a new adventure each night.
Where to Find Your Star Bed
Online Retailers
Online retailers like Amazon and Wayfair offer a wide selection of adult Star Wars beds. You can browse through different designs, sizes, and prices conveniently from the comfort of your home.
Specialty Furniture Stores
Specialty furniture stores such as Rooms To Go or Ashley HomeStore may also carry adult Star Wars beds. Visit their physical locations to see the beds in person and get a feel for their quality.
When searching for your ideal Star Wars bed, consider factors like material, size, and design. Reading customer reviews can provide valuable insights into the product’s durability and overall satisfaction.
Pros:
Wide variety of options available
Convenient online shopping experience
Ability to see and touch the bed in physical stores
Cons:
Prices may vary between retailers
Shipping costs could apply for online purchases
Before making a purchase, check for any ongoing sales or promotions that could help you save money on your dream Star Wars bed. Remember to measure your space to ensure the bed fits perfectly in your room.
Making It Your Own
Customization Options
Personalize your adult Star Wars bed with various customization options to suit your preferences and style. Choose from different themes, colors, and designs to create a unique piece that reflects your love for the iconic franchise.
Accessories and Decor
Enhance the look of your Star Wars bed by adding themed accessories and decor. From pillows and blankets featuring your favorite characters to wall art and lamps, these additions can elevate the overall aesthetic of your bedroom.
Summary
You’ve now journeyed through the vast galaxy of adult Star Wars beds, discovering a universe where design, comfort, and personalization collide. From exploring various themes to finding the perfect blend of coziness and adventure, you’re equipped to embark on your own interstellar slumber experience. With insights on where to procure these unique beds and tips on customizing them to suit your style, the force is truly with you as you navigate this cosmic bedding realm.
hether you’re a die-hard Star Wars fan looking to bring the saga into your bedroom or simply seeking a distinctive and comfortable bed that reflects your personality, the options are as boundless as space itself. May the force be with you as you embark on this quest for the ultimate adult Star Wars bed!
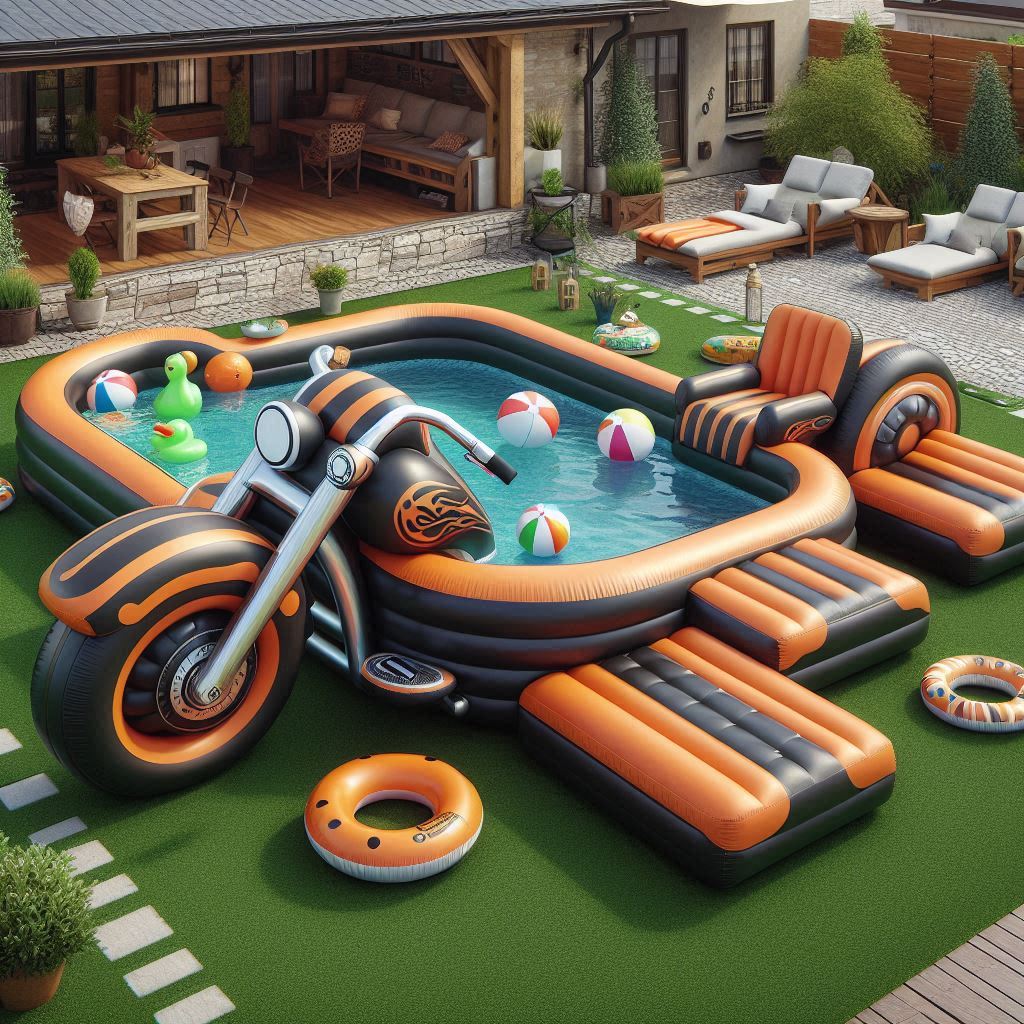
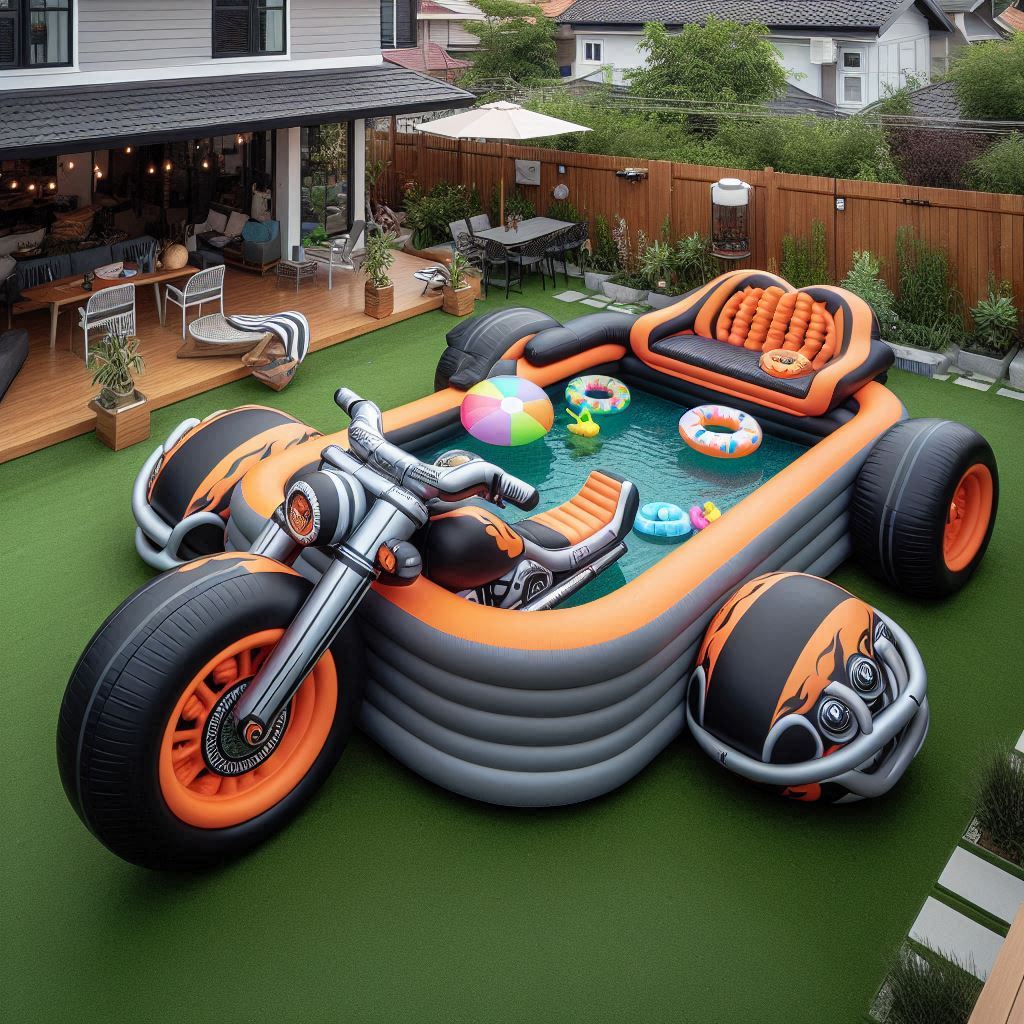
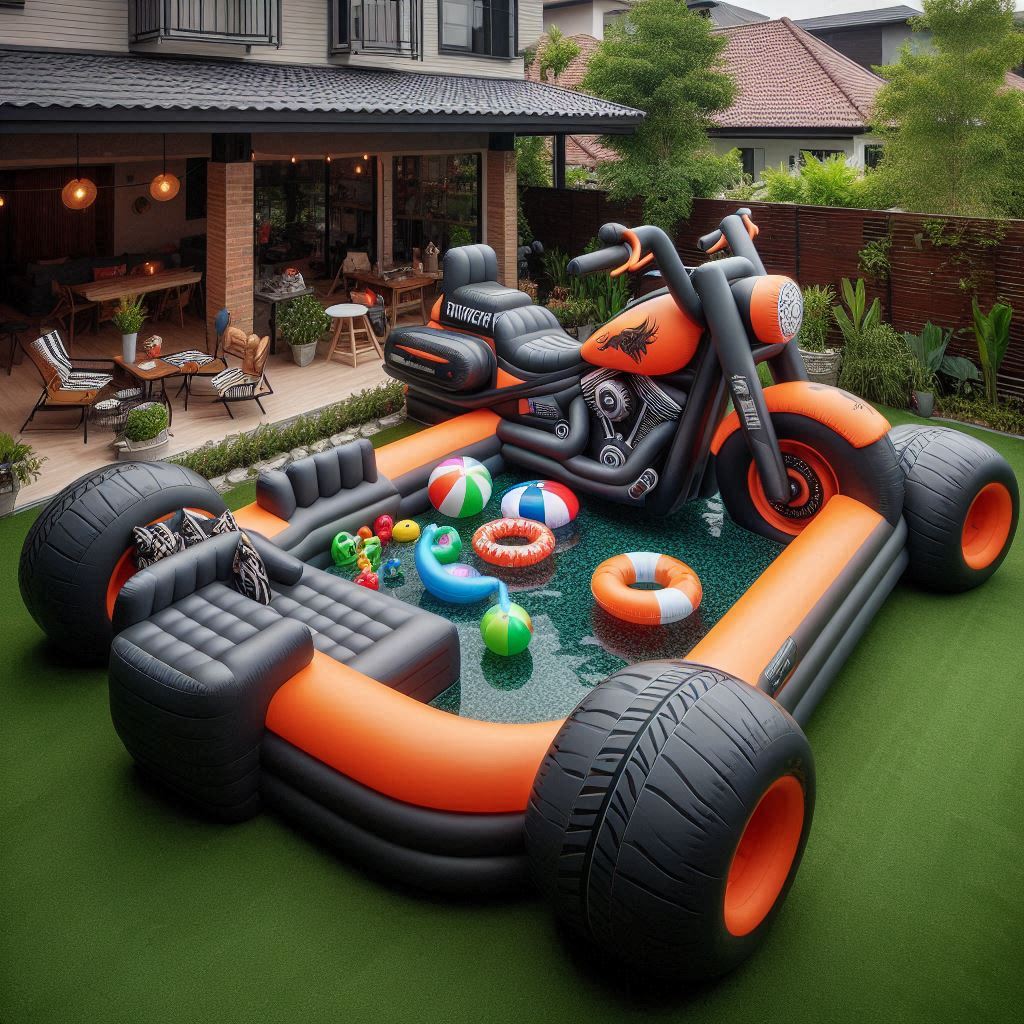
In the realm of luxury living and architectural marvels, designers and architects continuously push the boundaries of creativity. One of the most fascinating and eye-catching trends to emerge in recent years is the swimming pool designed to resemble a large motorcycle. This unique concept seamlessly blends the thrill of motorcycling with the relaxation of swimming, offering an unparalleled experience for enthusiasts and admirers alike. In this article, we delve into the origins, design process, benefits, and cultural impact of this extraordinary architectural feat.
The idea of designing a swimming pool to resemble a large motorcycle originates from a desire to combine the excitement of motorcycles with the serene experience of swimming. This innovative concept likely stems from the imaginations of architects and designers who wanted to create something both functional and visually stunning. The first motorcycle-shaped swimming pools were commissioned by passionate motorcyclists who sought to express their love for biking in a novel and immersive way.
The Design Process
Creating a swimming pool designed to resemble a large motorcycle is a complex and meticulous process that requires the collaboration of architects, engineers, and artists. Here’s a breakdown of the key steps involved:
Conceptualization and Planning
The initial stage involves extensive planning and conceptualization. Designers begin by understanding the client’s vision and the specific motorcycle model they wish to replicate. Detailed sketches and 3D models are created to visualize the pool’s design. Factors such as the pool’s location, size, and the surrounding landscape are also considered during this phase.
Structural Design
Once the concept is finalized, structural engineers step in to ensure the pool’s design is both safe and functional. This involves calculating the load-bearing capacity of the materials, ensuring proper water circulation, and integrating necessary plumbing and filtration systems. The structural design must also account for the unique shapes and angles of a motorcycle, which can be challenging to replicate in a swimming pool.
Material Selection
Choosing the right materials is crucial for achieving the desired aesthetic and durability. High-quality concrete, fiberglass, and specialized tiles are commonly used to create the intricate details of the motorcycle design. These materials must be resistant to water and chemicals to ensure the longevity of the pool.
Construction
The construction phase involves skilled craftsmen who meticulously bring the design to life. This includes sculpting the motorcycle shape, installing plumbing and filtration systems, and applying the final finishes. The construction process can take several months, depending on the complexity and scale of the design.
Finishing Touches
The final touches include adding custom features such as LED lighting, water jets, and even integrated sound systems that mimic the roar of a motorcycle engine. Landscaping around the pool is also designed to complement the overall theme, often incorporating elements like rocks, plants, and decorative pathways.
Benefits of a Motorcycle-Shaped Swimming Pool
Unique Aesthetic Appeal
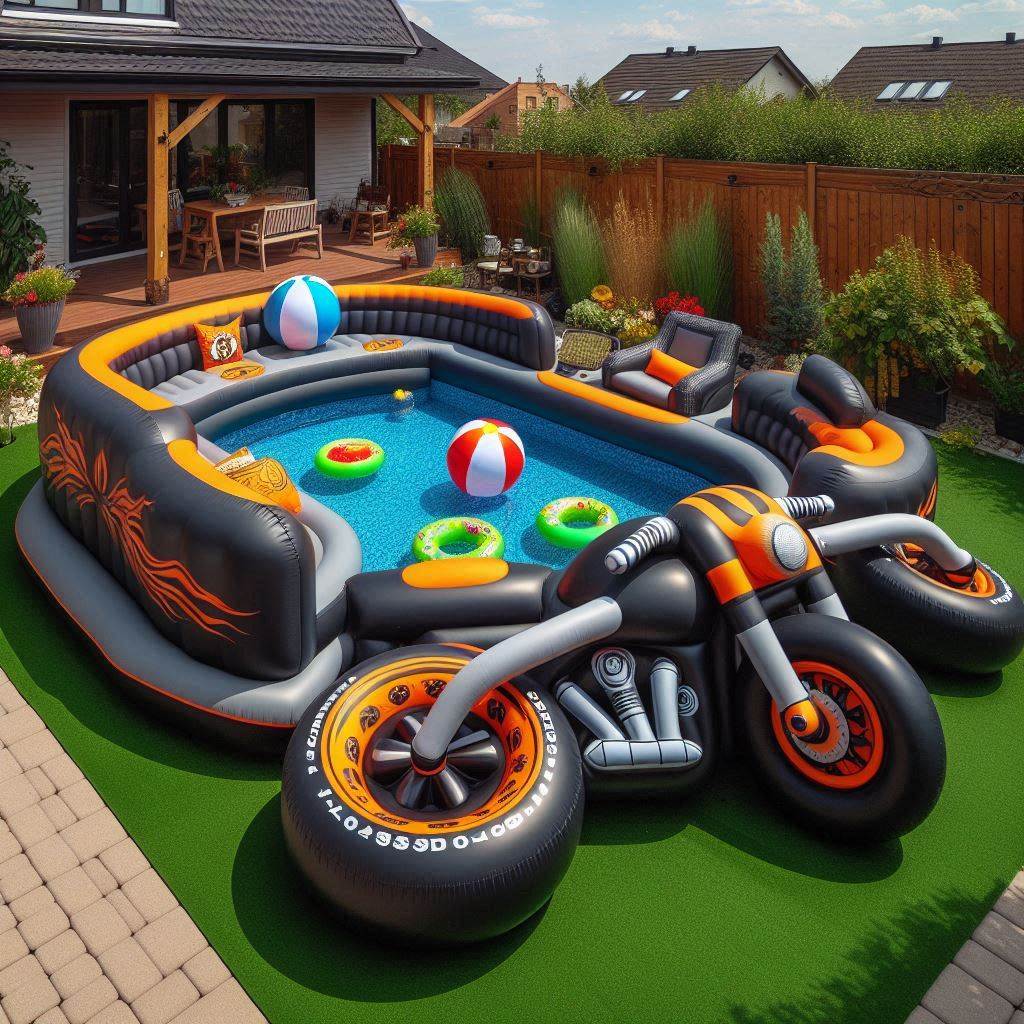
A swimming pool designed to resemble a large motorcycle is a stunning visual centerpiece. It adds a unique and personalized touch to any property, making it stand out. This bespoke design appeals not only to motorcycle enthusiasts but also to anyone who appreciates innovative and artistic architecture.
Customization and Personalization
These pools offer endless possibilities for customization. Owners can choose to replicate their favorite motorcycle models, incorporate specific color schemes, and add personalized features. This level of customization ensures that each pool is truly one-of-a-kind.
Enhanced Property Value
Investing in such a unique and high-end feature can significantly enhance the value of a property. Potential buyers are often willing to pay a premium for properties with distinctive and luxurious amenities, making it a worthwhile investment.
A Multifaceted Experience
A motorcycle-shaped swimming pool provides a multifaceted experience that combines relaxation with the thrill of motorcycling. Owners and guests can enjoy swimming in a uniquely designed environment that offers a sense of adventure and excitement.
Cultural Impact and Popularity
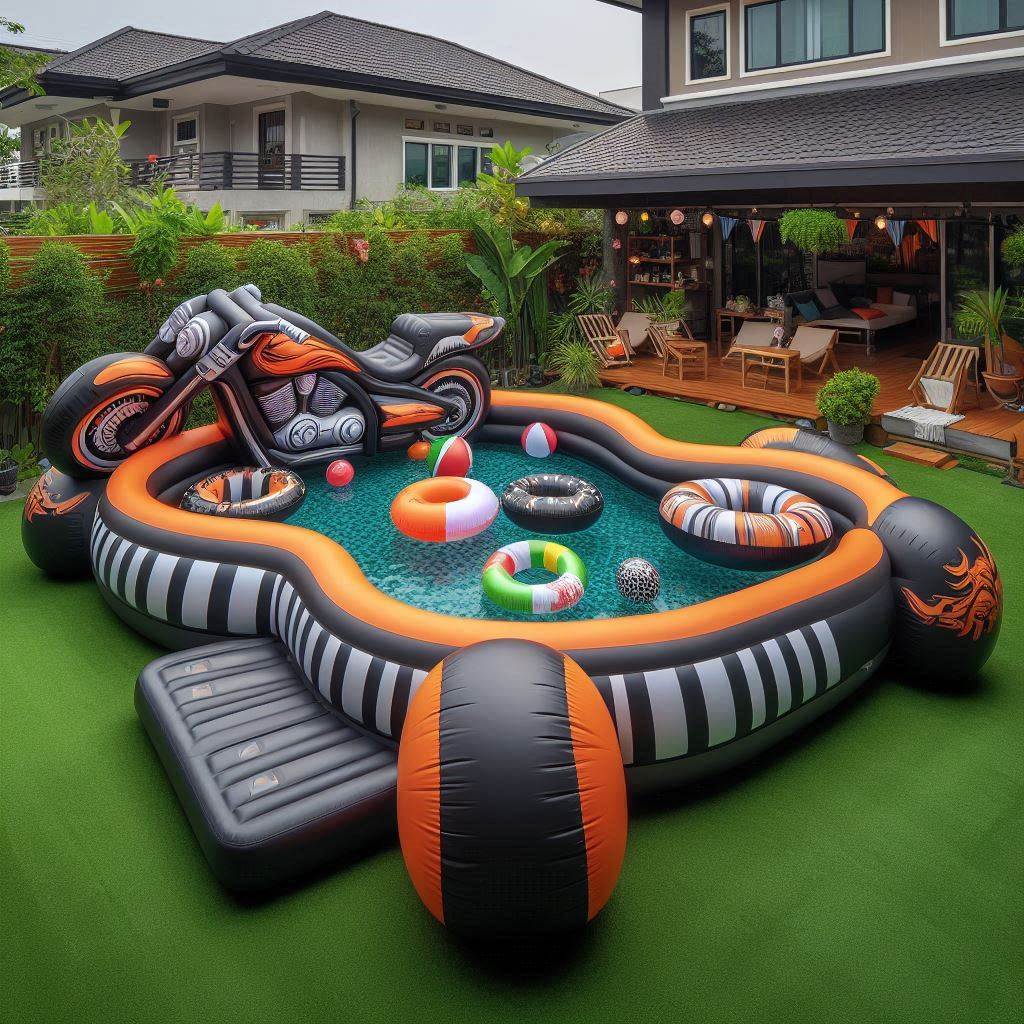
The concept of a swimming pool designed to resemble a large motorcycle has gained considerable popularity in recent years. Social media platforms, especially Instagram and Pinterest, have played a significant role in showcasing these architectural wonders to a global audience. Influencers, celebrities, and luxury property developers have all contributed to the growing trend by sharing images and videos of these stunning pools.
Influences on Modern Design
The success of motorcycle-shaped swimming pools has inspired designers to explore other unconventional pool designs. From car-shaped pools to those inspired by famous landmarks, the trend of thematic swimming pools continues to evolve, pushing the boundaries of creativity and engineering.
A Symbol of Luxury and Innovation
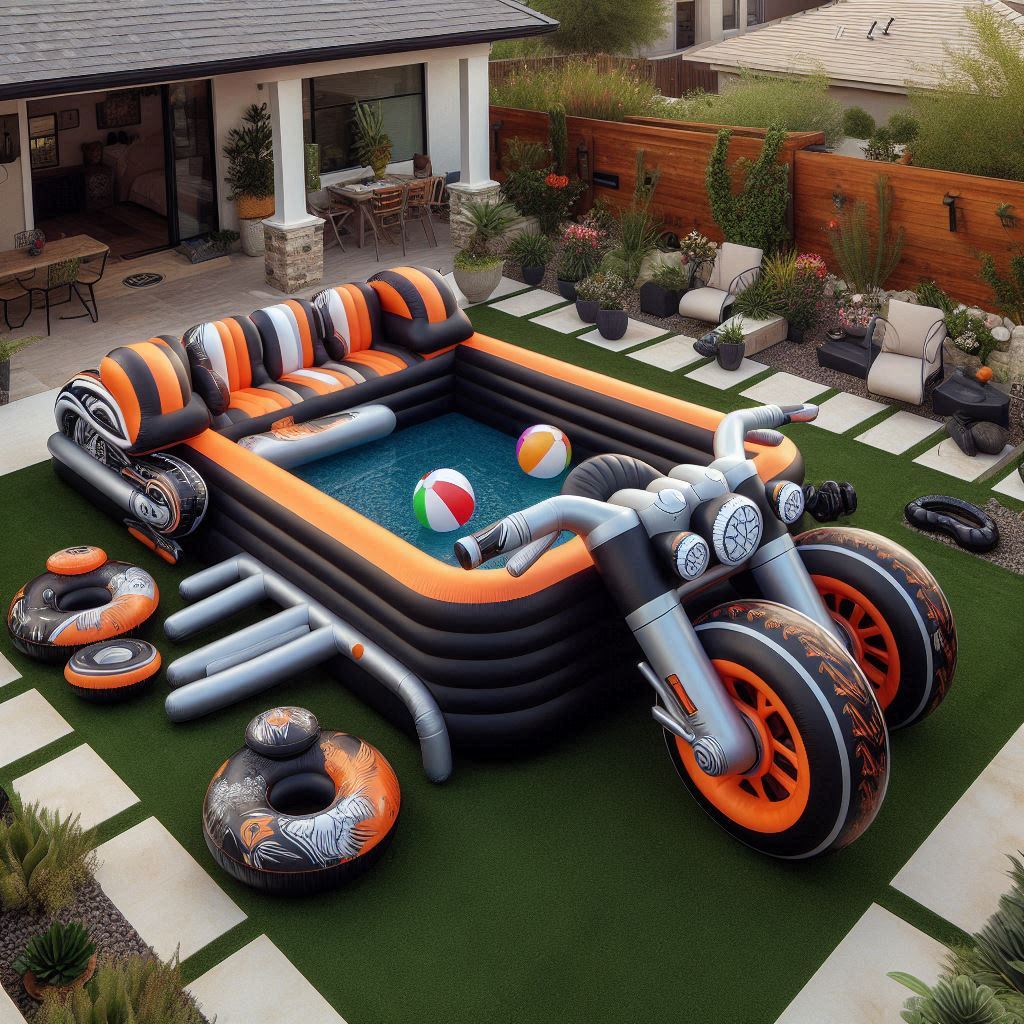
Owning a motorcycle-shaped swimming pool has become a symbol of luxury and innovation. It represents a fusion of passions—motorcycling and swimming—while showcasing the owner’s appreciation for unique and artistic designs. This trend reflects a broader cultural movement towards personalized and experiential luxury, where unique and memorable experiences are highly valued.
Conclusion
A swimming pool designed to resemble a large motorcycle is more than just a place to swim; it is a masterpiece of design and engineering. From its conceptualization to its construction, every aspect of these pools is meticulously crafted to create a one-of-a-kind experience that combines the thrill of motorcycling with the tranquility of swimming. As this trend continues to gain popularity, it stands as a testament to the endless possibilities of architectural innovation and the growing desire for personalized luxury. Whether you are a motorcycle enthusiast or simply appreciate extraordinary design, a motorcycle-shaped swimming pool is sure to leave a lasting impression.
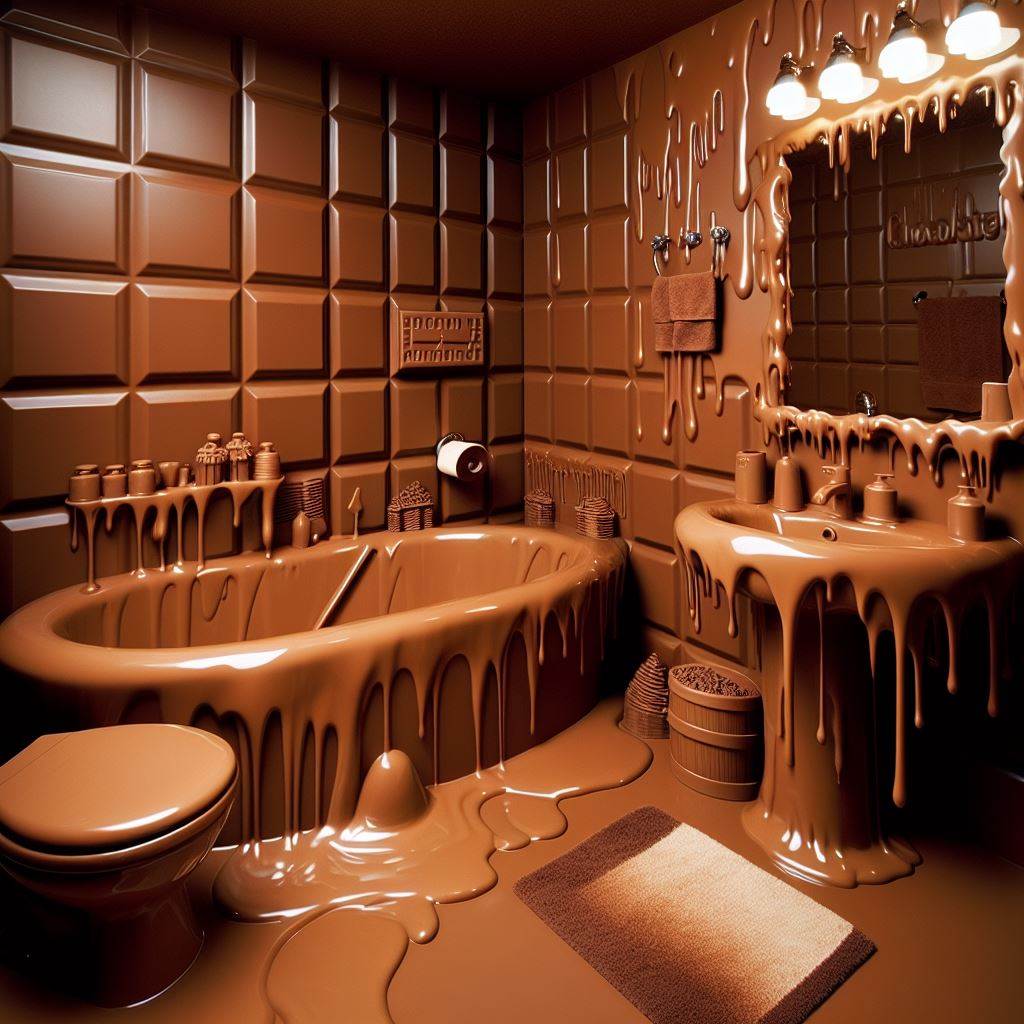
In the world of culinary creativity, there are always new and innovative ways to surprise and delight food enthusiasts. One such whimsical and delightful invention is the chocolate toilet. This unique creation has captured the imagination of many, blending the worlds of art, confectionery, and humor. In this article, we will dive deep into the fascinating world of chocolate toilets, exploring their origins, the craftsmanship involved, their appeal, and how they have become a trending topic in the culinary and social media spheres.
The concept of the chocolate toilet can be traced back to the ever-evolving world of culinary arts, where chefs and chocolatiers continuously push the boundaries of creativity. This idea likely emerged from the desire to create something completely unexpected and amusing, yet entirely edible. The first known chocolate toilet was crafted by a skilled chocolatier who wanted to combine humor with high-quality confectionery. This whimsical creation quickly gained attention, paving the way for more inventive and intricate designs.
Craftsmanship Behind the Chocolate Toilet
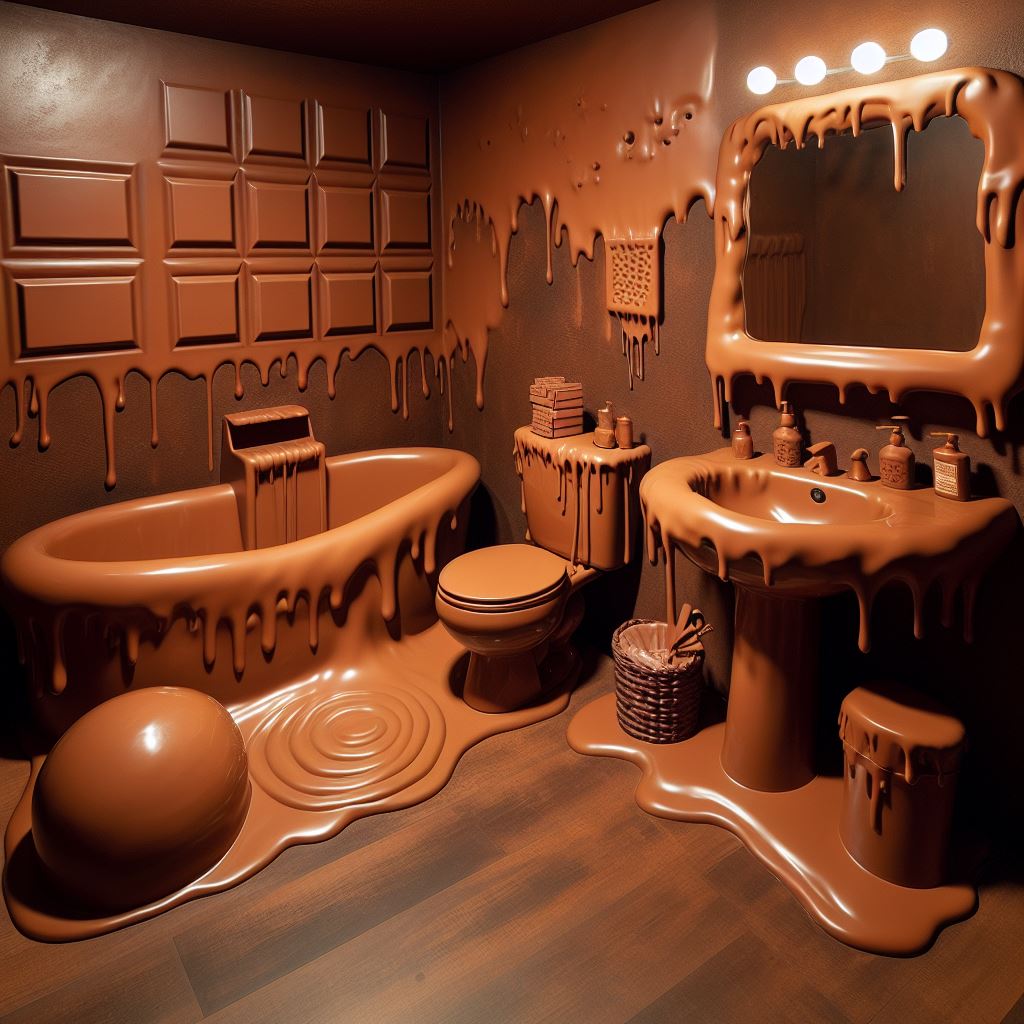
Creating a chocolate toilet is no simple feat. It requires a high level of craftsmanship and attention to detail. The process begins with selecting the finest quality chocolate, which is then melted and carefully molded into the shape of a toilet. Depending on the design, this can involve multiple layers and components, each requiring precise temperature control and timing to ensure the chocolate sets perfectly.
The chocolatier must also have a keen eye for detail, sculpting the toilet to resemble a real one as closely as possible. This includes adding elements like the tank, seat, and even tiny bolts and fixtures. Some chocolate toilets are even designed with working parts, such as a lid that lifts or a tank that can hold liquid chocolate, adding to the novelty and interactive experience.
The Appeal of the Chocolate Toilet
So, what makes the chocolate toilet so appealing? Part of its charm lies in its sheer unexpectedness. Toilets are mundane, everyday objects that are rarely associated with anything delightful or appetizing. By transforming this ordinary item into a delicious, edible piece of art, chocolatiers create a sense of surprise and amusement. This juxtaposition of the mundane and the delightful is at the heart of the chocolate toilet’s appeal.
Moreover, the chocolate toilet caters to a variety of occasions and audiences. It can be a show-stopping centerpiece at a themed party, a quirky gift for someone with a good sense of humor, or even a viral sensation on social media. Its uniqueness makes it a conversation starter, ensuring that it stands out in any setting.
Chocolate Toilets in Pop Culture and Social Media
In today’s digital age, where social media platforms play a significant role in shaping trends, the chocolate toilet has found a perfect stage. Platforms like Instagram, TikTok, and YouTube are filled with videos and photos showcasing these edible masterpieces. Influencers and food enthusiasts alike are drawn to the novelty of the chocolate toilet, sharing their reactions and experiences with their followers.
This social media exposure has propelled the chocolate toilet to viral status. Videos of people marveling at the intricate designs, cutting into the chocolate to reveal its rich, creamy texture, or even taking a playful bite, have garnered millions of views. This viral phenomenon has not only increased the popularity of chocolate toilets but has also inspired other chocolatiers to experiment with their own versions, each trying to outdo the last in terms of creativity and complexity.
The Culinary and Artistic Significance
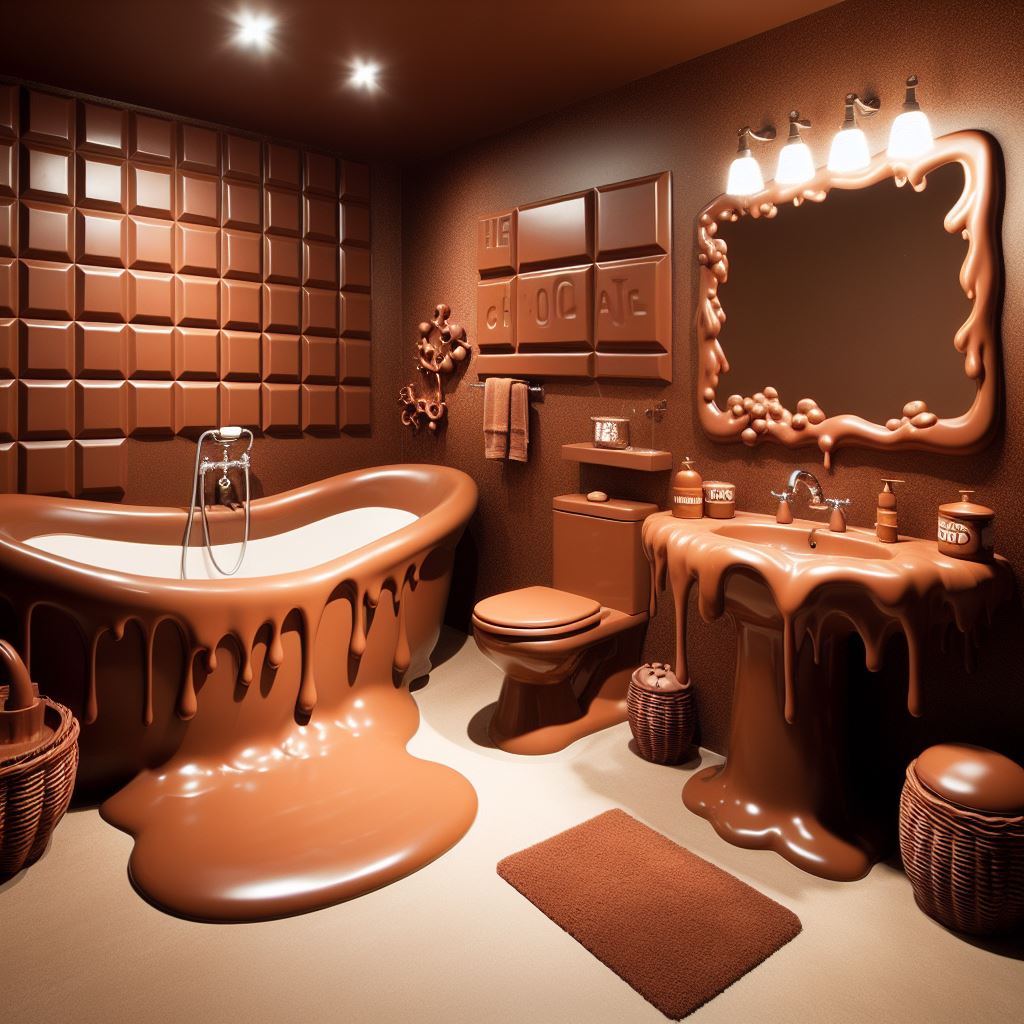
Beyond its humorous appeal, the chocolate toilet represents a significant achievement in both culinary arts and craftsmanship. Creating such an intricate and unexpected edible sculpture requires a deep understanding of chocolate’s properties and behavior. Chocolatiers must master techniques such as tempering, molding, and sculpting, ensuring that the final product is both visually stunning and delicious.
From an artistic perspective, the chocolate toilet challenges traditional notions of what food art can be. It pushes boundaries and encourages other artists to think outside the box, exploring new ways to merge everyday objects with edible materials. This blending of art and food creates a unique and memorable experience for anyone who encounters a chocolate toilet, making it a true masterpiece in the world of confectionery.
How to Make Your Own Chocolate Toilet
For those inspired by the idea and wanting to try their hand at creating a chocolate toilet, the process, while intricate, is incredibly rewarding. Here is a simplified guide to get you started:
Ingredients and Tools:
High-quality dark, milk, or white chocolate
Chocolate molds shaped like toilet parts (tank, bowl, seat, etc.)
A double boiler or microwave for melting chocolate
A spatula and brush for spreading chocolate
Edible gold or silver leaf for decoration (optional)
Steps:
Melt the Chocolate: Use a double boiler or microwave to gently melt the chocolate until smooth.
Prepare the Molds: Ensure the molds are clean and dry. Lightly brush them with a thin layer of melted chocolate to create a smooth base layer.
Layering and Setting: Pour the melted chocolate into the molds, filling them to the desired thickness. Tap the molds gently to remove air bubbles. Let the chocolate set at room temperature or in the refrigerator until firm.
Assemble the Toilet: Carefully remove the chocolate pieces from the molds. Use a bit of melted chocolate as “glue” to assemble the parts. Start with the base and work your way up, ensuring each piece is securely attached.
Finishing Touches: Add any decorative elements, such as edible gold or silver leaf, to give your chocolate toilet a luxurious touch.
Enjoying Your Creation:
Once your chocolate toilet is complete, it can be displayed as a centerpiece, gifted to a friend, or simply enjoyed piece by piece. The satisfaction of creating such a unique and whimsical confection is sure to delight both the maker and any lucky recipients.
Conclusion
The chocolate toilet is more than just a quirky novelty item; it represents a blend of culinary skill, artistic creativity, and playful humor. Whether you encounter one at a party, see it trending on social media, or decide to make your own, the chocolate toilet is sure to leave a lasting impression. As this delightful creation continues to capture imaginations and bring smiles, it stands as a testament to the endless possibilities of culinary innovation and the joy that comes from thinking outside the box—sometimes, quite literally!
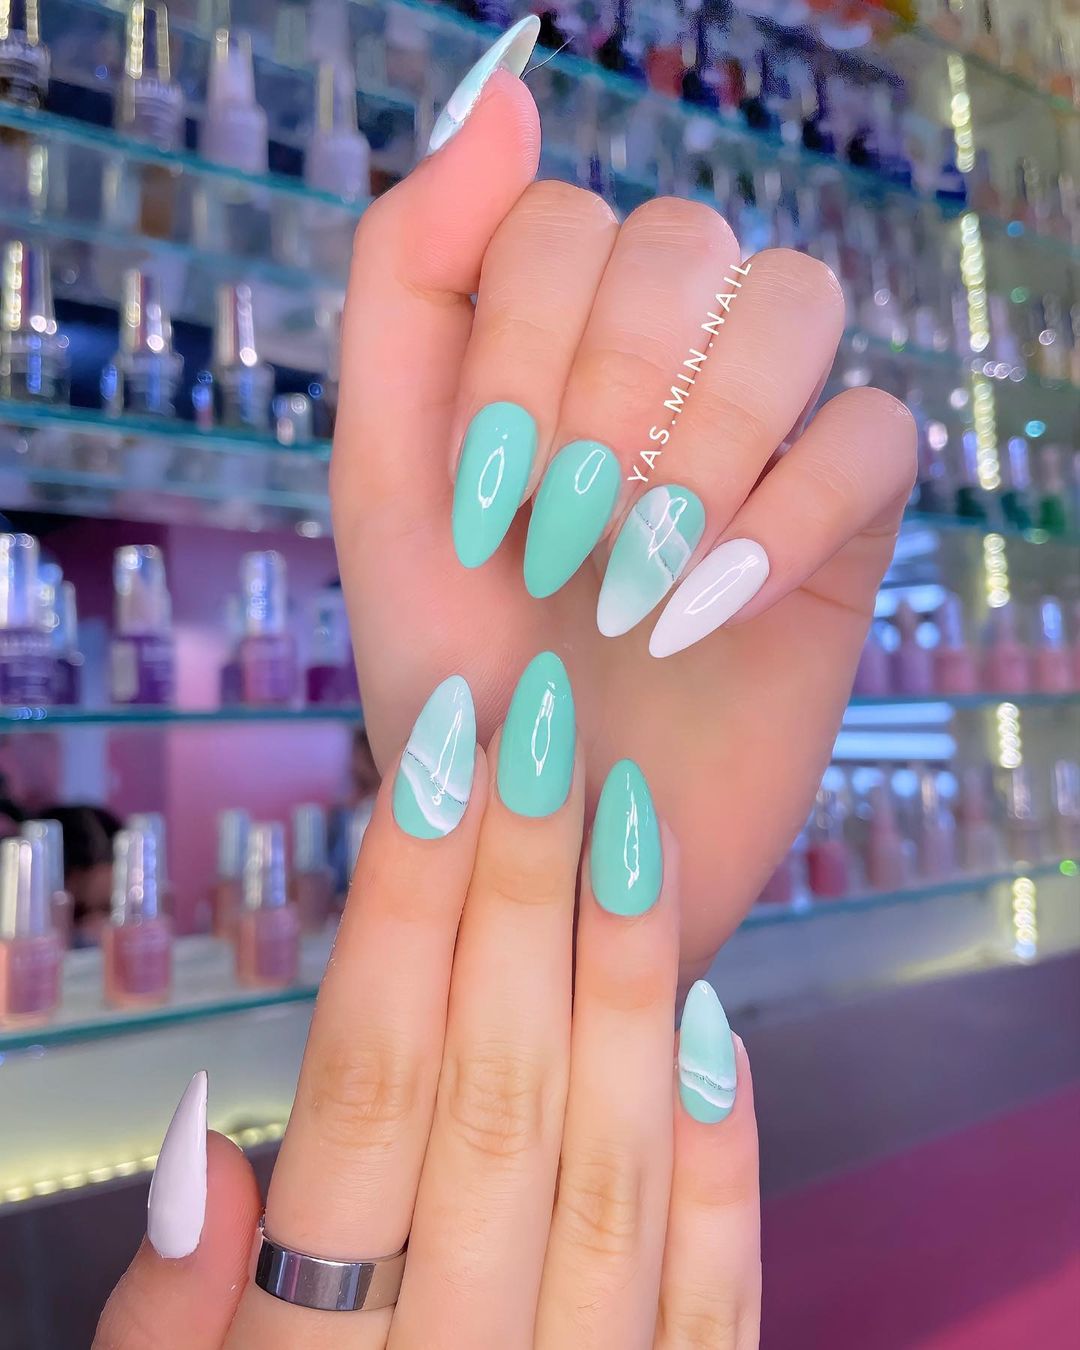
Minimalist nails have taken the beauty world by storm, offering a sleek and sophisticated alternative to more elaborate nail art designs. This trend focuses on simplicity, clean lines, and subtle accents, making it perfect for those who appreciate understated elegance. In this comprehensive guide, we’ll explore everything you need to know about minimalist nails, from popular designs to tips for achieving the perfect look.
Minimalist nails emphasize simplicity and elegance, often featuring neutral colors, clean lines, and small, delicate details. Unlike more intricate nail art, minimalist designs are easy to achieve and maintain, making them a favorite for those with busy lifestyles or those who prefer a more natural look.
Why Choose Minimalist Nails?
Timeless Elegance: Minimalist nail designs never go out of style. Their simplicity ensures they remain chic and sophisticated regardless of changing trends.
Versatility: Minimalist nails complement any outfit and are suitable for all occasions, from casual days to formal events.
Easy Maintenance: Simple designs are easier to maintain and touch up, saving you time and effort.
Healthy Nails: Fewer layers of polish and decorations mean less damage to your natural nails, promoting healthier nail growth.
Essential Tools and Materials for Minimalist Nails
Before you start creating your minimalist masterpiece, gather the following tools and materials:
Nail polish: Neutral shades like nude, white, black, and pastels are staples of minimalist nails.
Base coat: To protect your nails and create a smooth surface for your polish.
Top coat: To seal your design and add a glossy finish.
Nail brushes: Fine brushes are essential for precise lines and small details.
Nail tape or striping tape: For creating clean, straight lines.
Dotting tools: Useful for adding small accents like dots and tiny shapes.
Step-by-Step Guide to Achieving Minimalist Nails
1. Prepare Your Nails
Start with clean, dry nails. Trim and shape them to your desired length and shape. Apply a base coat to protect your natural nails and provide a smooth surface for your polish.
2. Choose Your Base Color
Select a neutral or soft base color. Popular choices include shades of nude, beige, pale pink, or light gray. Apply two thin coats for an even finish and let it dry completely.
3. Plan Your Design
Decide on the type of minimalist design you want to create. Some popular minimalist nail art ideas include:
Negative Space: Leaving parts of the nail unpainted to create a modern, geometric look.
Single Stripe: A single vertical or horizontal stripe in a contrasting color.
Dots: Small dots placed strategically on the nails.
Tiny Accents: Small shapes like hearts, stars, or triangles.
4. Create Your Design
Using your nail brushes, tape, or dotting tools, carefully create your minimalist design. Here are a few techniques:
Negative Space: Use nail tape to mark off sections of the nail you want to leave unpainted. Paint the remaining areas with a contrasting color and remove the tape once the polish is dry.
Single Stripe: Apply a thin strip of tape down the center or across the nail. Paint over the tape with a contrasting color, then remove the tape to reveal a clean stripe.
Dots: Dip a dotting tool in nail polish and gently apply dots in a desired pattern.
Tiny Accents: Use a fine brush to paint small shapes on your nails. Keep the designs simple and small for a true minimalist look.
5. Seal Your Design
Once your design is dry, apply a top coat to seal and protect your artwork. This will also add a glossy finish and prevent your design from chipping.
Popular Minimalist Nail Designs
1. Monochrome Minimalism
Using a single color palette, create simple designs like stripes, dots, or geometric shapes. Monochrome nails are both elegant and easy to achieve.
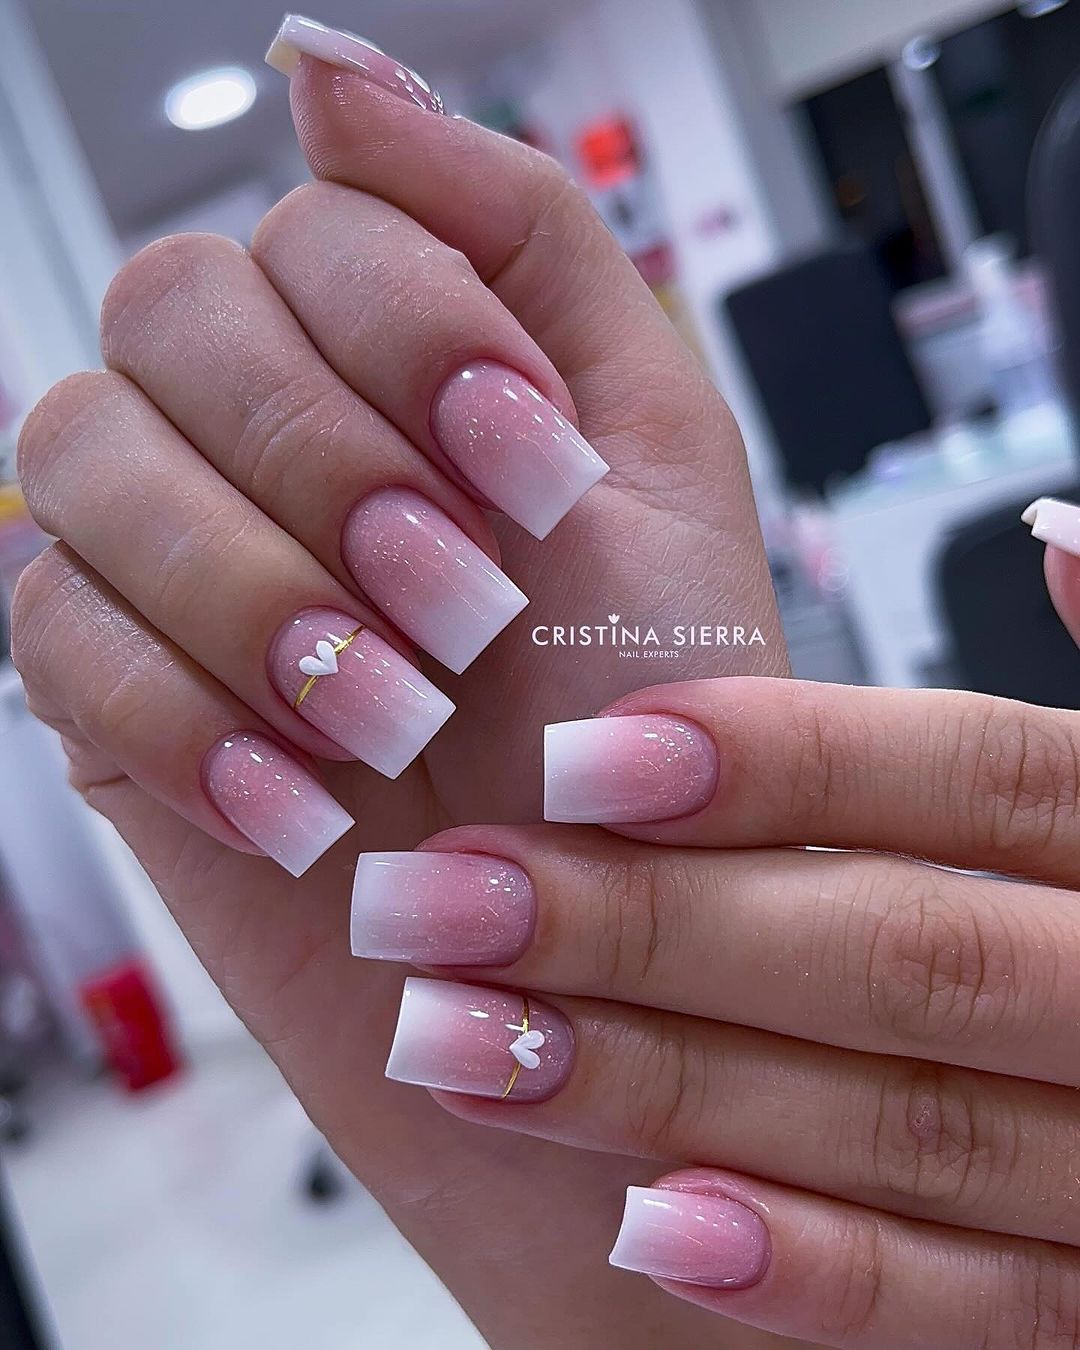
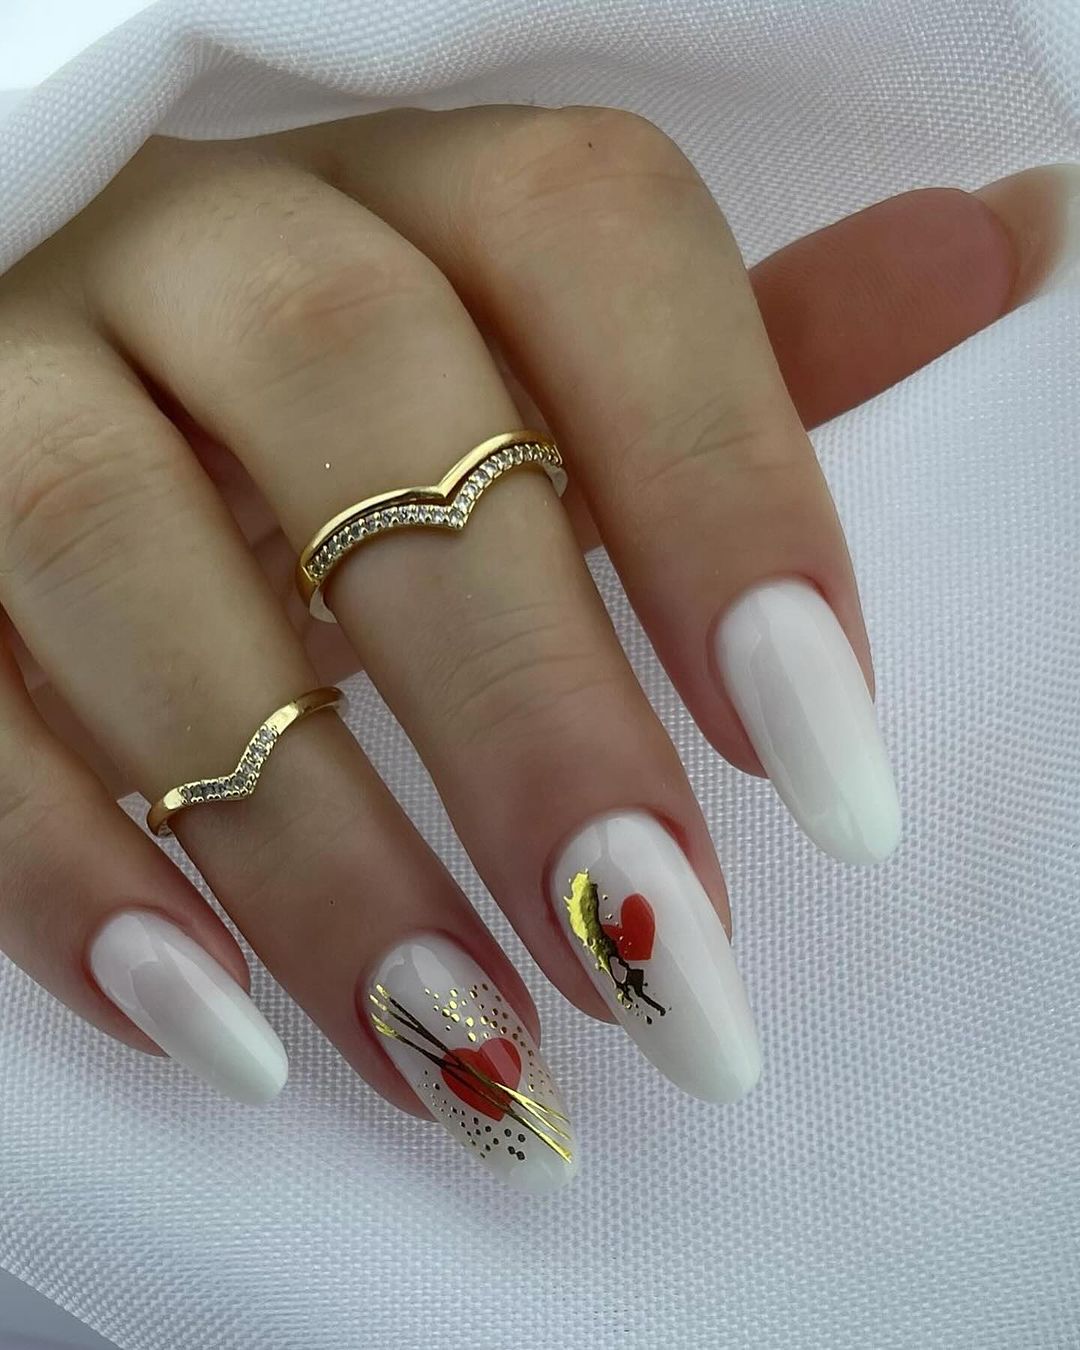
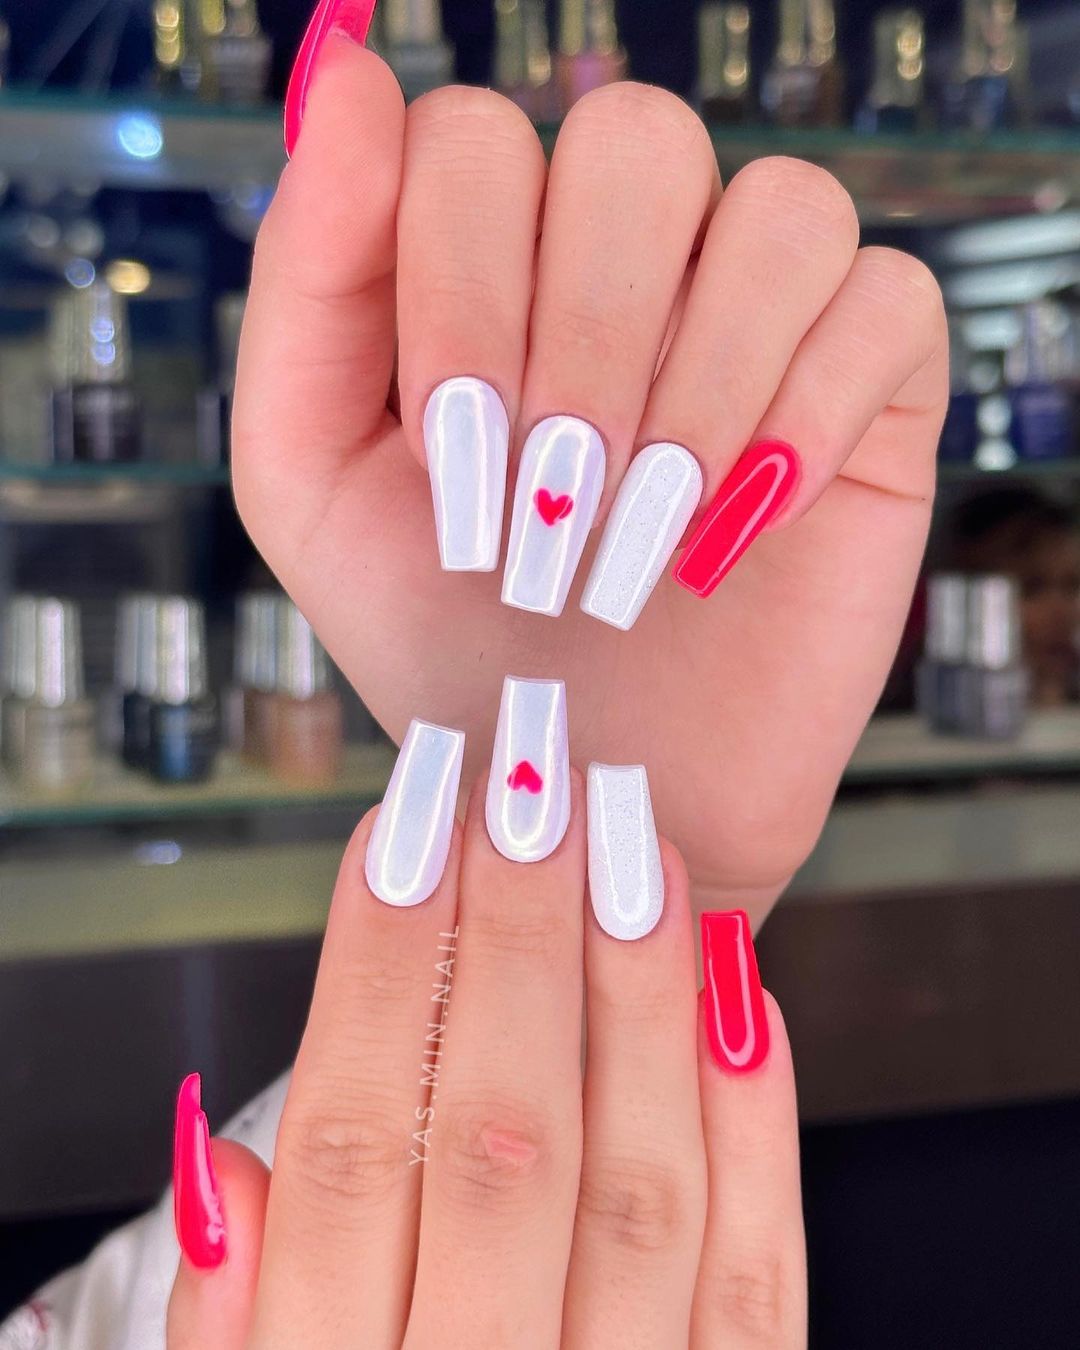
2. Nude and White Combination
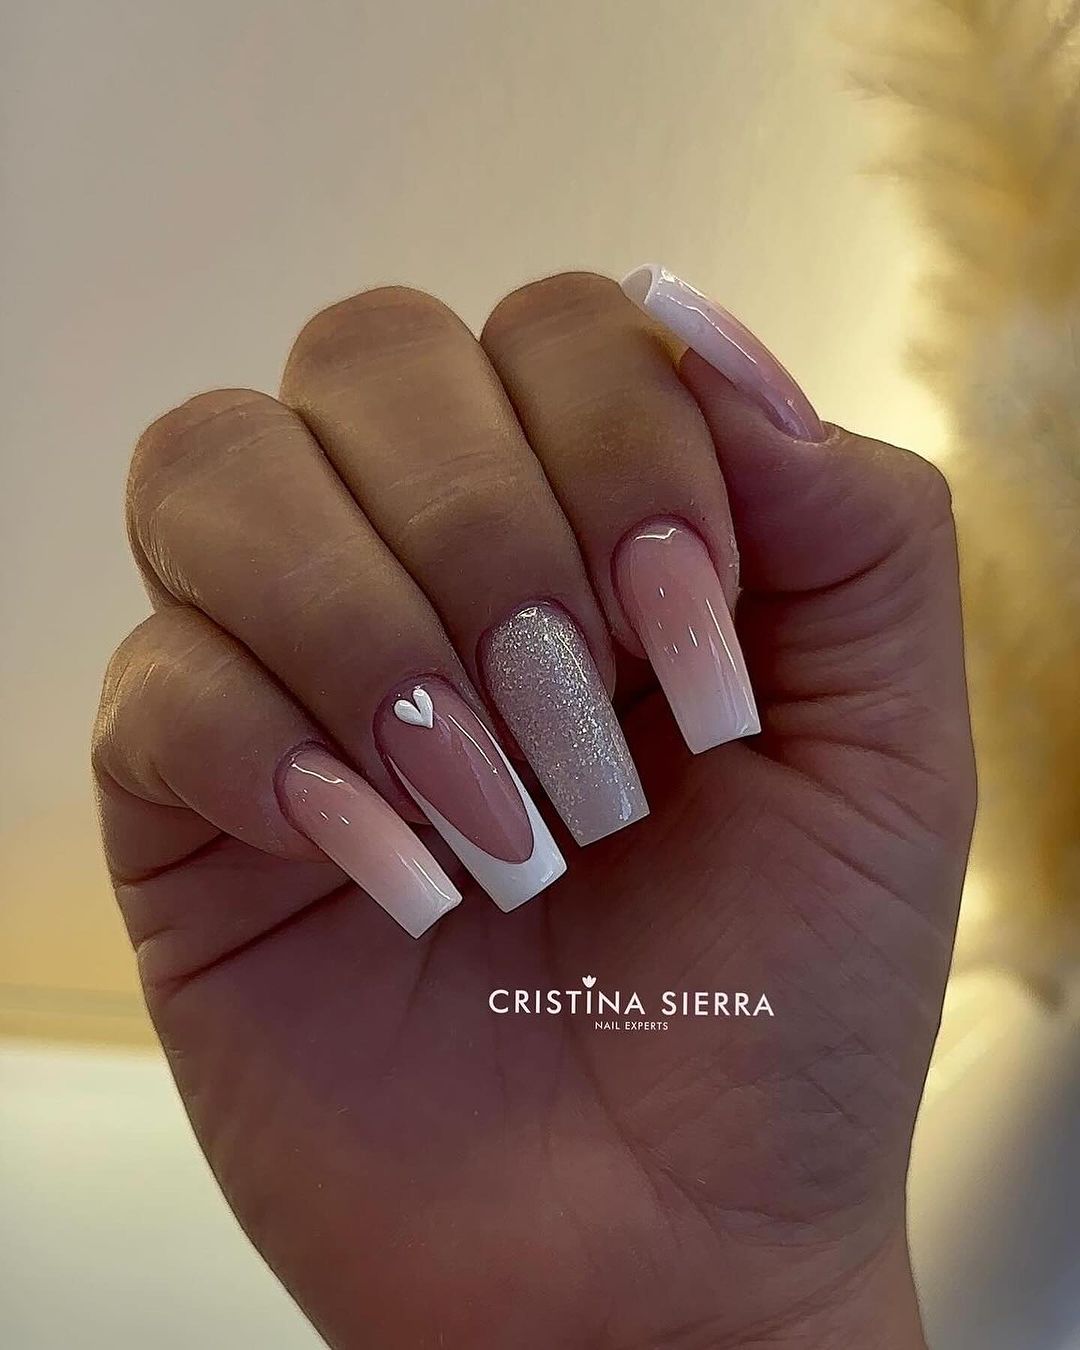
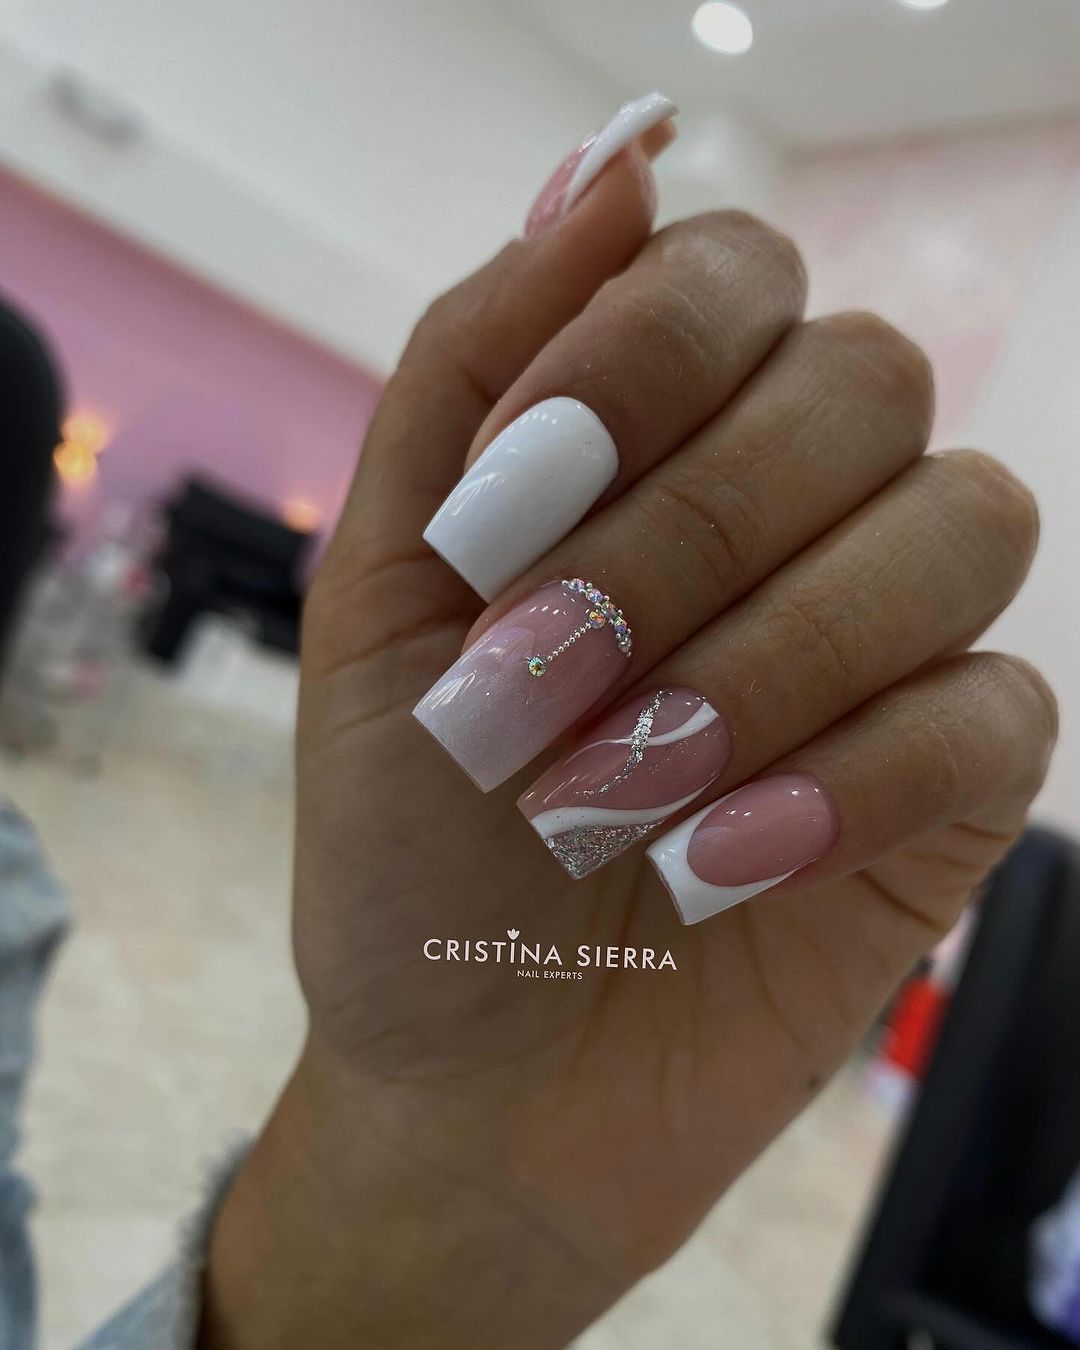
Combining nude and white polishes creates a clean and sophisticated look. Use white for small accents or stripes on a nude base for a timeless design.
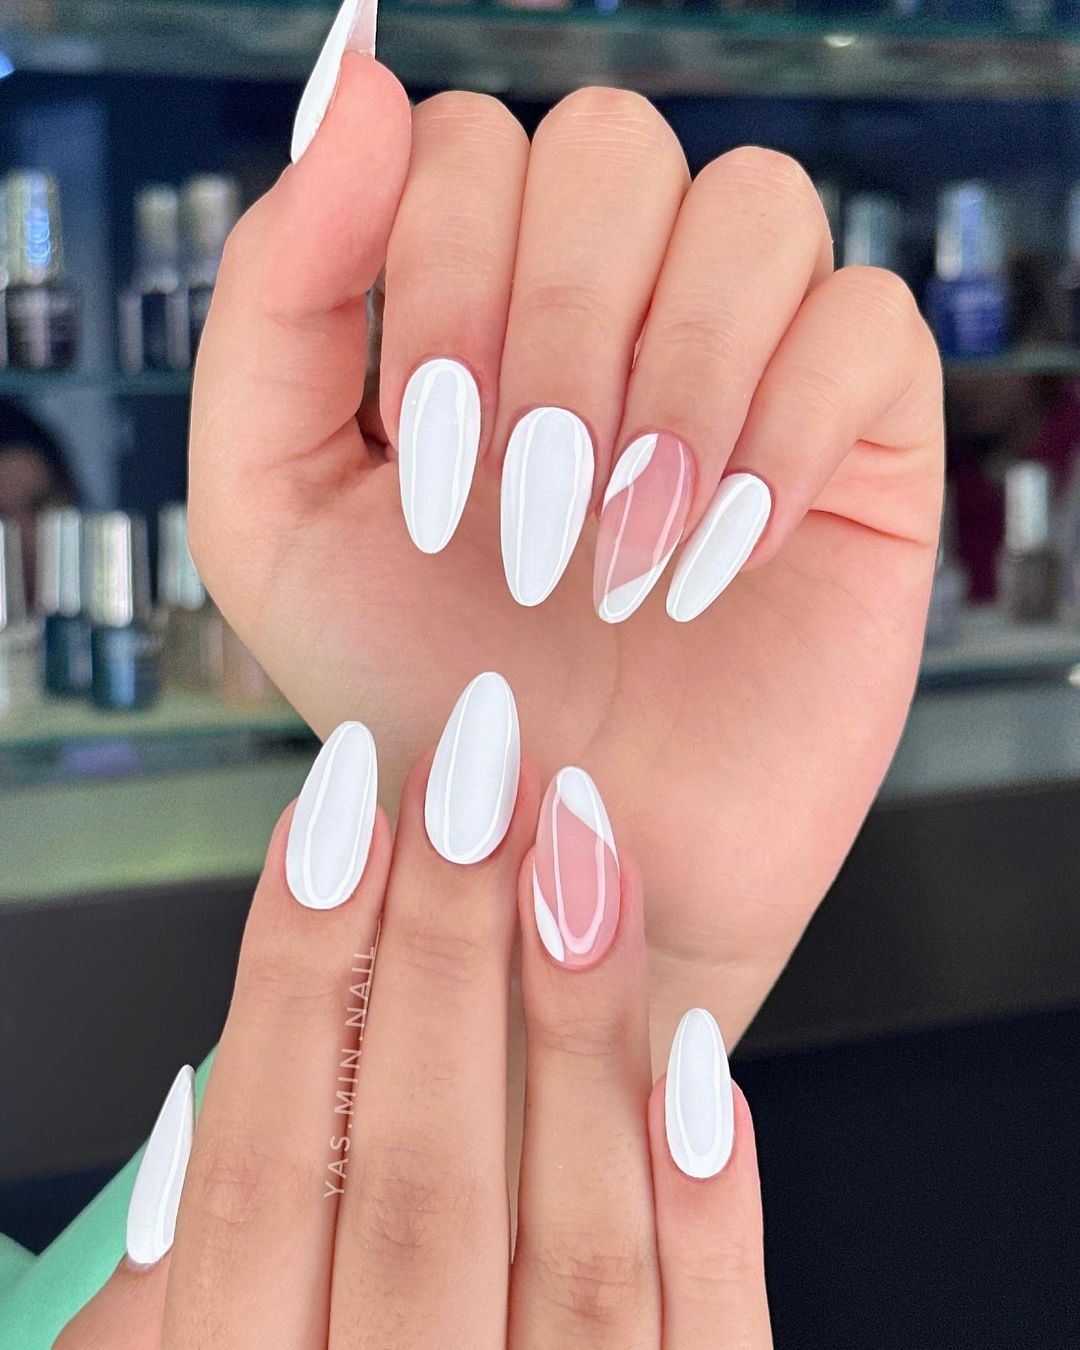
3. Negative Space Art
Incorporating negative space in your design can make a big impact with minimal effort. Experiment with different shapes and lines, leaving parts of your natural nail exposed.
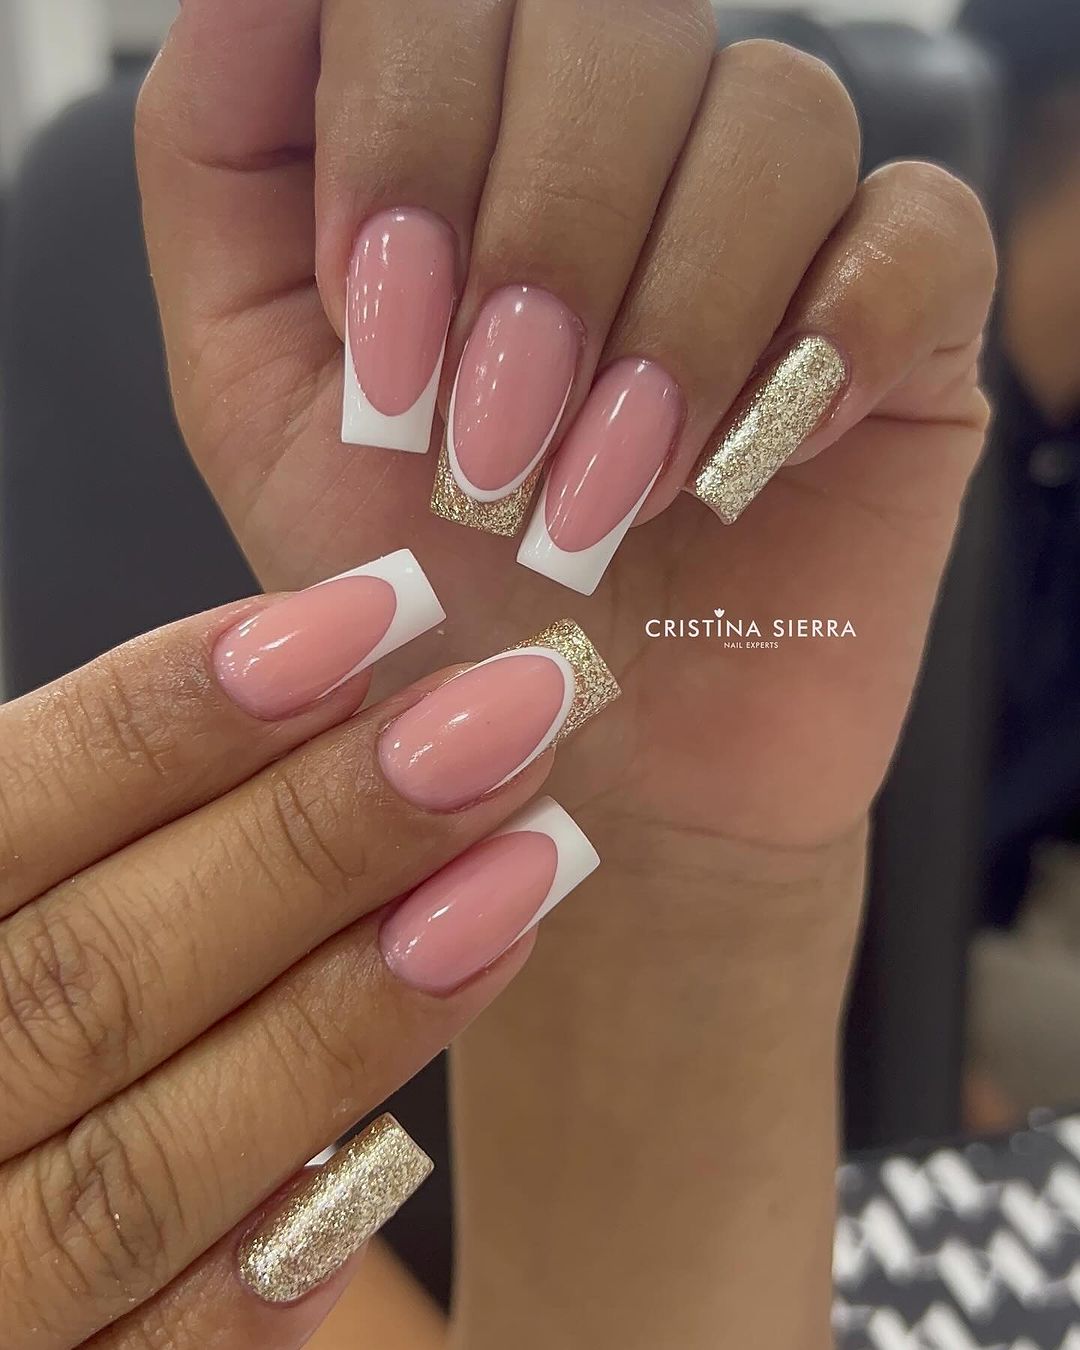
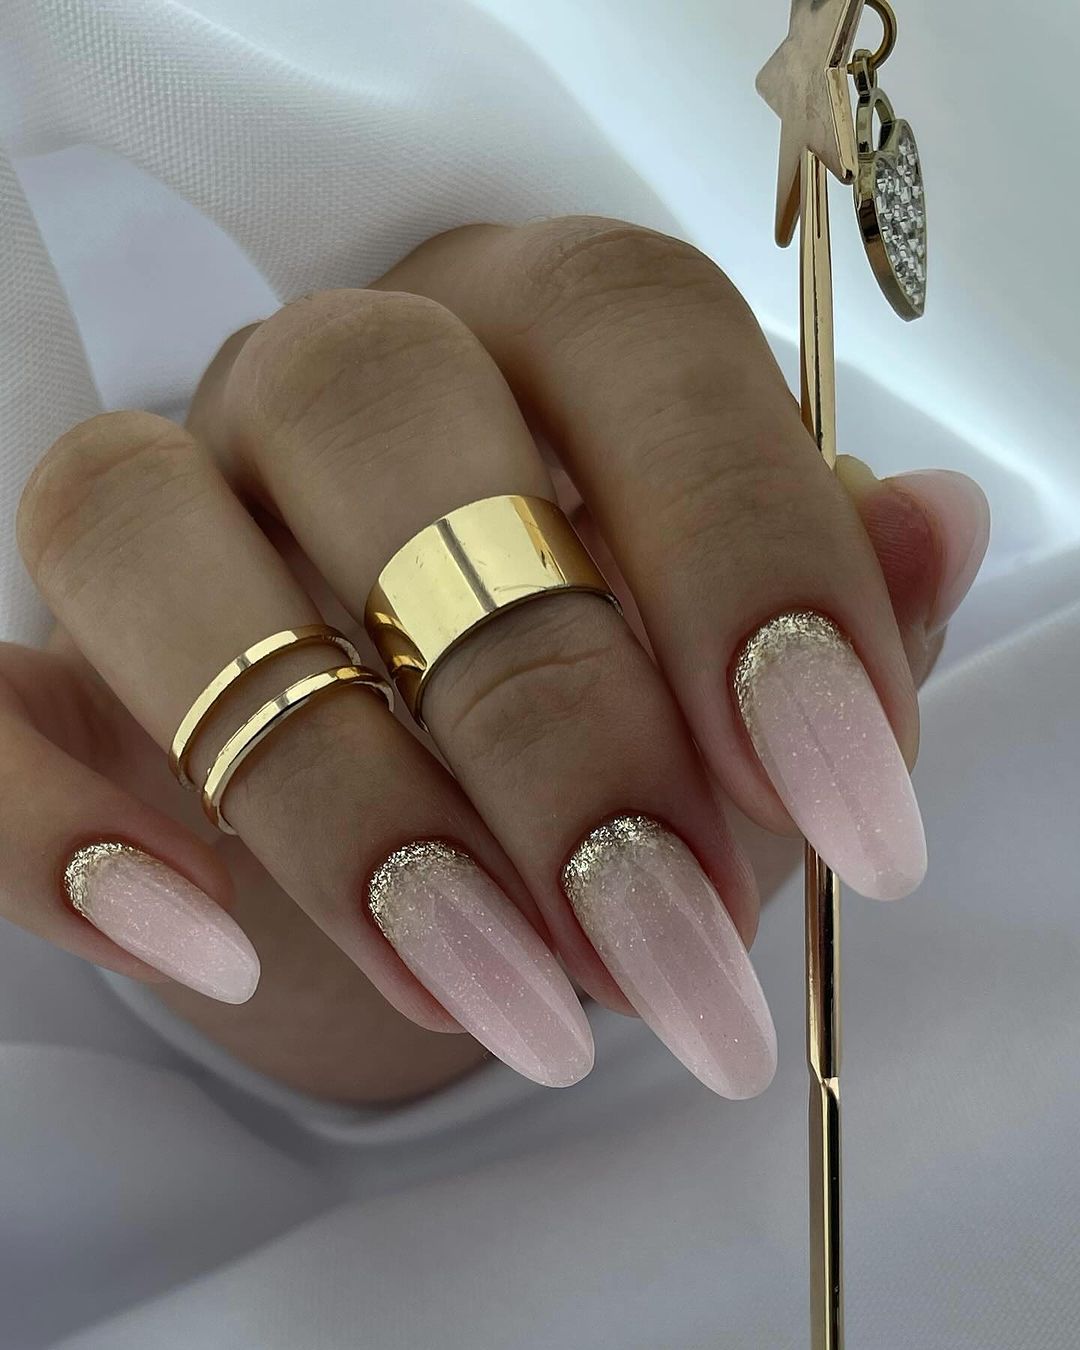
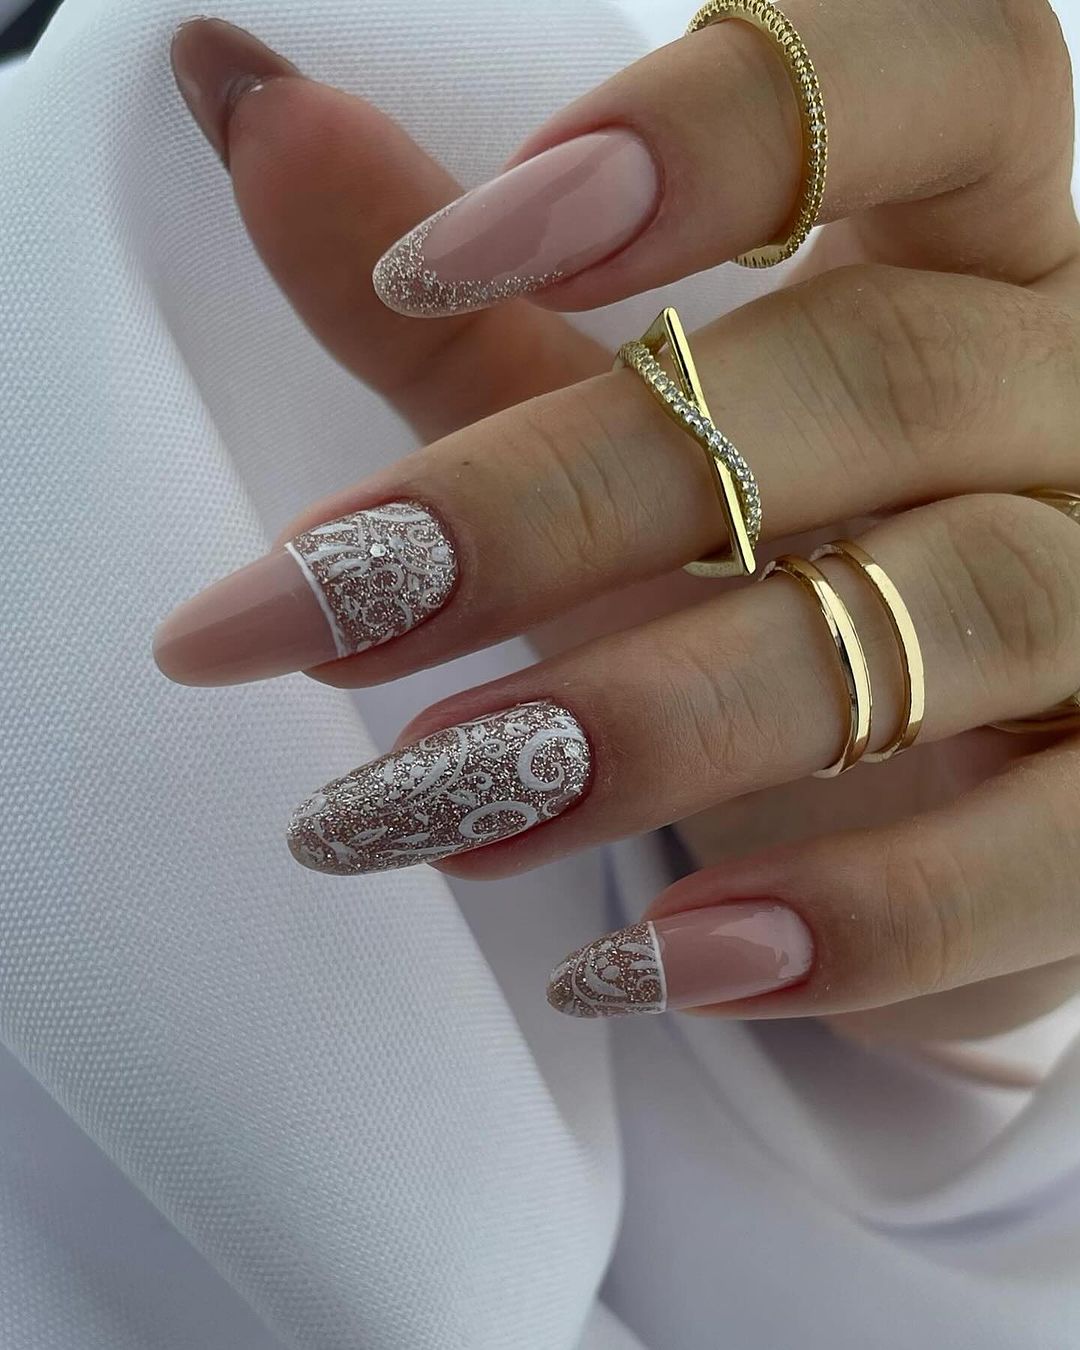
4. Subtle Glitter Accents
Add a touch of sparkle with minimal glitter accents. A single glitter stripe or a few glitter dots can elevate your minimalist nails without overpowering them.
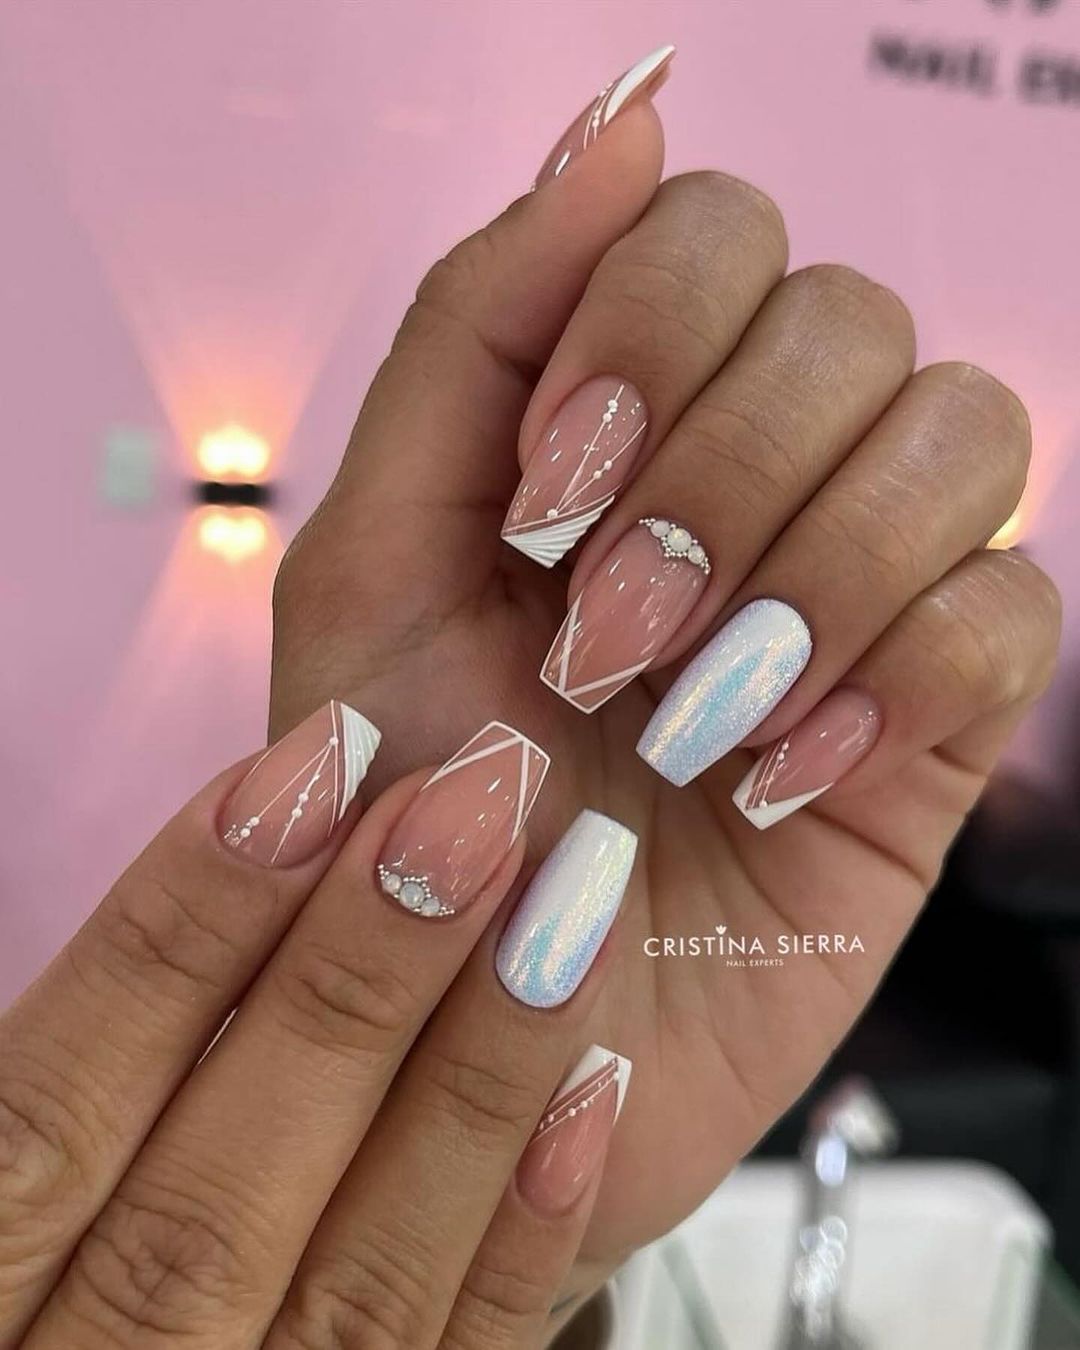
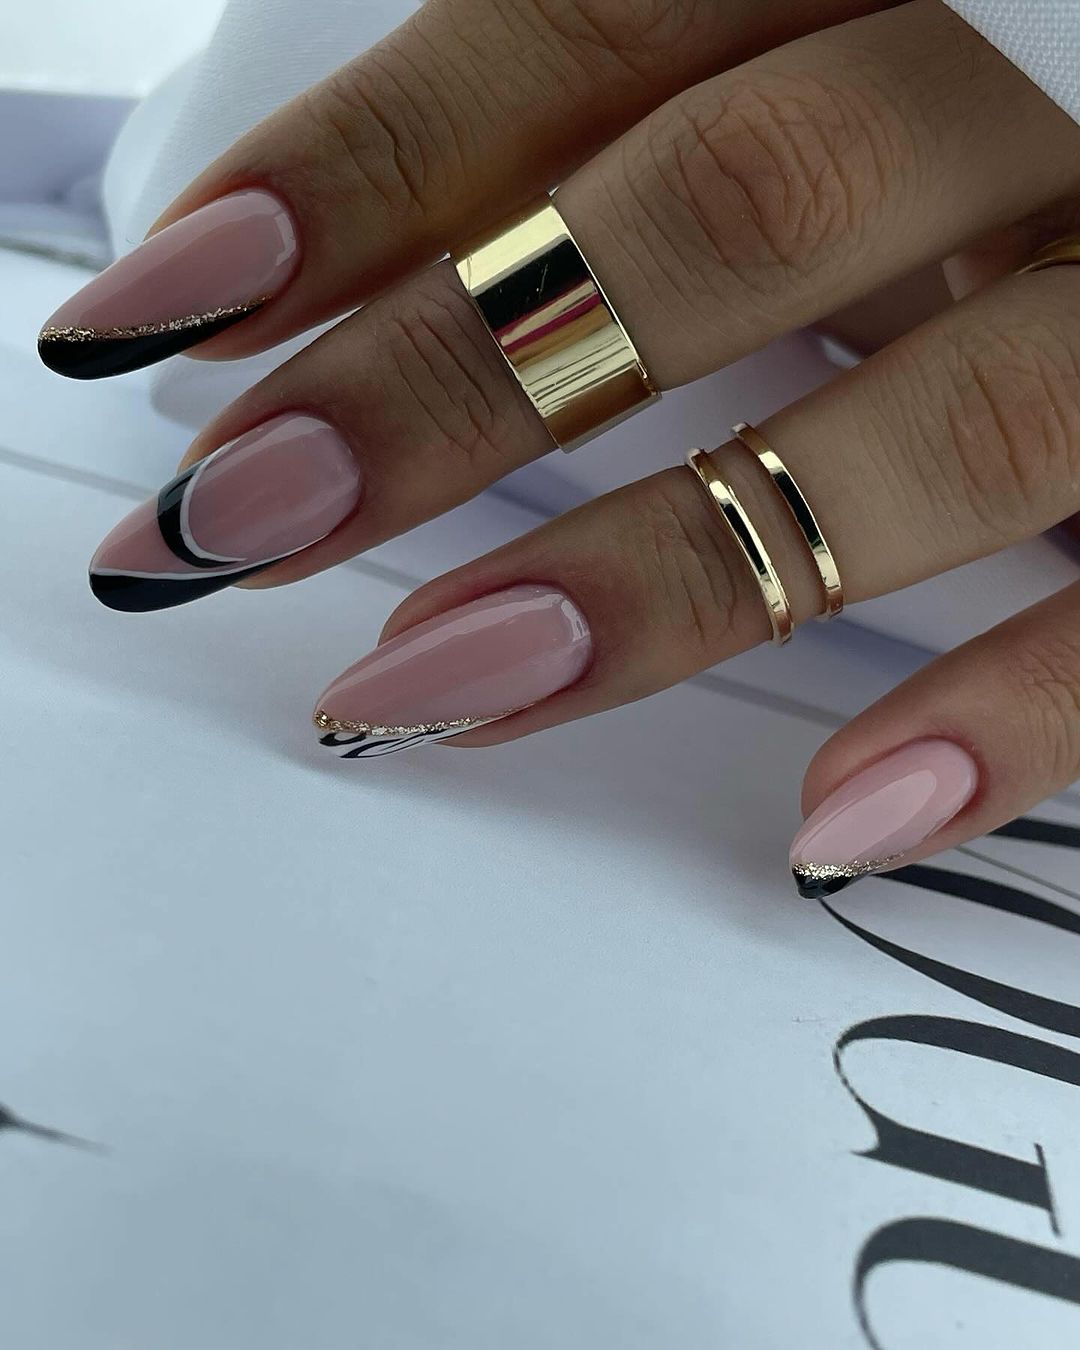
5. Minimalist French Tips
A modern twist on the classic French manicure, minimalist French tips feature thin, barely-there lines at the tips of your nails. This design is perfect for a refined and polished look.
Tips for Long-Lasting Minimalist Nails
Proper Preparation: Ensure your nails are clean and free of oils before applying any polish. This helps the polish adhere better and last longer.
Thin Layers: Apply polish in thin, even layers to prevent smudging and ensure faster drying times.
Top Coat: Always use a top coat to seal your design and protect it from chipping.
Avoid Hot Water: Prolonged exposure to hot water can cause your nail art to peel. Wear gloves when doing household chores to protect your nails.
Touch-Ups: Keep your nail art looking fresh by doing touch-ups as needed. Reapply a top coat every few days to maintain the glossy finish.
Conclusion
Minimalist nails are a perfect blend of elegance and simplicity, offering a sophisticated look that’s easy to achieve and maintain. Whether you prefer monochrome designs, negative space art, or subtle glitter accents, minimalist nails are versatile enough to suit any style and occasion. With the right tools, techniques, and a bit of creativity, you can master the art of minimalist nails and keep your manicure looking chic and timeless. Embrace the beauty of simplicity and let your nails make a subtle yet stylish statement.
Floral nail art has blossomed into one of the most beloved trends in the beauty world. From delicate daisies to bold roses, floral designs offer a versatile and elegant way to express your creativity and add a touch of nature to your look. Whether you’re a nail art novice or a seasoned pro, this comprehensive guide will help you master the art of floral nails.
Floral nail art involves creating flower-inspired designs on your nails using various techniques and tools. These designs can range from simple, single-flower accents to intricate, garden-like patterns covering the entire nail. The beauty of floral nail art lies in its versatility—there’s a style for every season, occasion, and personal taste.
Why Choose Floral Nail Art?
Versatility: Floral designs can be adapted to any color palette and style, from minimalist and modern to bold and vintage.
Seasonal Appeal: Flowers are a perfect match for any season. Think pastel blossoms for spring, bright and tropical flowers for summer, rich hues for fall, and festive poinsettias for winter.
Expression of Creativity: Floral nail art allows for endless creativity. You can mix and match flowers, incorporate different art techniques, and use a variety of nail accessories.
Tools and Materials Needed for Floral Nail Art
Before you start creating your floral masterpiece, it’s important to have the right tools and materials. Here’s a basic list to get you started:
Nail polish: A variety of colors for your base and floral designs.
Nail brushes: Fine detail brushes are essential for creating intricate designs.
Dotting tools: Perfect for creating flower centers and small details.
Nail stickers and decals: For those who prefer an easier application.
Top coat: To seal and protect your design.
Acrylic paints: Often used for detailed work, as they provide more control and precision.
Step-by-Step Guide to Creating Floral Nail Art
1. Prepare Your Nails
Start with clean, dry nails. Trim and shape them to your desired length and shape. Apply a base coat to protect your natural nails and provide a smooth surface for your nail art.
2. Choose Your Base Color
Select a base color that complements your floral design. Pastels are popular for a soft look, while bold colors can make your flowers pop. Apply two coats for an even finish and let it dry completely.
3. Plan Your Design
Decide on the type of flowers you want to create. Common choices include roses, daisies, cherry blossoms, and sunflowers. Sketching a rough design on paper can help you visualize your final look.
4. Create the Flowers
Using a fine nail brush or dotting tool, start painting your flowers. Here are a few techniques for different types of flowers:
Daisies: Use a dotting tool to create a central dot, then add petals around it using small, elongated strokes.
Roses: Paint small, concentric curved lines to create the appearance of rose petals.
Cherry Blossoms: Use a small brush to paint delicate branches, then add tiny blossoms along the branches.
Sunflowers: Start with a brown or black center, then paint yellow petals radiating outward.
5. Add Details
Enhance your flowers with additional details like leaves, stems, and vines. Use a contrasting color to make these elements stand out. Dotting tools can help create small accents, such as tiny dots around the flower petals.
6. Seal Your Design
Once your floral design is dry, apply a top coat to seal and protect your artwork. This will also add a glossy finish and prevent your design from chipping.
Popular Floral Nail Art Trends
1. 3D Floral Nail Art
3D floral designs use acrylic or gel to create raised flower designs. These designs add texture and dimension to your nails, making them look more lifelike.
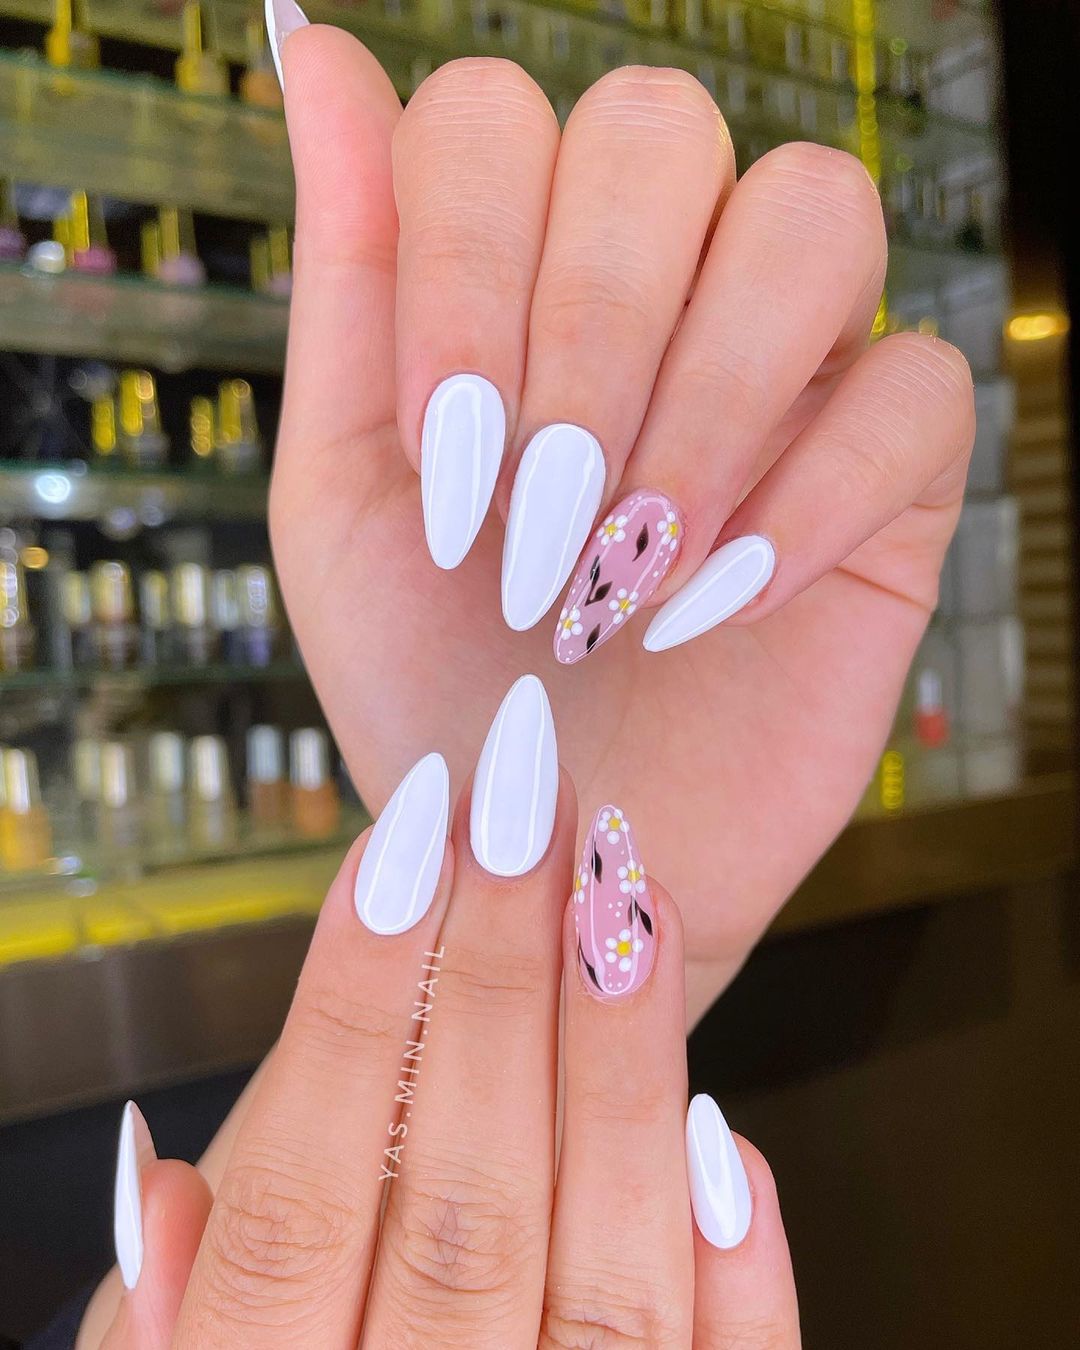
2. Minimalist Floral Nail Art
For a more understated look, minimalist floral designs focus on simple and clean lines. Often featuring a single flower or a few petals, this style is perfect for those who prefer a subtle touch.
3. Neon Floral Nail Art
Bright, neon colors bring a modern twist to traditional floral designs. This trend is perfect for summer and festivals, adding a vibrant pop of color to your nails.
4. Vintage Floral Nail Art
Inspired by vintage wallpaper and fabrics, this trend features intricate floral patterns in muted, antique colors. Think dusty roses, lavender, and sage green for a classic, timeless look.
Tips for Long-Lasting Floral Nail Art
Proper Preparation: Ensure your nails are clean and free of oils before applying any polish. This helps the polish adhere better and last longer.
Thin Layers: Apply polish in thin, even layers to prevent smudging and ensure faster drying times.
Top Coat: Always use a top coat to seal your design and protect it from chipping.
Avoid Hot Water: Prolonged exposure to hot water can cause your nail art to peel. Wear gloves when doing household chores to protect your nails.
Touch-Ups: Keep your nail art looking fresh by doing touch-ups as needed. Reapply a top coat every few days to maintain the glossy finish.
Conclusion
Floral nail art is a beautiful and versatile way to express your personal style. With the right tools, techniques, and a bit of practice, you can create stunning floral designs that will make your nails look like a work of art. Whether you prefer a simple daisy or an elaborate rose garden, there’s a floral nail art design out there for everyone. So, grab your nail polish and brushes, and let your creativity bloom!
By following this guide, you’ll be well on your way to mastering the art of floral nails and keeping up with the latest trends. Happy painting!
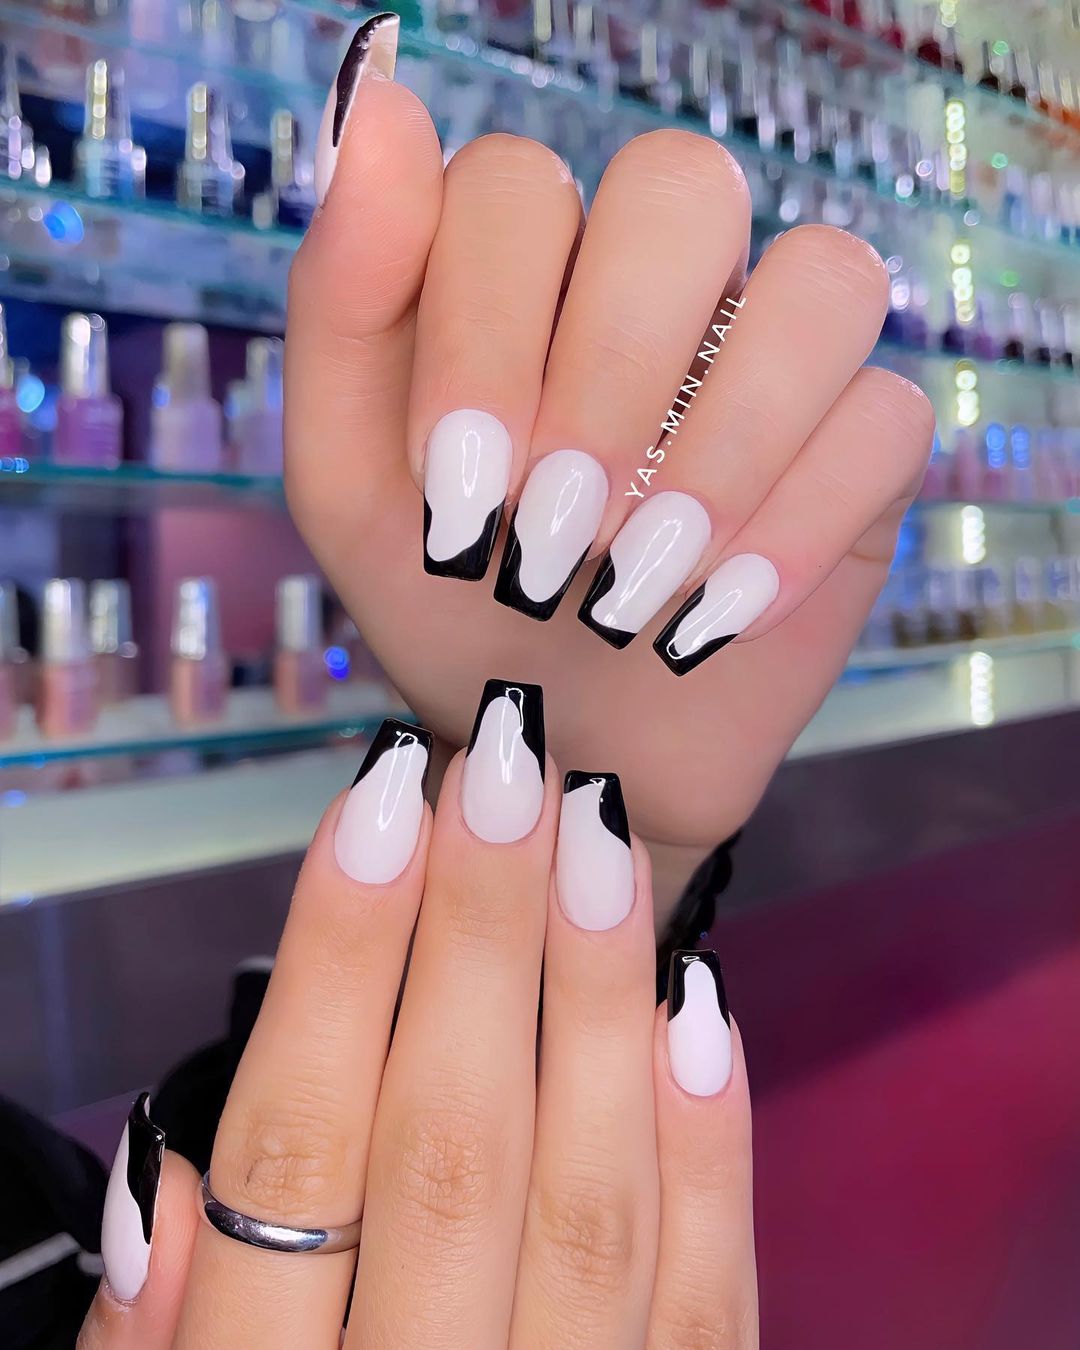
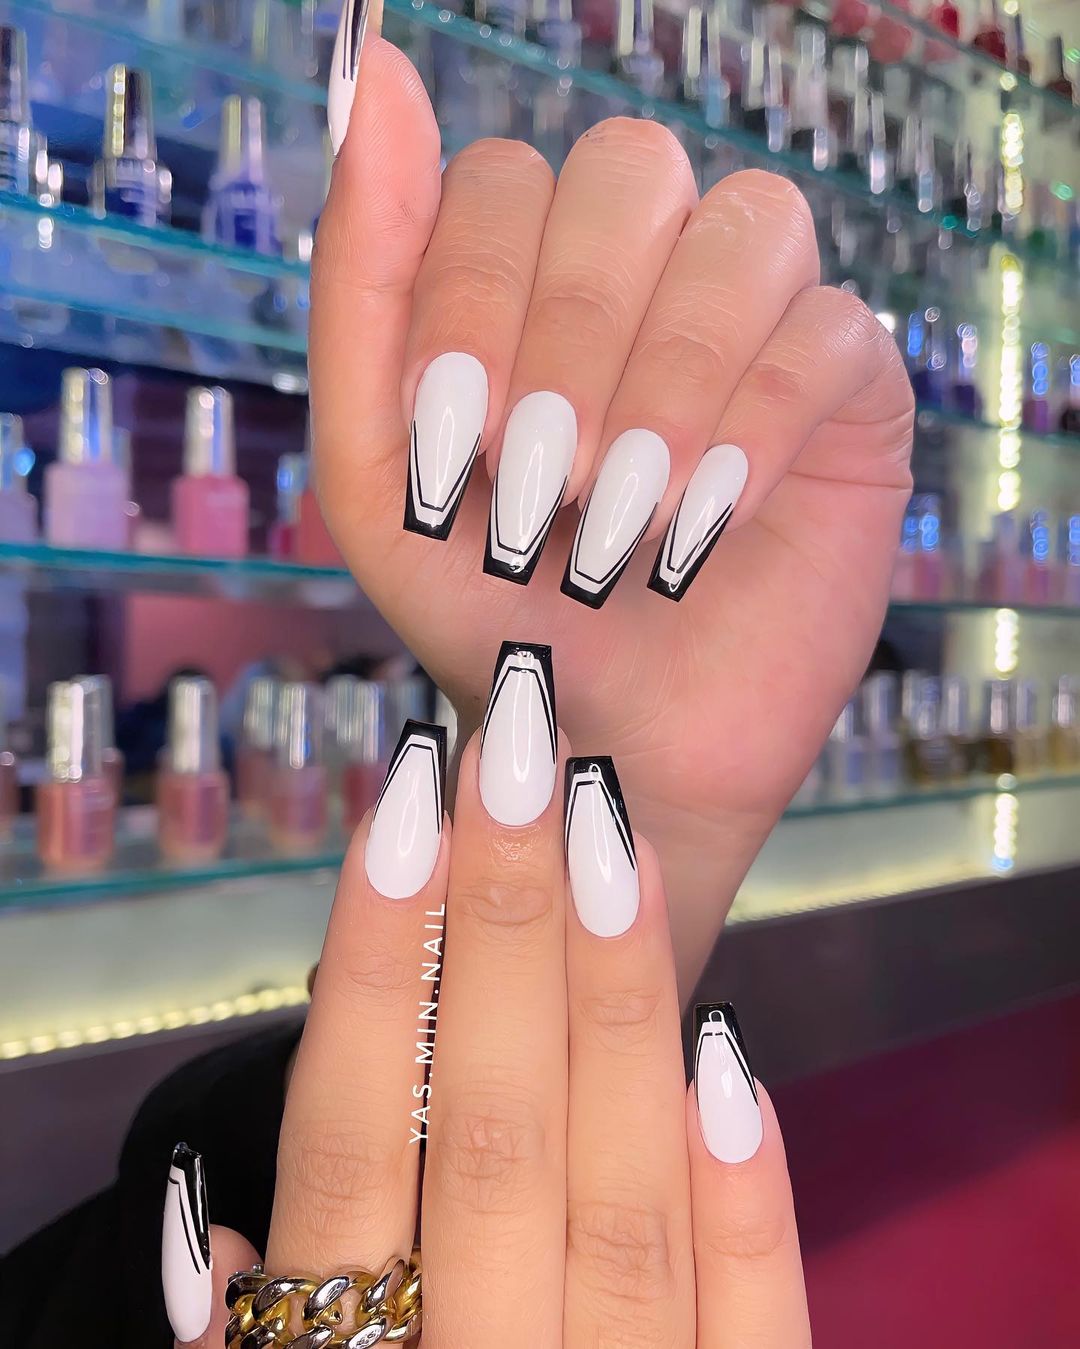
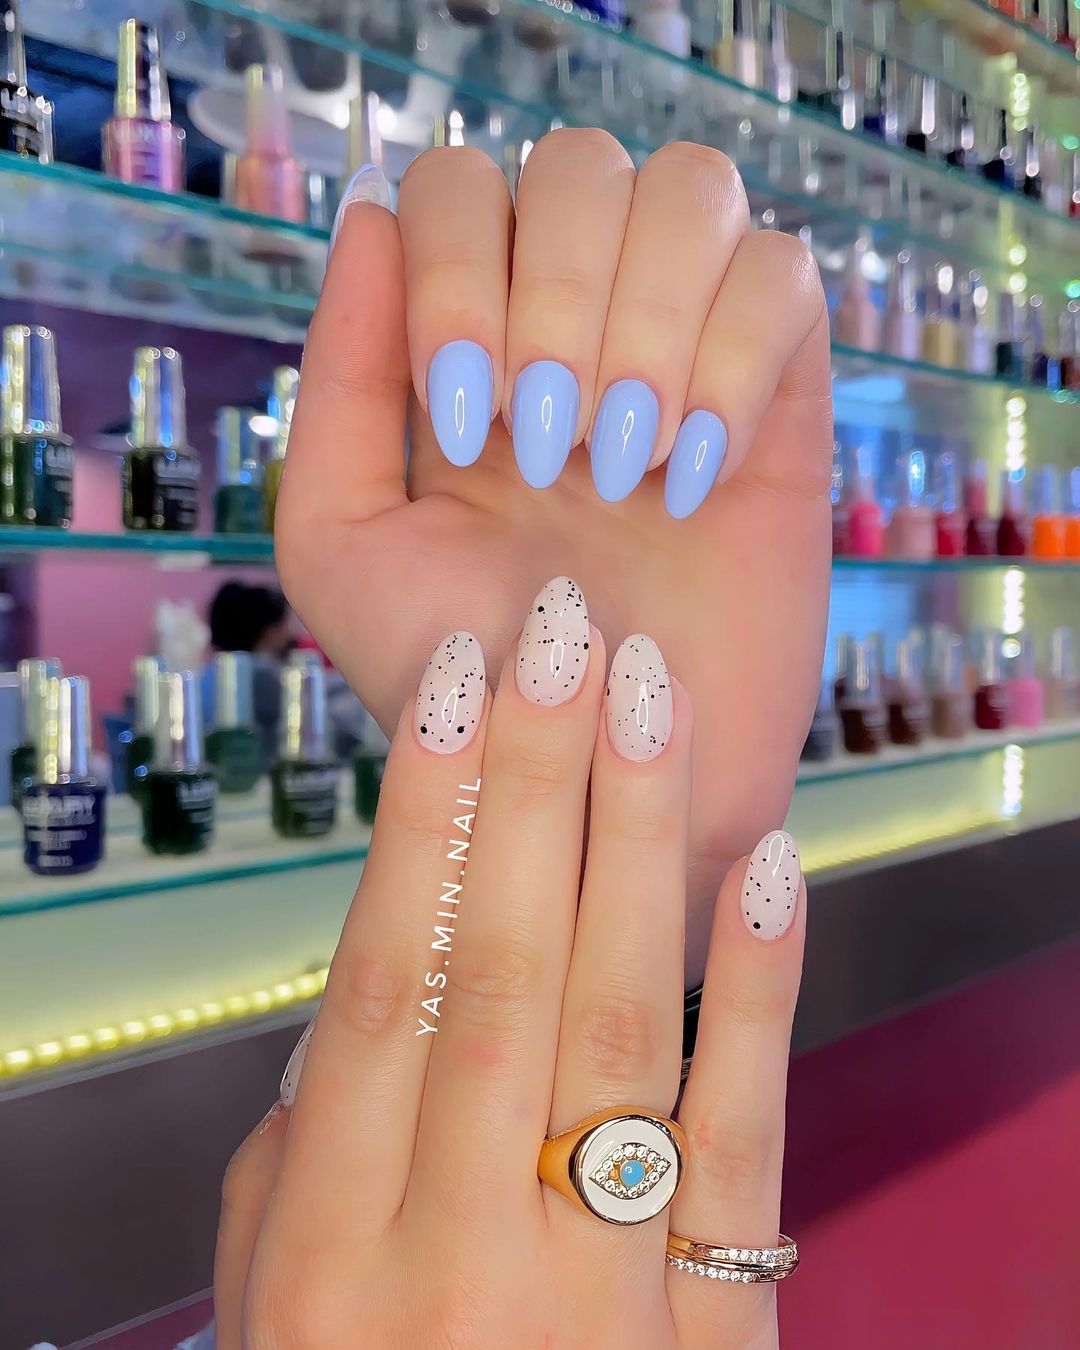
In the ever-evolving world of nail art and design, textured white nails have emerged as a chic and versatile trend that seamlessly transitions from casual to formal occasions. This avant-garde look adds depth, dimension, and a touch of sophistication to the classic white manicure, making it a standout choice for fashion-forward individuals seeking to elevate their nail game.
Exploring the Different Types of Textured White Nail Designs
Embossed Patterns
Embossed patterns are a popular technique for creating textured white nails. This method involves using a specialized tool or stamp to imprint intricate designs, such as lace, floral, or geometric patterns, onto the white nail polish. The resulting texture adds a tactile element to the nails, making them appear multidimensional and visually striking.
Matte Finishes
Matte finishes are another way to achieve textured white nails. By eliminating the glossy shine typically associated with traditional nail polish, matte finishes create a velvety, muted appearance. This technique can be applied to the entire nail or combined with glossy accents for a striking contrast.
Crackle Textures
Crackle textures are a unique and eye-catching option for textured white nails. This technique involves layering a specialized crackle polish over a white base coat, resulting in a shattered, cracked effect that adds depth and interest to the nails.
3D Embellishments
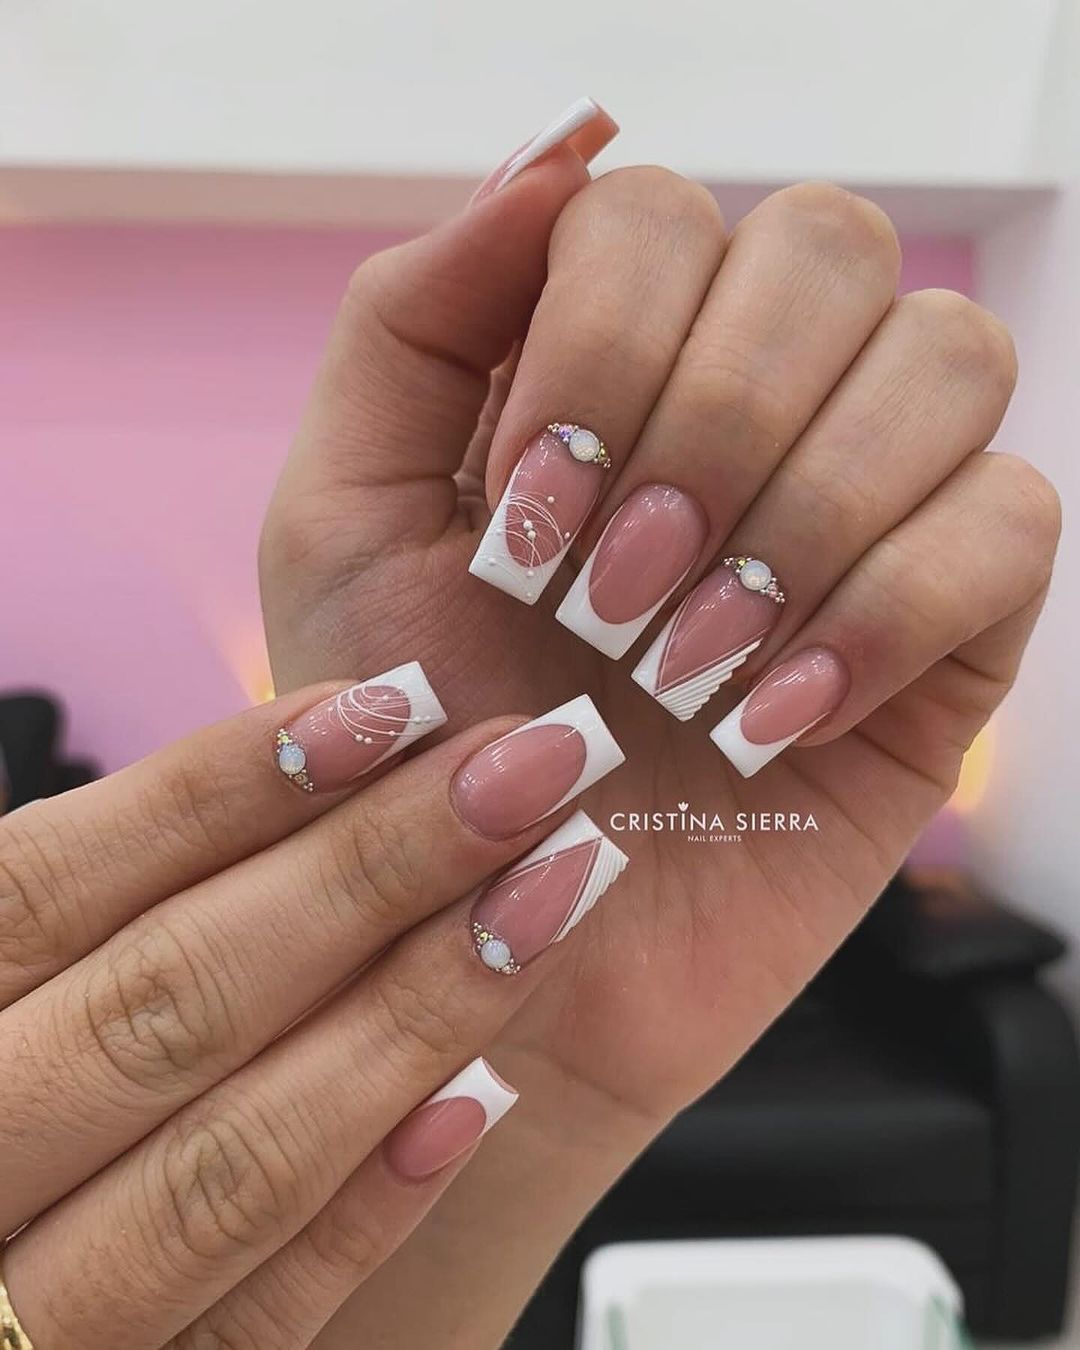
For those seeking a more dramatic and artistic approach, 3D embellishments can be incorporated into textured white nail designs. This technique involves adhering intricate details, such as pearls, rhinestones, or sculpted elements, to the nails, creating a multidimensional and sculptural appearance.
Textured Gradients
Textured gradients offer a modern twist on the classic French manicure. This design involves gradually transitioning from a smooth white base to a textured effect towards the tips of the nails, creating a visually appealing and sophisticated look.
Creating Textured White Nails at Home: A Step-by-Step Guide
Preparing the Nails
Start by removing any existing nail polish or debris from your nails.
Gently file and shape your nails to your desired length and shape.
Apply a base coat to protect your nails and ensure long-lasting wear.
Applying the White Base
Choose a high-quality white nail polish and apply a thin, even coat to all nails.
Allow the base coat to dry completely before proceeding to the next step.
Creating the Texture
Embossed Patterns: Using a specialized embossing tool or stamp, gently press the desired pattern onto the white base coat while it is still slightly tacky.
Matte Finishes: Apply a matte top coat or use a matte nail polish directly over the white base coat.
Crackle Textures: Once the white base coat is dry, apply a specialized crackle polish in a thin, even layer.
3D Embellishments: Carefully adhere desired embellishments, such as pearls or rhinestones, to the white base coat using a specialized nail glue or adhesive.
Textured Gradients: Begin with a smooth white base coat and gradually transition to a textured effect towards the tips using a sponge or makeup brush.
Sealing and Finishing
Once you have achieved the desired texture, apply a top coat to protect the design and add a glossy shine (if desired).
Allow the nails to dry completely before using your hands for any activities.
Styling Textured White Nails for Different Occasions
Casual Everyday Wear
Textured white nails are a perfect choice for casual everyday wear. Their understated elegance complements a variety of outfits, from jeans and a t-shirt to a simple sundress. For a relaxed yet chic look, opt for matte finishes or subtle embossed patterns.
Office or Professional Settings
Textured white nails can be an excellent option for office or professional settings. Their polished and sophisticated appearance pairs well with tailored suits or smart casual ensembles. Consider textured gradients or crackle textures for a touch of interest without being overpowering.
Special Occasions and Formal Events
For special occasions and formal events, textured white nails can add a touch of glamour and sophistication. Incorporate 3D embellishments, such as pearls or rhinestones, for a dazzling and eye-catching look that complements evening gowns or cocktail dresses.
Bridal Nails
Textured white nails are a stunning choice for brides seeking a modern and chic look on their big day. Embossed lace patterns or delicate pearls can add a touch of romance and elegance to your bridal ensemble.
The Benefits and Drawbacks of Textured White Nails
Benefits
Versatility: Textured white nails can be dressed up or down, making them suitable for a variety of occasions.
Unique and Eye-Catching: The added dimension and texture make your nails stand out from traditional manicures.
Timeless Elegance: White nails have a timeless appeal, and the added texture gives them a contemporary twist.
Low-Maintenance: Textured white nails can be easy to maintain, as chips and wear are less noticeable than with bold colors or patterns.
Drawbacks
Potential for Snagging: Certain textured designs, such as 3D embellishments or raised patterns, may be prone to snagging on fabrics or surfaces.
Limited Durability: Some textured techniques, like crackle textures, may wear down more quickly than traditional nail polish.
Difficulty in Application: Achieving precise and consistent textures can be challenging, especially for beginners.
Limited Color Options: While white nails can be versatile, some individuals may prefer more vibrant color options for certain occasions.
Textured White Nail Inspiration: Real-Life Designs and Ideas
Embossed Floral Patterns
A delicate embossed floral pattern on a white base coat creates a romantic and feminine look.
Pair with a flowy sundress or a crisp white blouse for a chic and polished ensemble.
Matte and Glossy Contrast
Combine matte and glossy finishes for a striking contrast and added depth.
Try a matte white base with glossy white accents or vice versa for a modern twist.
Pearlescent Crackle Texture
A pearlescent crackle texture over a white base coat adds a subtle shimmer and iridescence.
Perfect for a night out or a special occasion, this design is both elegant and eye-catching.
3D Pearls and Rhinestones
Adorn your nails with delicate pearls and sparkling rhinestones for a glamorous and luxurious look.
Ideal for formal events, weddings, or any occasion where you want to make a statement.
Textured French Manicure
Elevate the classic French manicure with a textured gradient effect on the tips.
Choose from embossed patterns, matte finishes, or crackle textures for a modern take on a timeless design.
Conclusion
In the realm of nail art, textured white nails stand out as a chic and versatile trend that offers endless possibilities for creativity and style. From embossed patterns to 3D embellishments, there are various ways to achieve a textured white nail design that suits your personal taste and the occasion at hand.
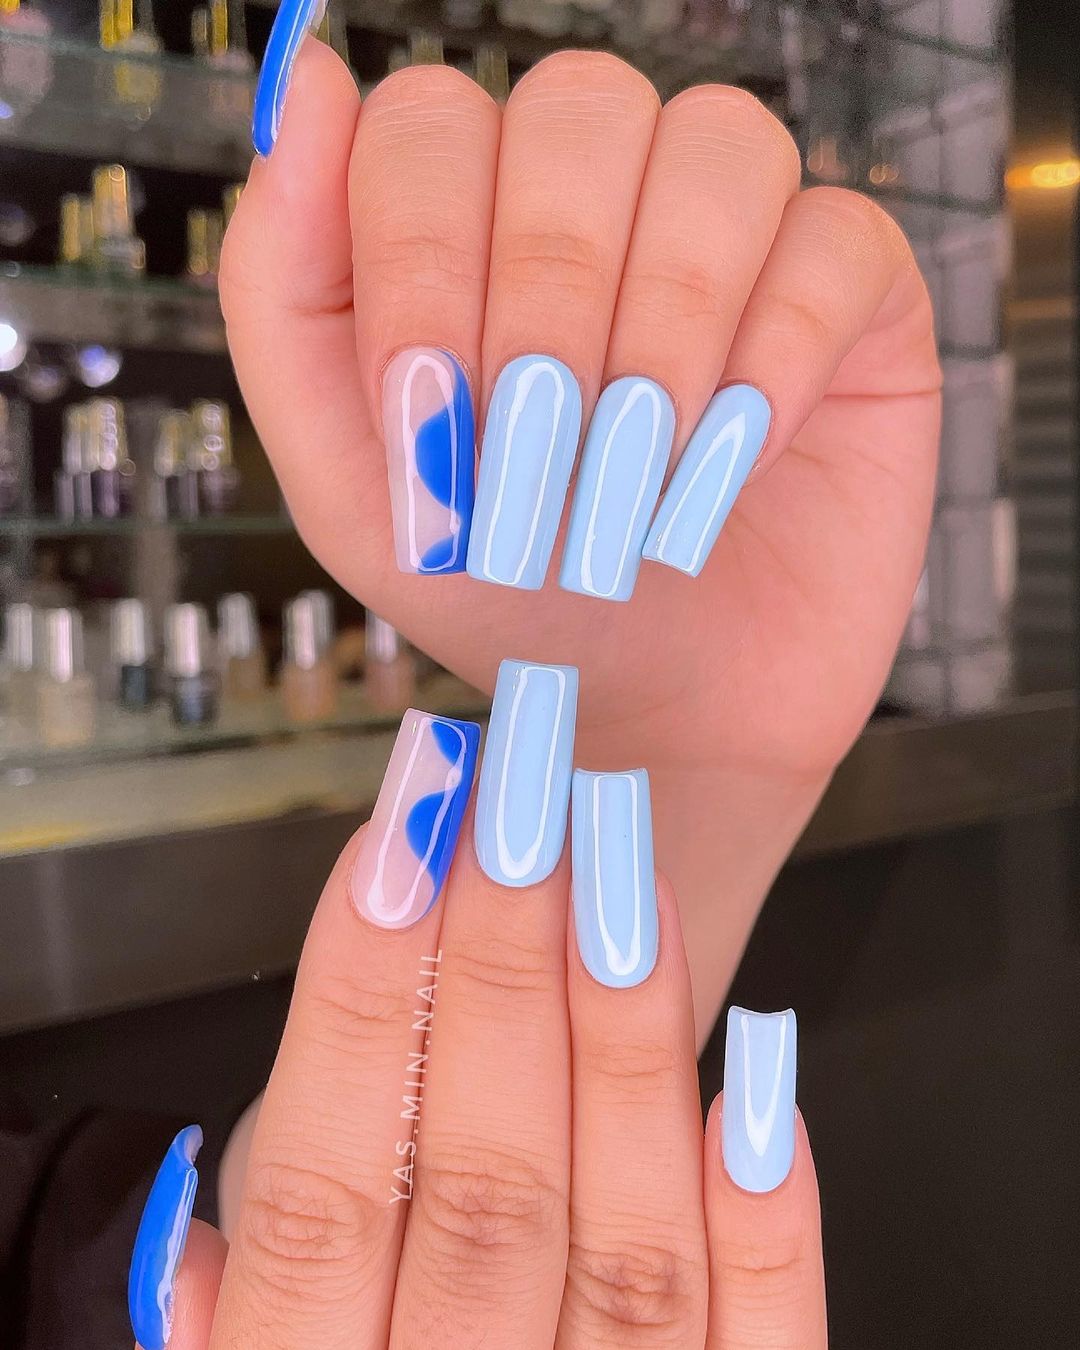
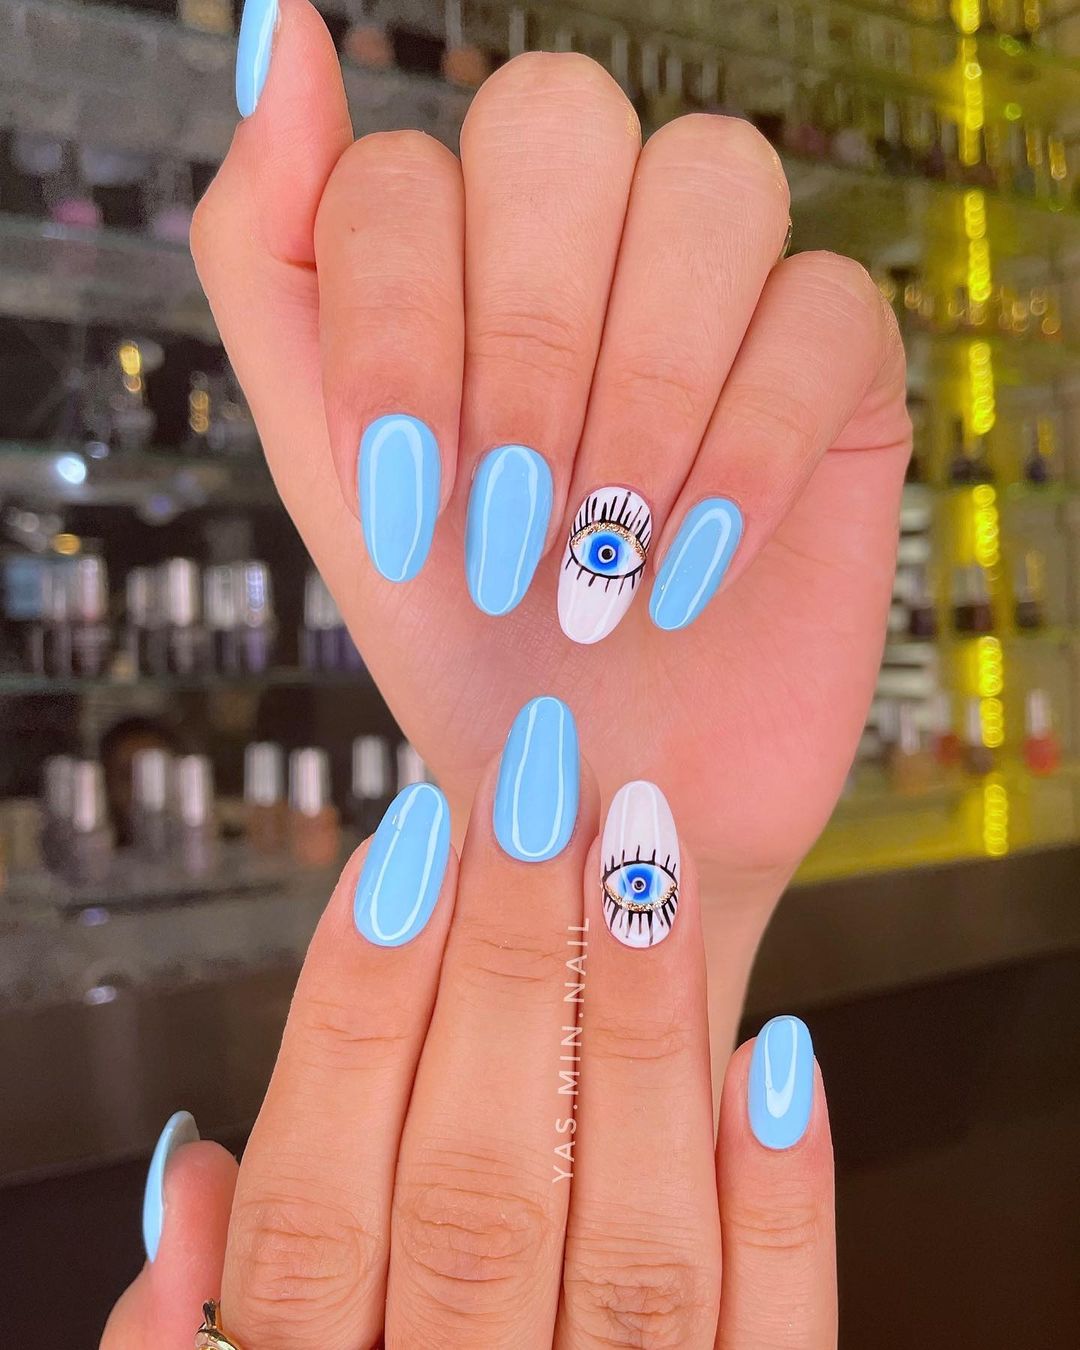
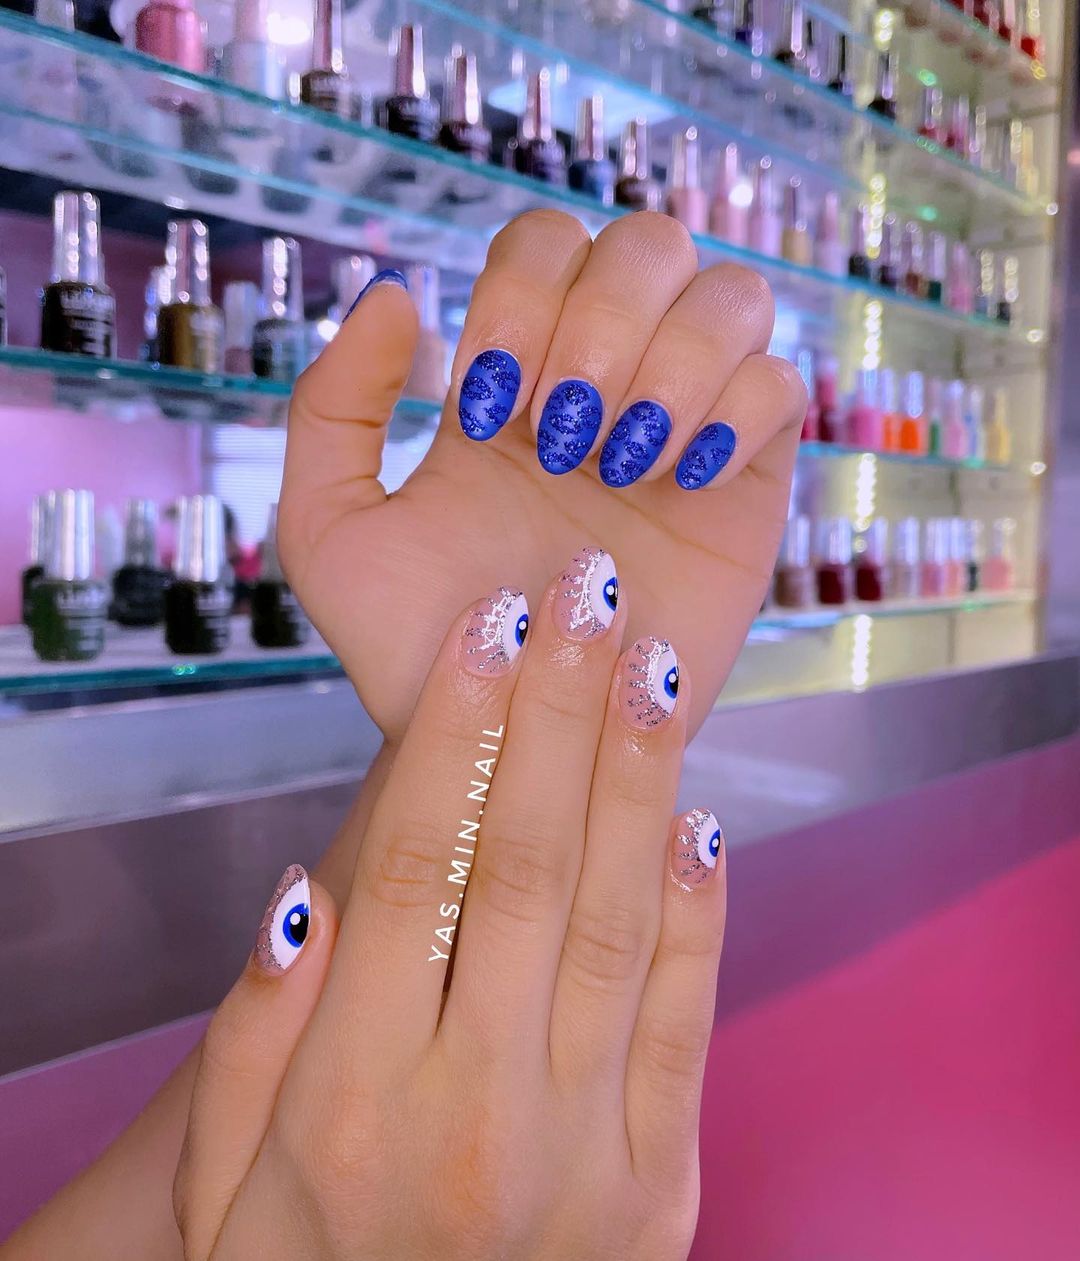
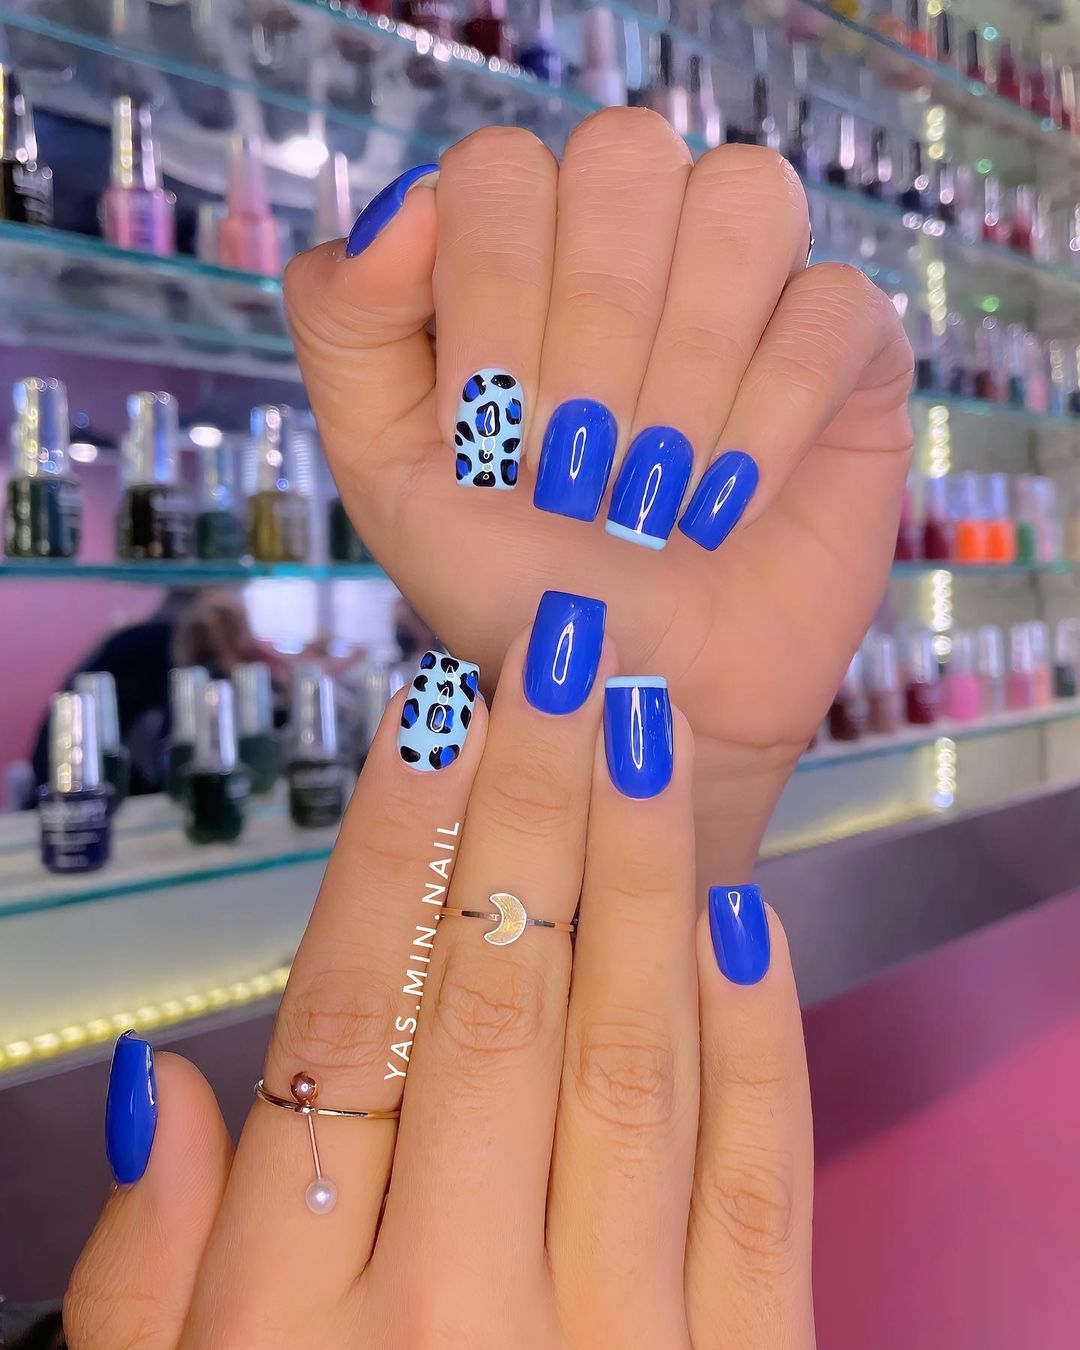
Introducing the regal and captivating world of royal blue nails – a trend that has been embraced by fashion enthusiasts and beauty aficionados alike. This timeless hue exudes elegance, confidence, and a touch of mystery, making it the perfect choice for those seeking to make a statement. In this comprehensive guide, we’ll delve into the mesmerizing allure of royal blue nails, exploring everything from stunning nail art inspirations to the best polishes and techniques for achieving the perfect manicure.
Royal Blue Nail Art Inspirations: From Classic to Trendy
The Minimalist Chic
For those who prefer a more subtle approach, minimalist royal blue nail art is the way to go. This style involves a clean base coat of royal blue polish, often accented with delicate designs or negative space patterns.
Classic French Tip: A modern twist on the traditional French manicure, this design features royal blue tips against a nude or clear base, creating a polished and elegant look.
Negative Space: Embrace the power of negative space by leaving portions of the nail bare, creating abstract patterns or geometric shapes against the rich royal blue backdrop.
Bold and Daring Designs
If you’re feeling daring, why not experiment with bold and eye-catching royal blue nail art? These designs are perfect for making a statement and showcasing your individuality.
Marble Effect: Create a mesmerizing marbled effect by combining royal blue with complementary shades, such as white or silver, for a truly unique and captivating look.
Glitter Accents: Add a touch of sparkle to your royal blue nails by incorporating glitter accents or a full glitter topcoat for a glamorous and party-ready vibe.
Intricate Patterns and Textured Designs
For those seeking a truly artistic expression, intricate patterns and textured designs are the way to go. These styles showcase the versatility of royal blue and allow you to unleash your creativity.
Floral Motifs: Incorporate delicate floral motifs onto your royal blue nails for a touch of femininity and elegance.
Textured Embellishments: Experiment with textured embellishments like studs, beads, or even embossed patterns for a unique and eye-catching twist on royal blue nails.
Royal Blue Nail Polishes for Every Occasion: Our Top Picks
Achieving the perfect royal blue manicure starts with choosing the right nail polish. Here are some of our top picks for every occasion:
Occasion
Polish Recommendation
Office/Professional
“Royal Rendezvous” by OPI – A deep, rich royal blue with a creamy finish, perfect for a polished and professional look.
Formal Events
“Evening Royalty” by Essie – A vibrant royal blue with subtle shimmer, ideal for adding a touch of glamour to your formal attire.
Casual/Weekend
“Blue Rebel” by China Glaze – A bold and vivid royal blue with a high-shine finish, perfect for a fun and playful weekend vibe.
Parties/Nights Out
“Royal Flush” by Deborah Lippmann – A dazzling royal blue with a metallic finish, guaranteed to turn heads at any party or night out.
Choosing the Right Finish
Royal blue nail polishes come in a variety of finishes, each offering a unique look and feel. Here are some popular options:
Crème: A classic and opaque finish that provides a rich, velvety appearance.
Shimmer: Infused with subtle shimmer particles, these polishes add a touch of glamour and depth to your nails.
Metallic: For a bold and eye-catching look, metallic finishes offer a high-shine, foil-like effect.
Matte: A modern and trendy option, matte royal blue polishes create a velvety, flat finish that is both chic and unique.
Mastering the Royal Blue Mani: Tips and Techniques
Achieving the perfect royal blue manicure requires a bit of skill and technique. Here are some tips to help you master the art of the royal blue mani:
Proper Nail Preparation
Start with clean, dry nails free of any oil or residue.
Gently buff the nail surface to create a smooth canvas for the polish to adhere to.
Apply a base coat to protect your nails and prolong the life of your manicure.
Application Techniques
Apply the royal blue polish in thin, even coats, allowing each coat to dry completely before applying the next.
For a flawless finish, use a clean-up brush dipped in acetone to clean up any messy edges or cuticle areas.
Seal the look with a high-quality top coat to add shine and protect your manicure from chipping and fading.
Nail Art Tips and Tricks
Dotting Tools: Use dotting tools or bobby pins to create intricate patterns and designs with precision.
Nail Vinyls: Invest in nail vinyls or stencils to create clean lines and shapes for your royal blue nail art.
Striping Brushes: For clean, crisp lines and details, use a striping brush dipped in a contrasting color or top coat.
Royal Blue Nails and Your Wardrobe: Matching Tips
Royal blue nails are a versatile and stylish addition to any outfit, but coordinating them with your wardrobe can take your look to the next level. Here are some tips for matching your royal blue nails with various outfits:
Complementary Colors
Pair royal blue nails with shades of orange, coral, or peach for a vibrant and eye-catching contrast.
For a more subtle approach, complement your royal blue nails with neutral tones like beige, cream, or tan.
Monochromatic Looks
Create a chic and cohesive monochromatic look by pairing your royal blue nails with clothing and accessories in varying shades of blue.
Experiment with different textures and patterns to add depth and interest to your monochromatic ensemble.
Metallic Accents
Incorporate metallic elements, such as silver or gold jewelry or accessories, to complement and elevate your royal blue nails.
For a glamorous evening look, pair your royal blue nails with a metallic dress or top for a touch of sophistication.
The History and Symbolism of Royal Blue Nails
The allure of royal blue nails extends beyond mere aesthetics – this rich hue carries a rich history and symbolic significance:
Royalty and Power: As the name suggests, royal blue has long been associated with royalty, power, and authority, dating back to ancient civilizations where it was a color reserved for the elite.
Confidence and Strength: The deep, intense shade of royal blue is often linked to confidence, strength, and determination, making it an empowering choice for those seeking to exude a sense of self-assurance.
Sophistication and Elegance: With its regal connotations, royal blue nails have become a symbol of sophistication and elegance, adding a touch of class and refinement to any look.
The Evolution of Royal Blue Nails in Fashion and Beauty
While royal blue has long been a favorite among the aristocracy, it wasn’t until the late 20th century that this stunning shade made its way onto the nails of fashion-forward individuals. Today, royal blue nails have become a staple in the beauty and fashion world, gracing the runways, red carpets, and the fingertips of trendsetters worldwide.
Conclusion
Royal blue nails are a timeless and captivating trend that transcends seasons and styles. From classic and minimalist designs to bold and intricate patterns, this regal hue offers endless possibilities for self-expression and creativity. By mastering the art of the royal blue mani and incorporating this stunning shade into your wardrobe, you’ll not only exude confidence and sophistication but also pay homage to the rich history and symbolism behind this iconic color. So, why not embrace the allure of royal blue nails and let your inner royalty shine through?
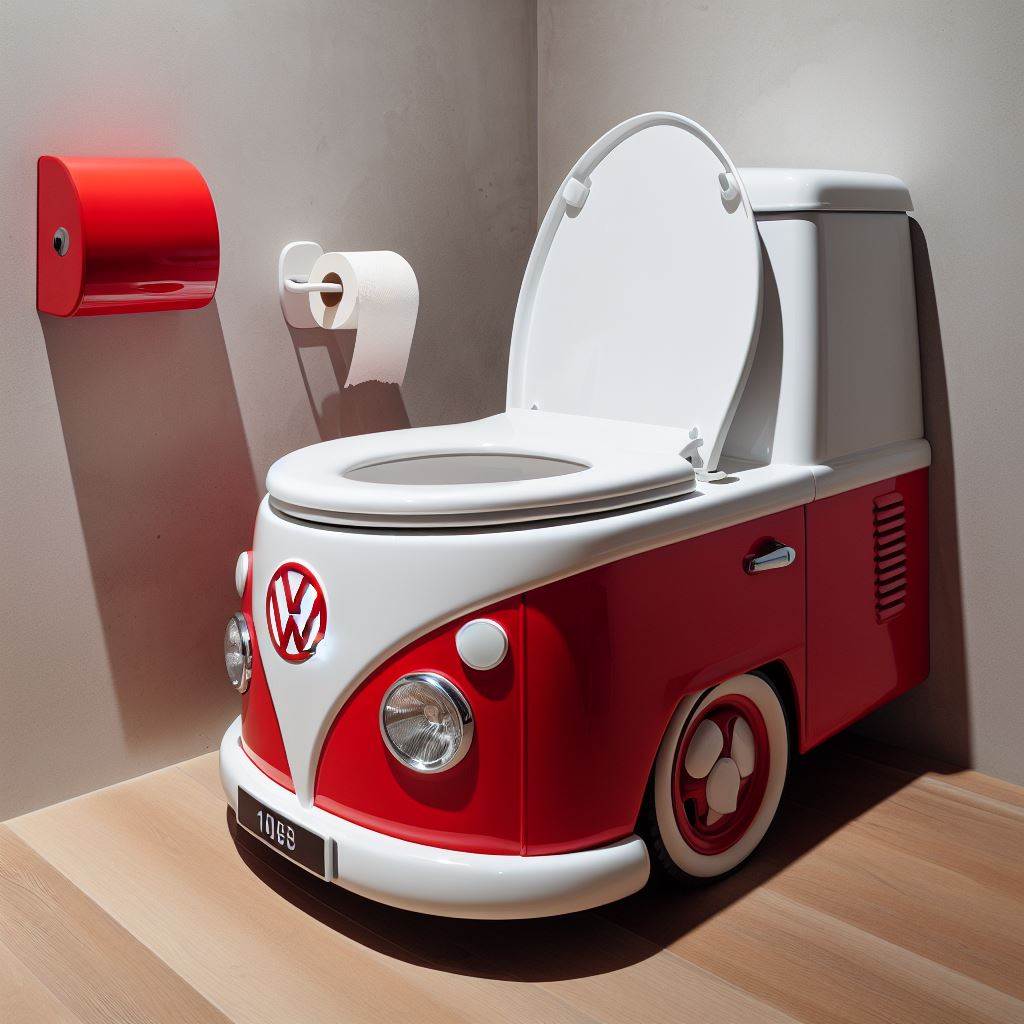
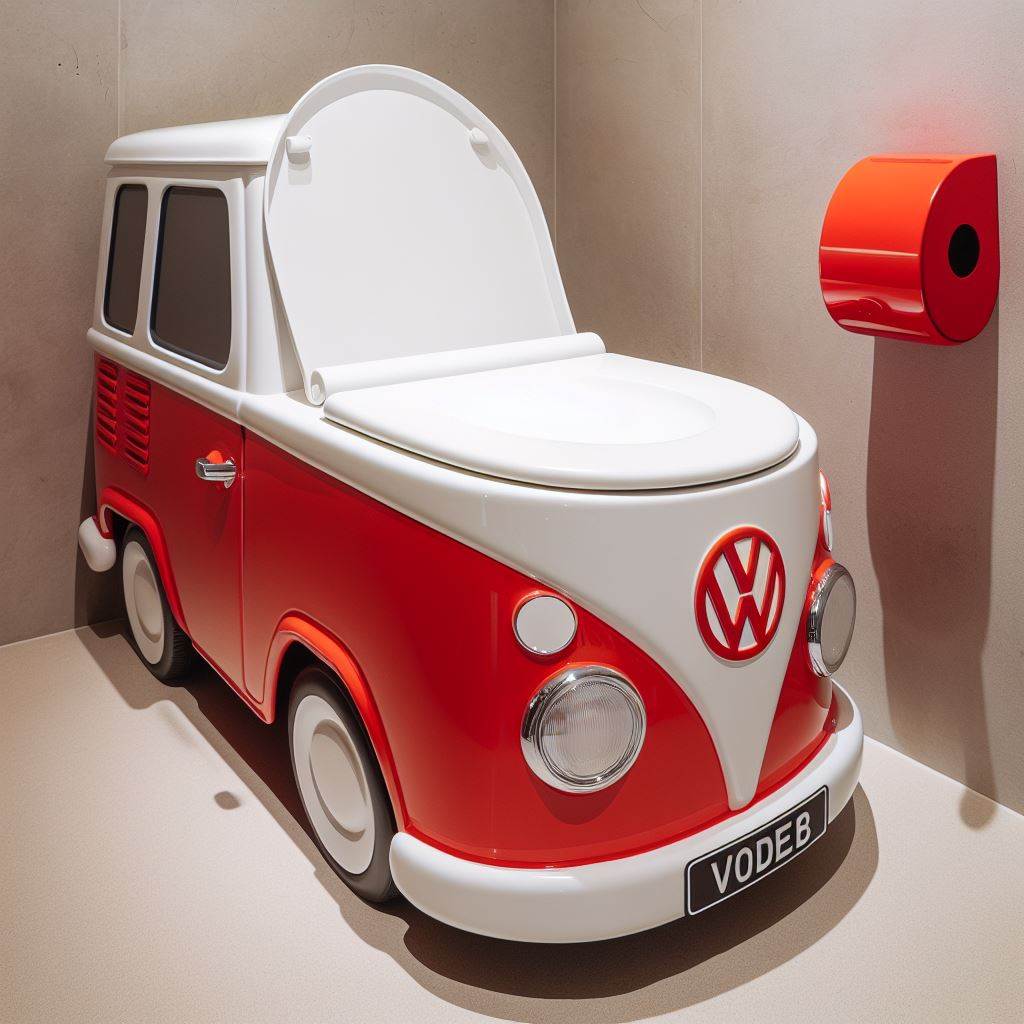
VW-Inspired Throne A Toilet Designed for Car Enthusiasts
In a world where automotive enthusiasts seek to infuse their passions into every aspect of life, a remarkable fusion of engineering and design has emerged: the VW-inspired toilet. This ingenious creation pays homage to the iconic German automaker, blending the sleek lines and timeless appeal of Volkswagen’s legendary vehicles with the functional necessity of a bathroom fixture. Prepare to embark on a journey where the realms of cars and commodes collide, creating a toilet that is sure to leave you both amused and impressed.
Engineered for Comfort: Exploring the Design Features of the Volkswagen Toilet
Contoured Seating: A Nod to Automotive Ergonomics
Inspired by the meticulously crafted seats found in Volkswagen’s renowned automobiles, the Volkswagen toilet boasts a contoured seating design that promises unparalleled comfort. Imagine sinking into a plush, form-fitting throne that cradles your body in a way that would make even the most discerning driver swoon.
Feature
Description
Ergonomic Shaping
The seat’s contours mimic the shape of a well-designed automotive seat, providing support and alleviating pressure points.
Lumbar Support
A subtle curve in the backrest offers exceptional lumbar support, ensuring your back remains comfortably aligned.
Heated Seating
Much like the luxurious heated seats found in high-end Volkswagen models, this toilet offers a toasty embrace during those chilly morning routines.
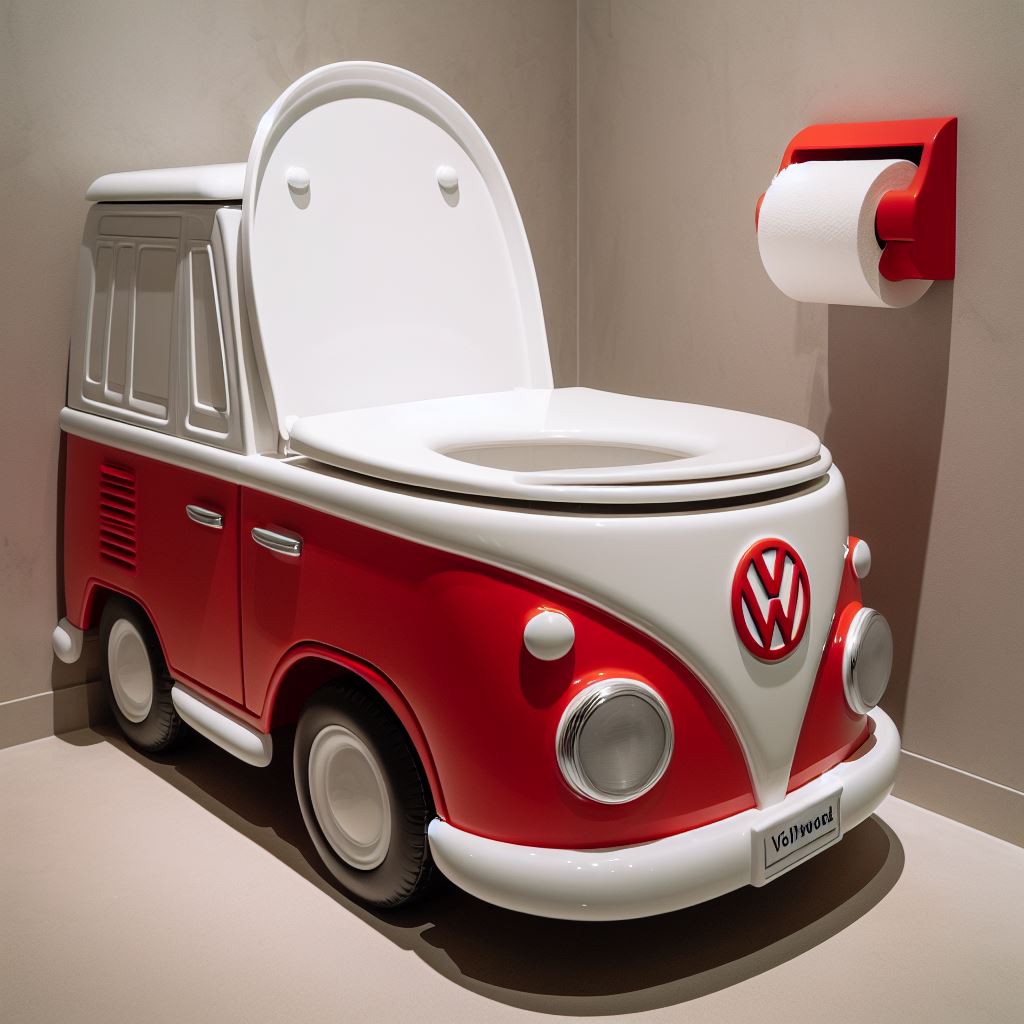
Streamlined Aesthetics: A Nod to Automotive Design
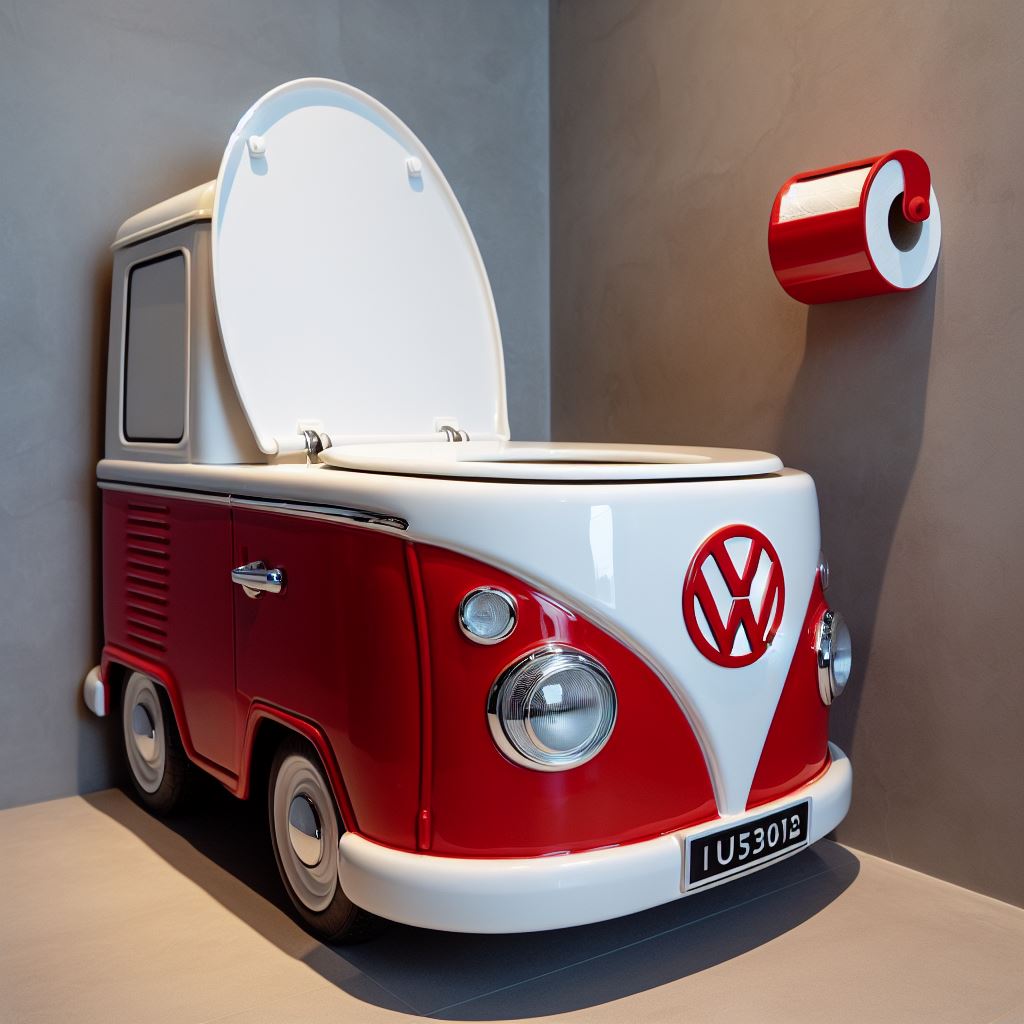
The Volkswagen toilet’s sleek and streamlined aesthetic draws inspiration from the iconic design language of Volkswagen’s most celebrated vehicles. From the smooth, flowing lines to the minimalist yet sophisticated details, this toilet is a true masterpiece of form and function.
Sculpted Lines: The toilet’s curves and contours evoke the aerodynamic lines of a Volkswagen sports car, creating a sense of motion even in the most stationary of settings.
Color Palette: Available in a range of classic Volkswagen hues, from the iconic “Tornado Red” to the timeless “Platinum Grey,” this toilet allows you to showcase your brand allegiance.
Attention to Detail: Every element, from the flushing mechanism to the toilet paper holder, has been meticulously designed to reflect the automaker’s commitment to quality and craftsmanship.
Innovative Features: A Nod to Automotive Technology
Just as Volkswagen vehicles are renowned for their cutting-edge features, the Volkswagen toilet incorporates innovative elements that elevate the bathroom experience to new heights.
Automatic Flush: Inspired by the seamless technology found in modern Volkswagen models, this toilet features an automatic flushing system that detects when you’re done and initiates a powerful yet water-efficient flush.
Adjustable Seat Height: Channeling the adjustable seating found in many Volkswagen vehicles, this toilet allows you to customize the seat height to your preference, ensuring optimal comfort and accessibility.
Integrated Air Freshener: Drawing from the advanced climate control systems in Volkswagen’s premium models, this toilet includes an integrated air freshener that releases a subtle, refreshing scent after each flush.
From Beetle to Bidet: A Quirky Fusion of Automotive and Bathroom Design
The Beetle Bidet: A Whimsical Spin on Personal Hygiene
For those seeking an even more immersive Volkswagen bathroom experience, the Beetle Bidet is a must-have addition. Modeled after the iconic Volkswagen Beetle, this bidet captures the essence of the beloved automobile with its distinctive shape and playful spirit.
Feature
Description
Distinctive Shape
The bidet’s body is sculpted to mimic the unmistakable silhouette of the Volkswagen Beetle, complete with the rounded fenders and sloping roofline.
Retro Styling
With a palette of vibrant colors and retro design accents, the Beetle Bidet pays homage to the beloved classic while adding a touch of whimsy to your bathroom routine.
Adjustable Nozzles
Just as the Beetle’s headlights could be adjusted for optimal illumination, the bidet’s nozzles offer customizable positioning and water pressure settings for a truly personalized cleansing experience.
The Golf Cart Toilet: A Hole-in-One for Compact Living
Inspired by Volkswagen’s iconic Golf hatchback, the Golf Cart Toilet is a space-saving solution that combines functionality with a quirky automotive twist. Perfect for compact bathrooms or even outdoor spaces, this toilet brings a touch of fun and ingenuity to your relieving routine.
Compact Design: With its diminutive size and sleek lines, the Golf Cart Toilet is a master of space-saving efficiency, fitting seamlessly into even the tightest of quarters.
Portable Convenience: Equipped with sturdy wheels and a compact water tank, this toilet can be easily moved and relocated, making it ideal for camping trips, tailgating parties, or anywhere a mobile commode is required.
Automotive Accents: From the golf ball-inspired flush handle to the distinctive Volkswagen emblem adorning the lid, this toilet is a playful nod to the automaker’s iconic hatchback.
A Seat Fit for a King.. or a Beetle Driver: The Volkswagen Toilet’s Unique Appeal
A Collectible for the Die-Hard Volkswagen Enthusiast
For the true Volkswagen aficionado, the Volkswagen toilet represents more than just a functional bathroom fixture; it’s a coveted collectible that celebrates their unwavering passion for the brand. From limited editions featuring intricate details inspired by legendary Volkswagen models to custom-designed pieces crafted by renowned automotive artists, these toilets are sure to become the centerpieces of any Volkswagen-themed collection.
Limited Edition Releases: Exclusive runs of Volkswagen toilets may feature unique colorways, special edition emblems, or intricate engravings that pay homage to iconic Volkswagen models or milestones.
Customization Options: For those seeking a truly one-of-a-kind toilet, specialized workshops offer bespoke customization services, allowing enthusiasts to create a personalized masterpiece that reflects their unique Volkswagen obsession.
Autographed Models: Imagine owning a toilet autographed by legendary Volkswagen designers, engineers, or even racing drivers – a true grail for any die-hard collector.
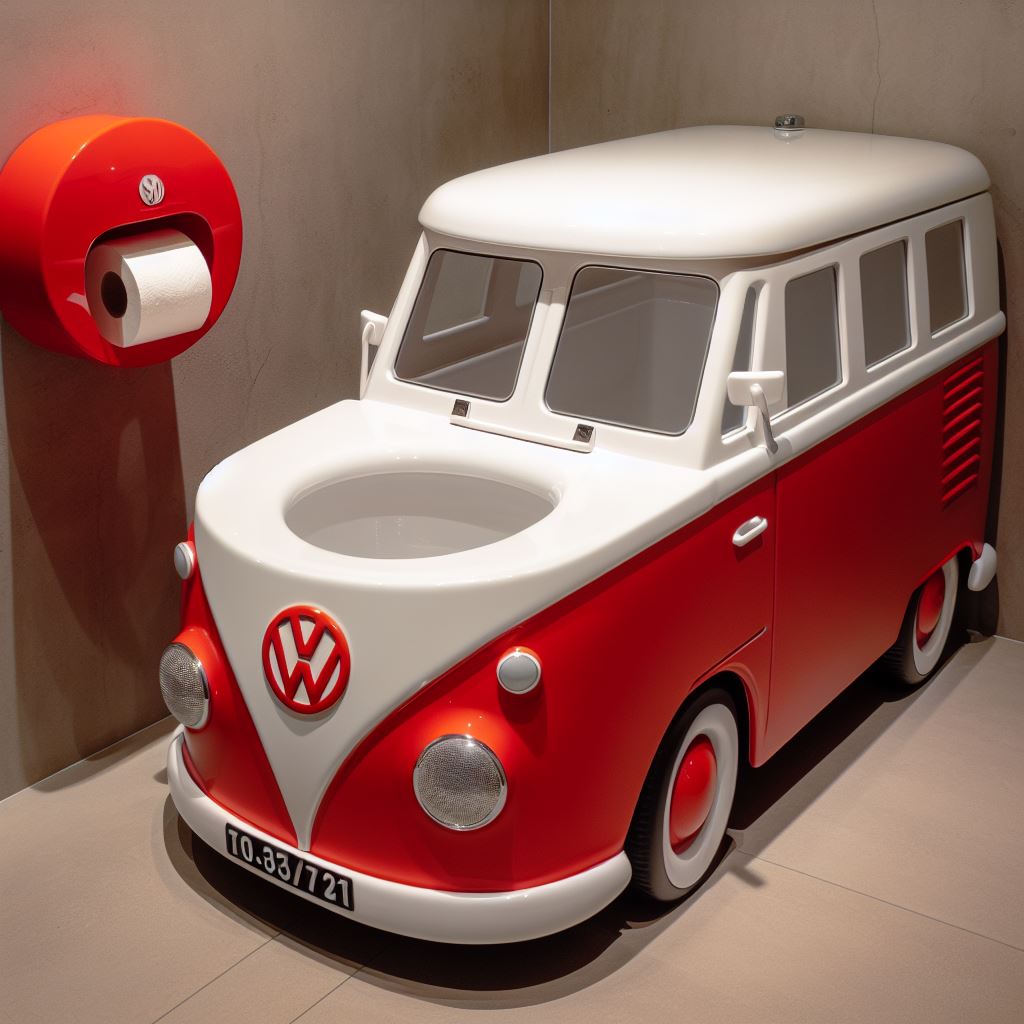
A Conversation Starter for the Unconventional Homeowner
Beyond its appeal to Volkswagen devotees, the Volkswagen toilet serves as a conversation starter for those who appreciate unique and unconventional home decor. Imagine the looks of surprise and delight on your guests’ faces as they step into your bathroom and encounter this automotive-inspired marvel.
Talking Point: With its whimsical design and automotive inspiration, the Volkswagen toilet is sure to spark lively discussions and become the subject of fascination for visitors.
Personality Statement: Owning a Volkswagen toilet is a bold declaration of your individuality and appreciation for quirky, boundary-pushing design.
Memorable Experiences: From hosting unforgettable bathroom-themed parties to creating Instagram-worthy photo ops, a Volkswagen toilet guarantees that your home will be the talk of the town.
Beyond the Flush: How This Toilet Celebrates Volkswagen’s Heritage
Echoing Volkswagen’s Commitment to Innovation
Just as Volkswagen has been at the forefront of automotive innovation, the Volkswagen toilet pays homage to this spirit of ingenuity through its cutting-edge design and features. From water-saving technologies to eco-friendly materials, this toilet embodies the automaker’s commitment to sustainability and forward-thinking engineering.
Water-Efficient Flushing: Employing advanced water-saving mechanisms, the Volkswagen toilet helps reduce water consumption without compromising performance, aligning with the brand’s efforts toward environmental responsibility.
Sustainable Materials: Crafted from recycled or renewable materials, the toilet’s construction reflects Volkswagen’s ongoing pursuit of sustainable manufacturing practices.
Smart Connectivity: Imagine a toilet that integrates seamlessly with your smart home ecosystem, allowing you to control settings, monitor water usage, and even schedule maintenance – a truly futuristic approach to bathroom fixtures.
Celebrating Volkswagen’s Global Appeal
Volkswagen’s iconic vehicles have captured the hearts of enthusiasts worldwide, and the Volkswagen toilet serves as a testament to the brand’s global appeal. With regionalized designs and cultural references, this toilet transcends borders and celebrates the diverse communities that have embraced the Volkswagen legacy.
Cultural Adaptations: From toilets adorned with traditional patterns and motifs to designs that incorporate regional architectural elements, the Volkswagen toilet offers a localized touch that resonates with Volkswagen fans across the globe.
International Collaborations: Partnering with local artists, designers, and craftsmen, Volkswagen creates limited edition toilets that showcase unique cultural influences and artistic interpretations, fostering a sense of global unity among enthusiasts.
Collector’s Editions: Exclusive releases inspired by specific countries or regions pay homage to the rich automotive heritage and passionate fan base that Volkswagen has cultivated worldwide, making these toilets highly sought-after collector’s items.
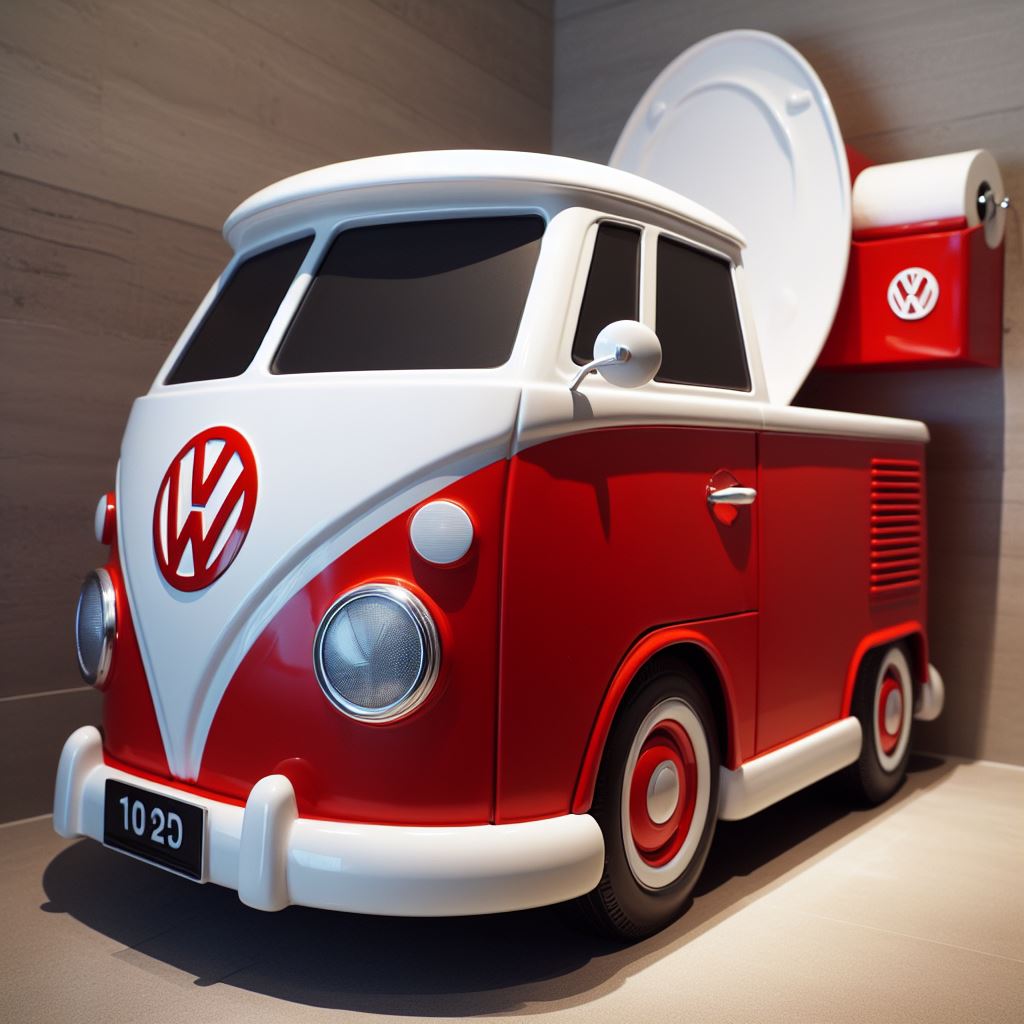
Preserving Volkswagen’s Legacy of Design Excellence
As a brand renowned for its iconic design language and aesthetic appeal, Volkswagen has left an indelible mark on the automotive industry. The Volkswagen toilet continues this tradition of design excellence, translating the brand’s signature style elements and visual cues into a functional and visually striking bathroom fixture.
Iconic Branding: From the unmistakable Volkswagen logo emblazoned on the toilet tank to the sleek curves and clean lines reminiscent of classic Volkswagen vehicles, every detail of this toilet reflects the brand’s design DNA.
Timeless Elegance: Just as Volkswagen cars exude a timeless elegance that transcends fleeting trends, the Volkswagen toilet boasts a sophisticated and enduring design that will remain stylish for years to come.
Seamless Integration: Whether placed in a contemporary urban apartment or a vintage-inspired home, the Volkswagen toilet seamlessly blends with a variety of interior styles, adding a touch of automotive flair to any bathroom space.
Get Your Gears Grinding: Is a Volkswagen Toilet the Ultimate Bathroom Statement?
Elevating Your Bathroom Experience with Automotive Flair
In a world where personalization and self-expression reign supreme, the Volkswagen toilet offers a unique opportunity to infuse your bathroom with personality and style. By incorporating elements of automotive design and engineering into a traditionally mundane fixture, this toilet transforms the bathroom into a space that reflects your passions and interests.
Personalized Touch: Whether you opt for a sleek and modern Volkswagen toilet or a whimsical Beetle-inspired bidet, each piece allows you to express your individuality and create a bathroom environment that is uniquely yours.
Conversation Piece: Beyond its practical function, the Volkswagen toilet serves as a conversation starter and focal point in your bathroom, inviting admiration and curiosity from guests.
Lifestyle Statement: Owning a Volkswagen toilet is more than just a design choice – it’s a lifestyle statement that showcases your love for innovation, creativity, and distinctive aesthetics.
Redefining Luxury with Volkswagen’s Signature Style
For those who appreciate the finer things in life, the Volkswagen toilet represents the pinnacle of luxury and sophistication in bathroom design. With its premium materials, meticulous craftsmanship, and attention to detail, this toilet elevates the bathroom experience to a new level of refinement and elegance.
High-Quality Construction: Crafted from top-of-the-line materials such as porcelain, chrome, and stainless steel, the Volkswagen toilet exudes quality and durability, ensuring long-lasting performance and beauty.
Designer Accents: From elegant finishes and luxurious textures to designer touches inspired by Volkswagen’s most prestigious models, this toilet embodies the essence of upscale automotive luxury.
Spa-Like Comfort: With ergonomic seating, customizable features, and advanced functionalities, the Volkswagen toilet offers a spa-like experience in the comfort of your own home, transforming daily routines into moments of indulgence.
Embracing Innovation and Technology in the Bathroom
Just as Volkswagen has pushed the boundaries of automotive technology with groundbreaking innovations, the Volkswagen toilet integrates cutting-edge features and smart functionalities to revolutionize the bathroom experience. From intuitive controls to eco-friendly solutions, this toilet represents the future of intelligent bathroom design.
Smart Home Connectivity: Imagine controlling your toilet’s settings with a simple voice command or monitoring water usage and efficiency through a dedicated app – the Volkswagen toilet brings the convenience of smart home technology to your bathroom.
Energy-Efficient Solutions: Equipped with energy-saving modes, motion sensors, and automated functions, the Volkswagen toilet optimizes resource usage and reduces environmental impact, aligning with the brand’s commitment to sustainability.
Advanced Hygiene Features: In addition to standard flushing mechanisms, the Volkswagen toilet may include innovative hygiene technologies such as UV sterilization, self-cleaning surfaces, or even integrated bidet functions for enhanced cleanliness and comfort.
Conclusion
In conclusion, the Volkswagen-inspired throne represents a harmonious fusion of automotive ingenuity and bathroom design innovation. From the quirky charm of the Beetle Bidet to the luxurious sophistication of the Golf Cart Toilet, each Volkswagen toilet model offers a unique blend of style, functionality, and personality for discerning enthusiasts and design aficionados alike.
By celebrating Volkswagen’s heritage, embracing cutting-edge technology, and redefining luxury in the bathroom space, these toilets go beyond mere fixtures – they become statements of individuality, expressions of creativity, and symbols of a lifestyle centered around innovation and design excellence.
Whether you’re a die-hard Volkswagen fan looking to elevate your home decor or a design enthusiast seeking a one-of-a-kind statement piece, the Volkswagen toilet promises to transform your bathroom into a space that reflects your passion for automotive artistry and forward-thinking design. So why settle for a standard toilet when you can have a Volkswagen-inspired masterpiece that truly revs up your bathroom experience?
Toenails are often overlooked but play a crucial role in our overall foot health. From protecting our toes to aiding in balance and grip, healthy toenails are essential. However, various conditions can affect our toenails, causing discomfort, pain, and even impaired mobility. In this comprehensive blog post, we will explore common toenail problems, their causes, symptoms, and effective treatments.
Ingrown Toenails: Causes, Symptoms, and Home Remedies
What is an Ingrown Toenail?
An ingrown toenail is a condition where the edge or corner of the toenail grows into the surrounding skin, causing inflammation, pain, and sometimes infection. This condition is particularly common in the big toes.
Causes of Ingrown Toenails
Improper toenail trimming: Cutting toenails too short or cutting the corners can lead to ingrown nails.
Tight shoes or socks: Footwear that puts excessive pressure on the toes can cause the nail to grow inward.
Injury: Trauma to the toenail, such as stubbing or jamming, can cause the nail to grow improperly.
Poor foot hygiene: Not keeping the feet clean and dry can increase the risk of ingrown toenails.
Genetics: Some people are more prone to ingrown toenails due to their nail shape or thickness.
Symptoms of Ingrown Toenails
Pain and tenderness along the edge of the toenail
Redness and swelling around the affected area
Discharge of pus or fluid (if infected)
Difficulty walking or wearing shoes
Home Remedies for Ingrown Toenails
Soak and Elevate
Soak the affected foot in warm water with Epsom salts or antibacterial soap for 15-20 minutes daily.
Elevate the foot to reduce swelling and discomfort.
Proper Nail Trimming
Trim the toenail straight across, avoiding cutting the corners too short.
Use a nail file to gently file down any sharp edges.
Dental Floss or Cotton Technique
Carefully insert a small piece of dental floss or cotton under the ingrown nail edge to lift it away from the skin.
Replace the floss or cotton daily until the nail grows out.
Over-the-Counter Medications
Use over-the-counter pain relievers or anti-inflammatory medications to reduce pain and swelling.
Apply antibiotic ointments to prevent infection.
If home remedies fail to provide relief or if the ingrown toenail becomes severely infected, it is essential to seek professional medical attention from a podiatrist or a qualified healthcare provider.
Fungal Toenail Infections: Diagnosis, Treatment, and Prevention
What is a Fungal Toenail Infection?
A fungal toenail infection, also known as onychomycosis, is a common condition caused by a group of fungi called dermatophytes. These fungi thrive in warm, moist environments and can invade the toenail, causing discoloration, thickening, and crumbly or brittle nails.
Causes of Fungal Toenail Infections
Excessive moisture: Fungi thrive in warm, damp environments, such as sweaty shoes or damp socks.
Weakened immune system: People with weakened immune systems are more susceptible to fungal infections.
Diabetes: Individuals with diabetes have a higher risk of developing fungal toenail infections.
Nail injuries: Cracks or breaks in the toenail can provide an entry point for fungi.
Aging: As we age, our nails become thicker and more susceptible to fungal infections.
Symptoms of Fungal Toenail Infections
Discoloration of the toenail (yellow, brown, or white streaks)
Thickening and crumbling of the toenail
Distorted or misshapen toenail
Foul odor from the affected toenail
Diagnosis and Treatment
Diagnosis
Physical examination: A healthcare provider will inspect the affected toenail for signs of fungal infection.
Nail clippings or scrapings: A sample may be taken and sent to a laboratory for analysis to confirm the presence of fungi.
Treatment Options
Oral antifungal medications: Prescription oral antifungal drugs, such as terbinafine or itraconazole, are effective in treating fungal toenail infections but may have potential side effects.
Topical antifungal treatments: Over-the-counter or prescription topical antifungal solutions, lacquers, or creams can be applied directly to the affected toenail.
Laser treatment: Some healthcare providers use laser therapy to target and destroy the fungus within the toenail.
Surgical removal: In severe cases, the toenail may need to be partially or completely removed to allow for proper treatment and regrowth of a healthy nail.
Prevention of Fungal Toenail Infections
Keep feet clean and dry: Wash and thoroughly dry your feet, especially between the toes.
Wear breathable socks and shoes: Choose moisture-wicking materials to reduce moisture buildup.
Disinfect shoes and socks: Regularly clean and disinfect shoes and socks to prevent fungal growth.
Avoid sharing personal items: Do not share socks, towels, or nail clippers with others to prevent the spread of fungi.
Trim toenails properly: Cut toenails straight across and avoid excessive trimming to prevent injury and potential fungal entry points.
Toenail Fungus: Natural Remedies and Home Treatments
While medical treatments are often necessary for severe cases of toenail fungus, some natural remedies and home treatments may help manage mild to moderate infections or complement traditional therapies.
Tea Tree Oil
Tea tree oil has antifungal and antiseptic properties that can help fight toenail fungus. Here’s how you can use it:
Mix a few drops of tea tree oil with a carrier oil (e.g., coconut oil or olive oil).
Apply the mixture directly to the affected toenail using a cotton ball.
Repeat this process once or twice daily.
Baking Soda
Baking soda has antifungal and antibacterial properties that can help control toenail fungus.
Mix baking soda with water to form a paste.
Apply the paste to the affected toenail and let it sit for 10-15 minutes.
Rinse off with water and dry the foot thoroughly.
Repeat this process once or twice daily.
Apple Cider Vinegar
Apple cider vinegar is known for its antifungal and antiseptic properties.
Mix equal parts of apple cider vinegar and warm water.
Soak the affected foot in the solution for 30 minutes.
Rinse and dry the foot thoroughly.
Repeat this process once or twice daily.
Oregano Oil
Oregano oil contains compounds with antifungal properties that can help fight toenail fungus.
Dilute oregano oil with a carrier oil (e.g., coconut oil or olive oil).
Apply the mixture directly to the affected toenail using a cotton ball.
Repeat this process once or twice daily.
Garlic
Garlic contains allicin, a compound with antifungal properties that can help combat toenail fungus.
Crush a clove of garlic and apply the paste to the affected toenail.
Cover with a bandage or sock and leave it on overnight.
Rinse and dry the foot in the morning.
Repeat this process daily.
It’s important to note that while these natural remedies may help manage mild to moderate toenail fungus, severe or persistent cases may require medical treatment. Always consult a healthcare professional for proper diagnosis and treatment recommendations.
Toenail Trauma: Causes, Symptoms, and When to Seek Help
Causes of Toenail Trauma
Toenail trauma can occur due to various reasons, including:
Dropping heavy objects on the toes
Stubbing the toes against hard surfaces
Sports injuries or accidents involving the feet
Repetitive trauma from tight shoes or activities like running
Symptoms of Toenail Trauma
The symptoms of toenail trauma can range from mild to severe, depending on the extent of the injury. Common symptoms include:
Pain and tenderness in the affected toe
Swelling and bruising around the toenail
Bleeding under the toenail (subungual hematoma)
Detachment or separation of the toenail from the nail bed
When to Seek Help
While mild cases of toenail trauma may resolve on their own with home care, it is important to seek medical attention if you experience:
Severe pain or difficulty bearing weight on the affected toe
Excessive swelling, redness, or warmth around the toenail
Signs of infection, such as pus or discharge
Persistent bleeding or a visible deformity of the toenail
A healthcare provider can assess the extent of the injury and provide appropriate treatment, which may include draining a subungual hematoma, prescribing antibiotics for an infected toe, or providing guidance on proper nail care to prevent complications.
Home Care for Toenail Trauma
If you’ve experienced minor toenail trauma, you can try the following home care tips to promote healing:
Soak the affected foot in warm water to help reduce pain and swelling.
Keep the toenail clean and dry to prevent infection.
Trim any loose or detached parts of the toenail to prevent snagging and further injury.
Apply a sterile bandage or dressing to protect the toe and keep it clean.
Avoid wearing tight or constricting footwear that can put pressure on the injured toenail.
By practicing proper home care and seeking medical attention when necessary, you can ensure optimal healing and prevent complications associated with toenail trauma.
Healthy Toenails: Tips for Prevention and Care
Proper Hygiene Practices
Maintaining good foot hygiene is essential for healthy toenails. Here are some tips to follow:
Wash your feet daily with soap and water, ensuring to dry them thoroughly, especially between the toes.
Trim toenails straight across to prevent ingrown nails, and file any sharp edges.
Wear clean, moisture-wicking socks and well-fitted shoes to prevent fungal growth.
Rotate your shoe collection to allow each pair to air out between wears.
Balanced Diet and Hydration
A balanced diet rich in vitamins and minerals is crucial for overall nail health. Ensure adequate intake of the following nutrients:
Biotin: Found in eggs, nuts, and whole grains, biotin promotes healthy nail growth.
Iron: Include iron-rich foods like lean meats, spinach, and legumes to prevent brittle nails.
Hydration: Drink plenty of water to keep your nails hydrated and prevent dryness and brittleness.
Protective Measures
Toenails can be prone to injuries, so consider the following protective measures:
Wear protective footwear during activities that pose a risk of trauma, such as construction work or sports.
Use caution when trimming toenails to avoid cutting too short or at an angle that can lead to ingrown nails.
Apply a moisturizing cream or lotion to keep toenails and surrounding skin hydrated.
Regular Check-ups
Include your toenail health in regular foot exams or wellness visits with a healthcare provider. They can identify early signs of infections, abnormalities, or conditions that may affect your toenails and provide appropriate interventions.
Professional Care
Visit a podiatrist or foot specialist for persistent toenail issues, such as recurring infections, ingrown toenails, or changes in nail color or texture. They can offer specialized treatments and recommendations tailored to your specific needs.
Incorporating these tips into your daily routine can help maintain healthy toenails and prevent common issues that may arise. Prioritizing proper foot care and seeking professional guidance when needed can support overall nail health and quality of life.
Conclusion
Taking care of your toenails is an essential part of overall foot health. From common conditions like ingrown toenails and fungal infections to traumatic injuries, understanding the causes, symptoms, and treatment options can help you better manage and prevent these issues.
By following proper hygiene practices, incorporating preventive measures, and seeking timely medical attention, you can promote healthy toenails and minimize the risk of complications. Whether utilizing natural remedies, home treatments, or professional care, prioritize the well-being of your toenails to support your comfort and mobility.
Remember, if you have concerns about your toenail health or experience persistent symptoms, consult a healthcare provider for accurate diagnosis and personalized treatment recommendations. Your feet carry you through life; give them the care and attention they deserve.