

Get ready to elevate your nail game with the latest trend: tie-dye nails! Say goodbye to boring single-color manicures and hello to vibrant, eye-catching designs that are sure to turn heads. Whether you prefer subtle pastel swirls or bold psychedelic patterns, tie-dye nails offer a fun and unique way to express your style. Embrace the contrast of soft hues blending seamlessly or opt for a striking mix of bright colors for a statement look that pops. Transform your nails into mini works of art with this playful and trendy nail design.
Exploring Tie-Dye Nails
History
Tie-dye nails have a fascinating history, originating in the 1960s during the hippie movement. Bright and vibrant colors were used to create unique and psychedelic patterns on nails.
Techniques
Various techniques are used to achieve tie-dye nail designs. One popular method involves using a sponge to dab different colors onto the nails, creating a marbled effect. Another technique includes swirling colors together with a toothpick for a more intricate design.
Popularity
Tie-dye nails have surged in popularity in recent years, especially on social media platforms like Instagram. Beauty enthusiasts are experimenting with different color combinations and patterns, showcasing their creative nail art online.
DIY Tie-Dye Swirls Tutorial
Essential Tools

To create tie-dye swirls on your nails, you’ll need a few essential tools. Grab a base coat to protect your nails, followed by your chosen nail polish colors. Have some nail art brushes, a small sponge, and nail polish remover for clean-up.
Step-by-Step Guide
- Prepare your nails: Start with a clear base coat to protect your nails.
- Apply the base colors: Choose two or three nail polish colors for the tie-dye effect.
- Create the swirl design: Use a small sponge to dab each color onto your nails in a circular motion.
- Blend the colors: With a nail art brush, gently blend the colors together to create the tie-dye swirl effect.
- Add finishing touches: Clean up any excess polish around your nails using nail polish remover and seal in your design with a top coat.
Tips for Perfect Swirls

- Keep the layers thin to prevent clumping and ensure quicker drying time.
- Experiment with different color combinations for unique tie-dye patterns.
- Practice on a nail wheel or paper before trying it on your nails for precision.
Tips for Perfect Tie-Dye Nails
Maintaining Tie-Dye Nails

To maintain tie-dye nails and ensure a vibrant, long-lasting look, apply a clear top coat every few days. This protective layer helps seal in the colors and prevents chipping. avoid harsh chemicals such as acetone-based nail polish removers, as they can fade the tie-dye effect.
For an extra pop of color and longevity, consider using UV gel polishes for your tie-dye designs. These polishes are known for their durability and resistance to fading, making them ideal for maintaining the vibrancy of your nail art.
Fixing Common Mistakes
If you encounter smudges or uneven patterns while creating tie-dye nails, don’t worry! Simply dip a small brush in nail polish remover and gently clean up any mistakes. For smudges, lightly dab a cotton swab in remover and carefully blend out the imperfections.
Top Coats and Nail Care Products

When it comes to top coats, opt for quick-drying formulas to prevent smudging and ensure a glossy finish. Look for products labeled as “fast dry” or “quick dry” for best results. Invest in a good quality cuticle oil to keep your nails hydrated and prevent chipping around the edges.
Remember, proper nail care is essential for maintaining your tie-dye nails’ beauty. Moisturize your hands regularly and avoid exposing your nails to harsh chemicals or excessive water to prolong the life of your colorful nail art.
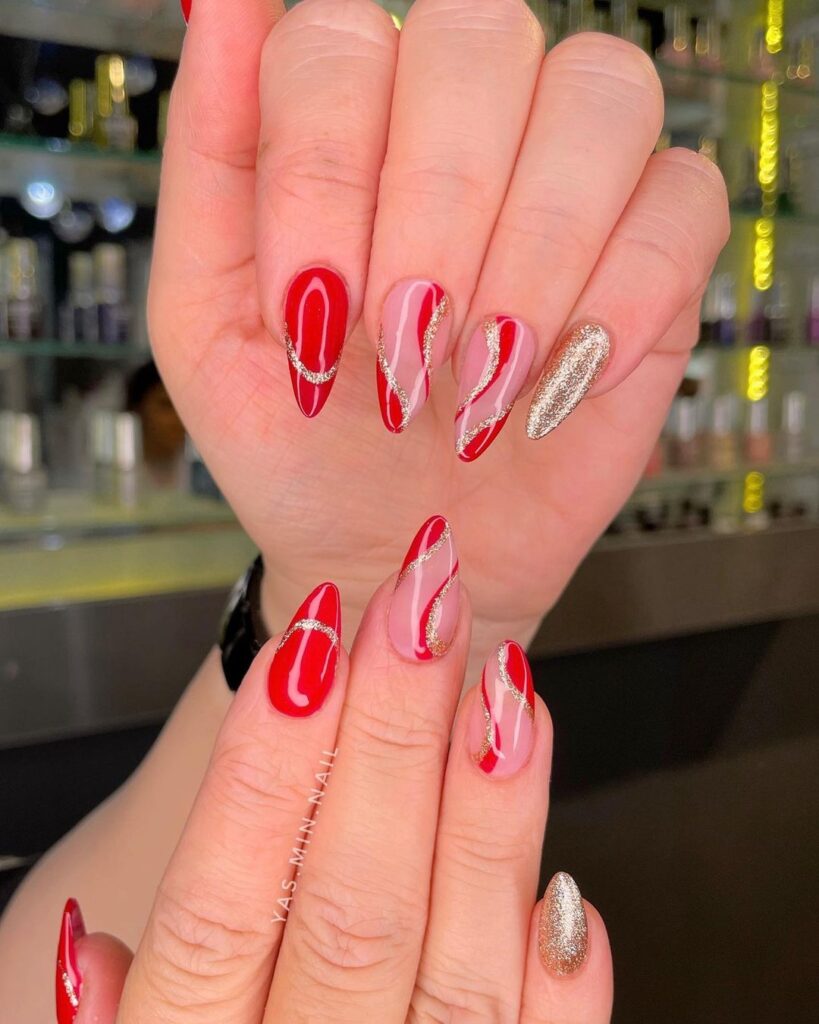
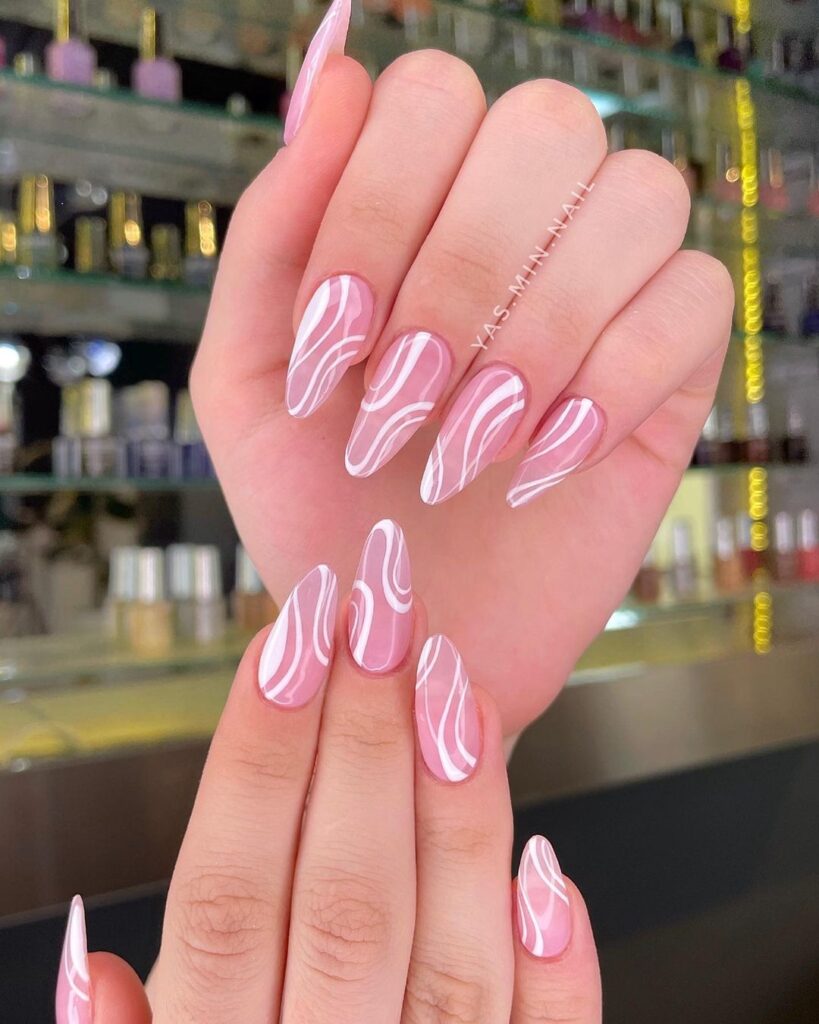
Summer Tie-Dye Nail Ideas
Vibrant Designs
Experiment with bold and bright colors like neon pink, electric blue, and sunny yellow to create eye-catching tie-dye nail art. Combine these hues in swirling patterns for a fun and playful summer look.
Opt for a watercolor effect by blending pastel shades like mint green, baby blue, and soft lavender. Use a thin brush to create delicate swirls and splatters for a dreamy tie-dye design.
Trendy Combinations
Pair your tie-dye nails with other popular summer nail trends for a stylish finish. Try incorporating floral accents or palm tree motifs to enhance the tropical vibe of your manicure.
Consider adding glitter or metallic accents to your tie-dye nails for a touch of glamour. Experiment with ombre gradients or negative space designs to elevate your summer nail art game.
Closing Thoughts
You’ve learned how to rock tie-dye nails like a pro! From creating mesmerizing swirls to mastering the art of summer-inspired designs, your nails are now ready to steal the show. Keep experimenting with colors and techniques to express your unique style and stand out from the crowd. Don’t forget to share your vibrant nail creations with friends and spread the tie-dye love!
Now, grab your nail polish and get creative – it’s time to show off your trendy tie-dye nails! Let your imagination run wild, and remember, the brighter, the better. Embrace this fun and funky nail trend, and let your personality shine through your colorful fingertips. Get ready to turn heads with your fabulous tie-dye nail art!


