Inspirational Design

Home Blog Page 9

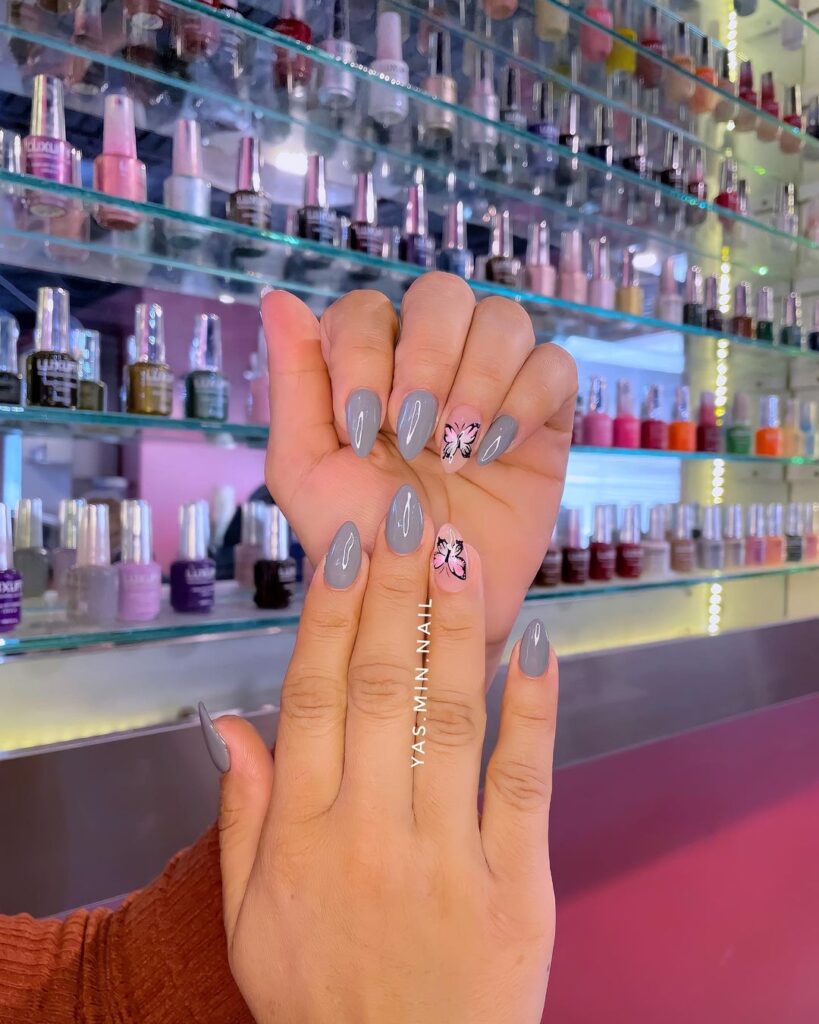
Pastel Shades: Soft, muted colors perfect for a subtle and elegant look.

0

Step into a world where nails become canvases for artistry with a timeless twist. Pastel shades nails bring a touch of soft elegance and sophistication to your fingertips, creating a look that is both chic and versatile. Embracing these delicate hues allows you to express your style in a subtle yet impactful way, perfect for any occasion. Dive into the history of pastel shades, tracing back to their origins as symbols of femininity and grace. Discover how these muted tones have stood the test of time, remaining a beloved choice for those seeking a classic yet modern aesthetic.

Spring Pastel Nails Overview

Popularity

Pastel shades continue to reign supreme in spring nail trends, captivating individuals with their soft and delicate hues. The subtle yet elegant colors of pastel nails have become a staple choice for many during the spring season.

Embraced by fashionistas and beauty enthusiasts alike, pastel nails offer a refreshing twist to traditional manicures. The gentle tones exude a sense of sophistication while adding a touch of femininity to one’s overall look.

Versatility

Pastel nails effortlessly transition from casual outings to formal events, making them a versatile option for various occasions. Whether it’s a day at the office, a weekend brunch, or even a wedding celebration, pastel shades complement any ensemble with grace.

The understated charm of pastel colors allows individuals to express their style in a subtle yet impactful manner. From soft pinks to muted blues, there is a pastel shade suitable for every mood and outfit.

Mood Upliftment

During the rejuvenating season of spring, pastel colors play a vital role in uplifting moods and evoking feelings of joy and optimism. The light and airy tones symbolize new beginnings, freshness, and blooming flowers, resonating perfectly with the spirit of springtime.

Adorning one’s nails with pastel hues not only enhances their aesthetic appeal but also serves as a mood booster. The calming effect of pastels creates a sense of tranquility and serenity, fostering positivity and happiness amidst the vibrant energy of spring.

Pastel Nail Design Inspirations

Trendy Designs

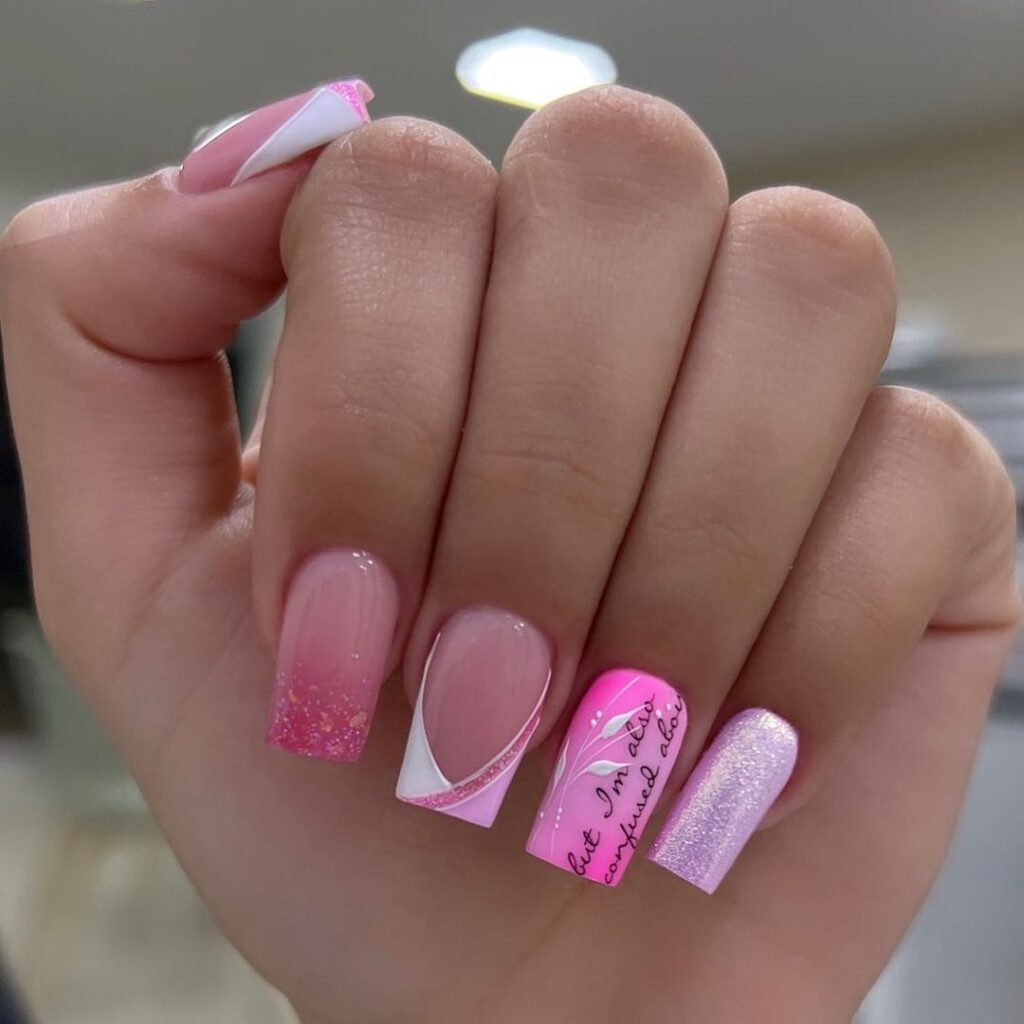
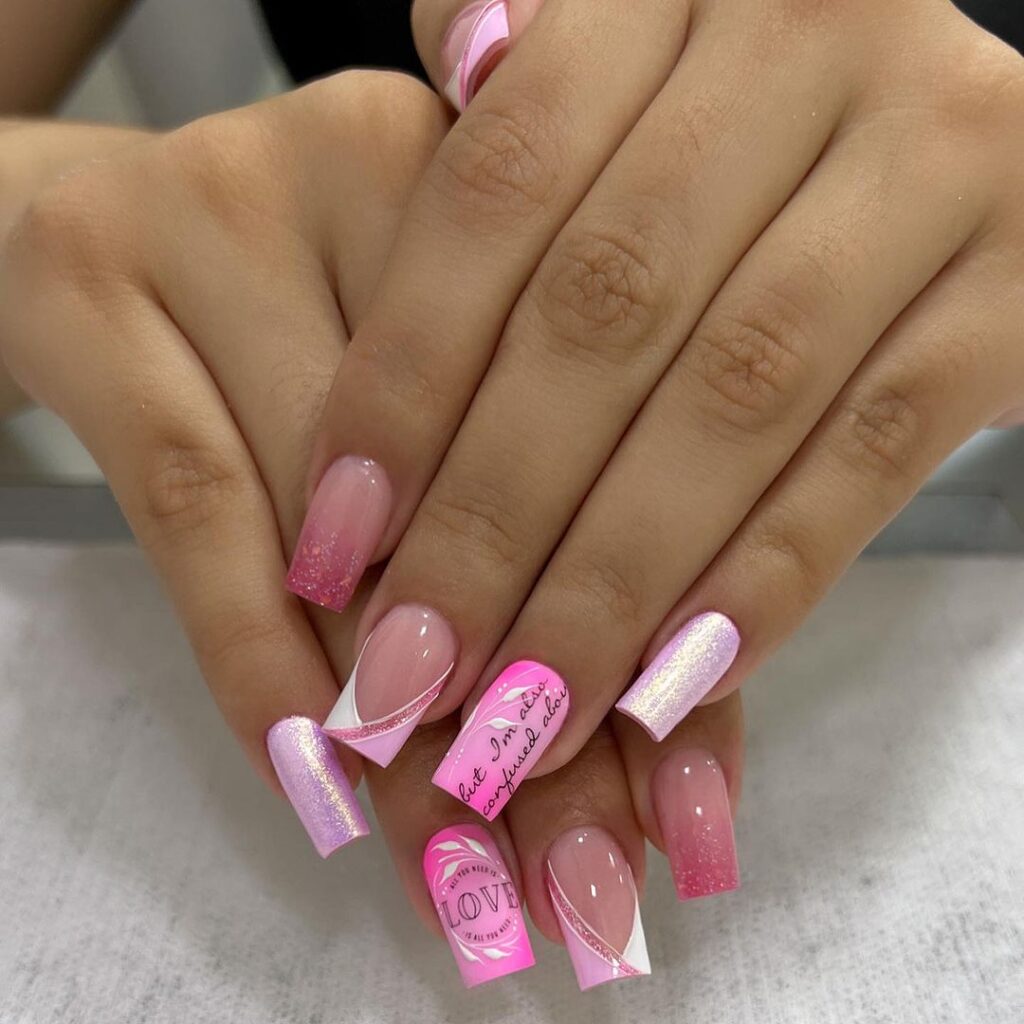
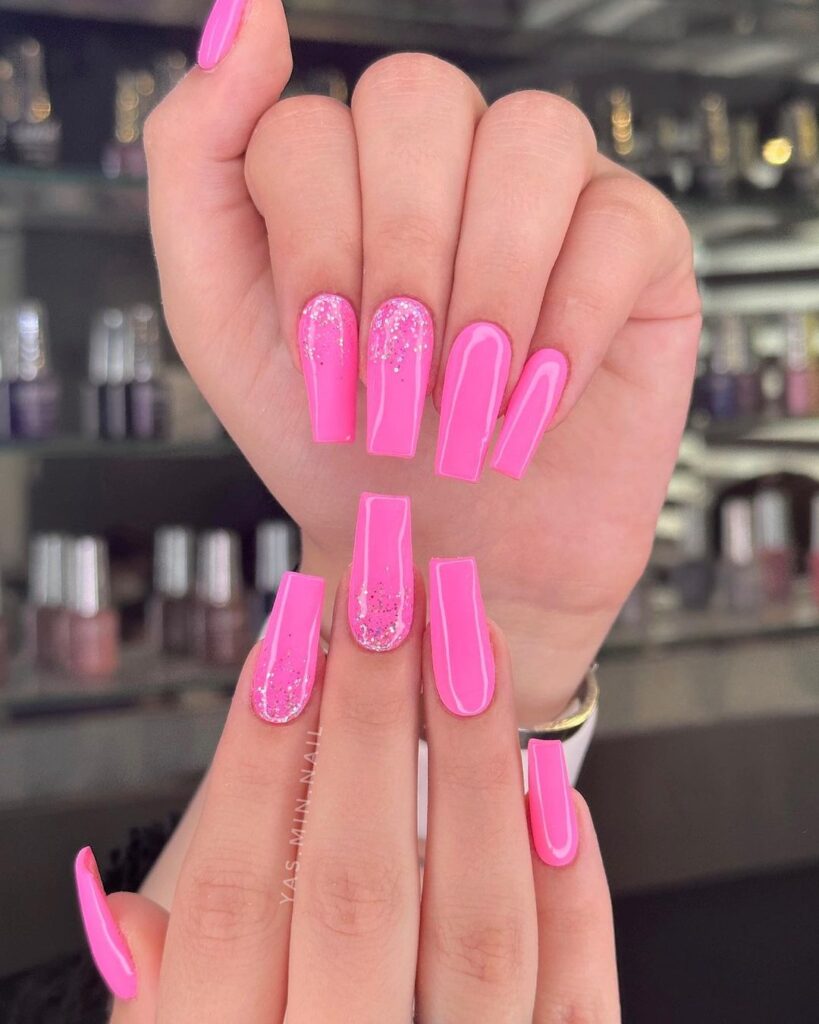
Elevate your style with pastel shades for a chic and elegant look. Experiment with soft pinks, blues, and greens to create a refreshing and modern nail art design. Embrace nail art brushes to add intricate details and patterns to your pastel nails.

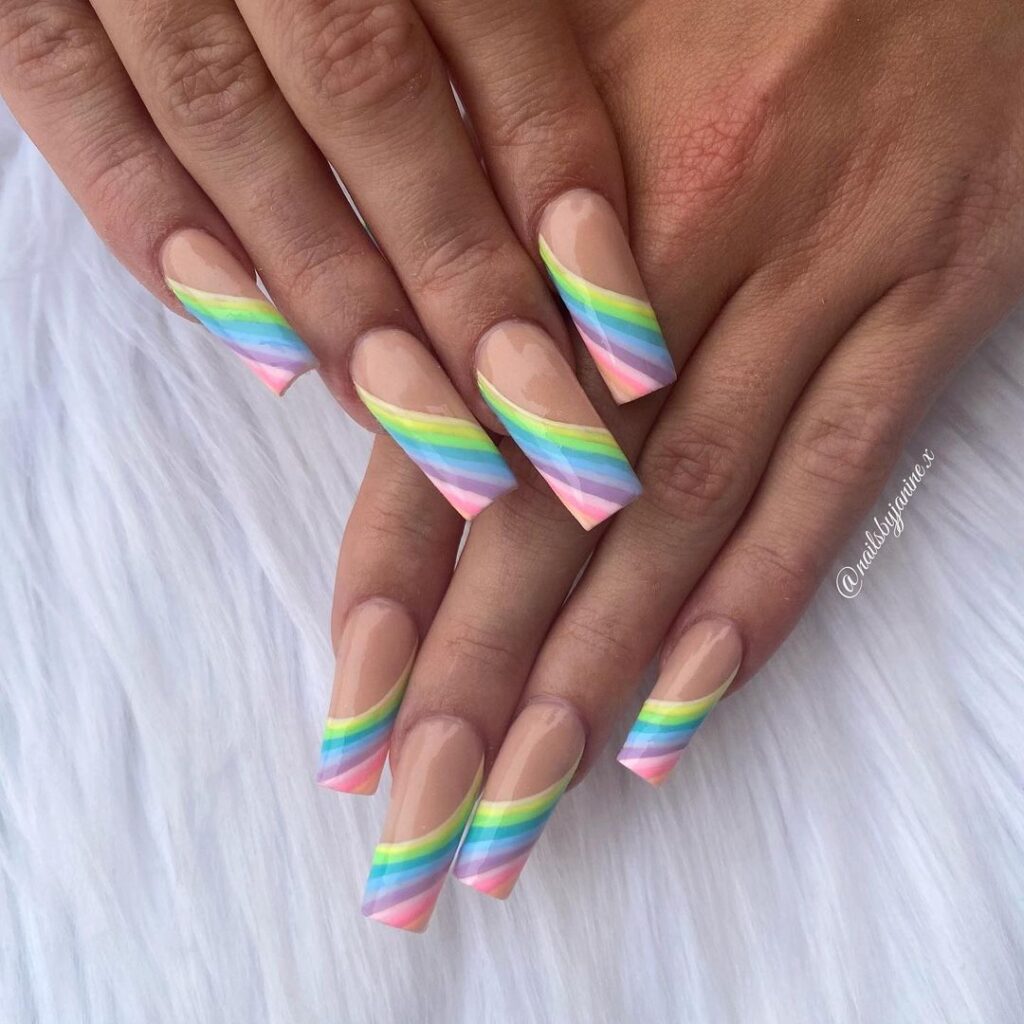
Step-by-Step Guide for Ombre Nails

  1. Start by applying a base coat of white polish to ensure the pastel colors pop.
  2. Use a makeup sponge to dab on different pastel shades in a gradient pattern.
  3. Blend the colors seamlessly for a smooth ombre effect.
  4. Finish with a glossy top coat for a polished finish.

Innovative Incorporation of Pastel Hues

  • Mix and match pastel colors for a playful and unique nail design.
  • Try geometric shapes or floral patterns using nail art brushes for added flair.
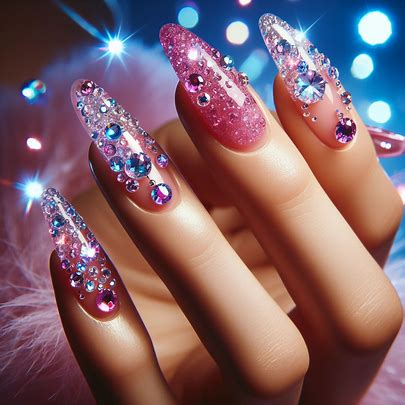
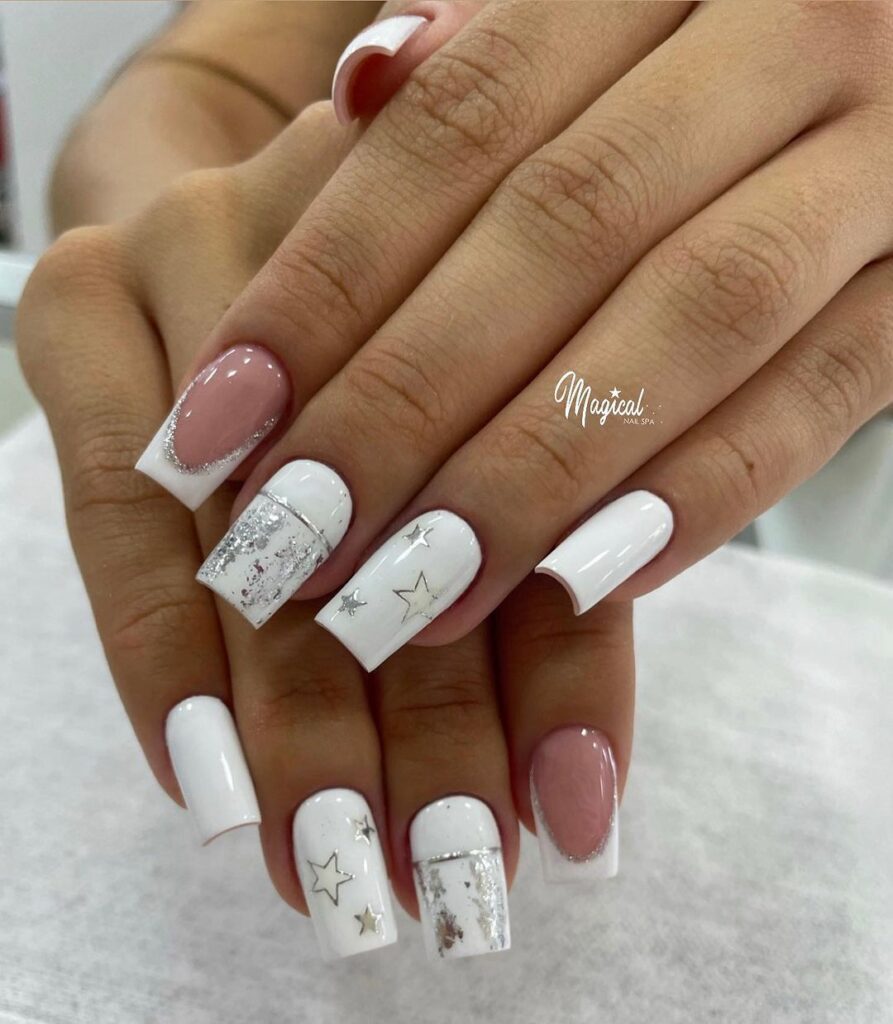
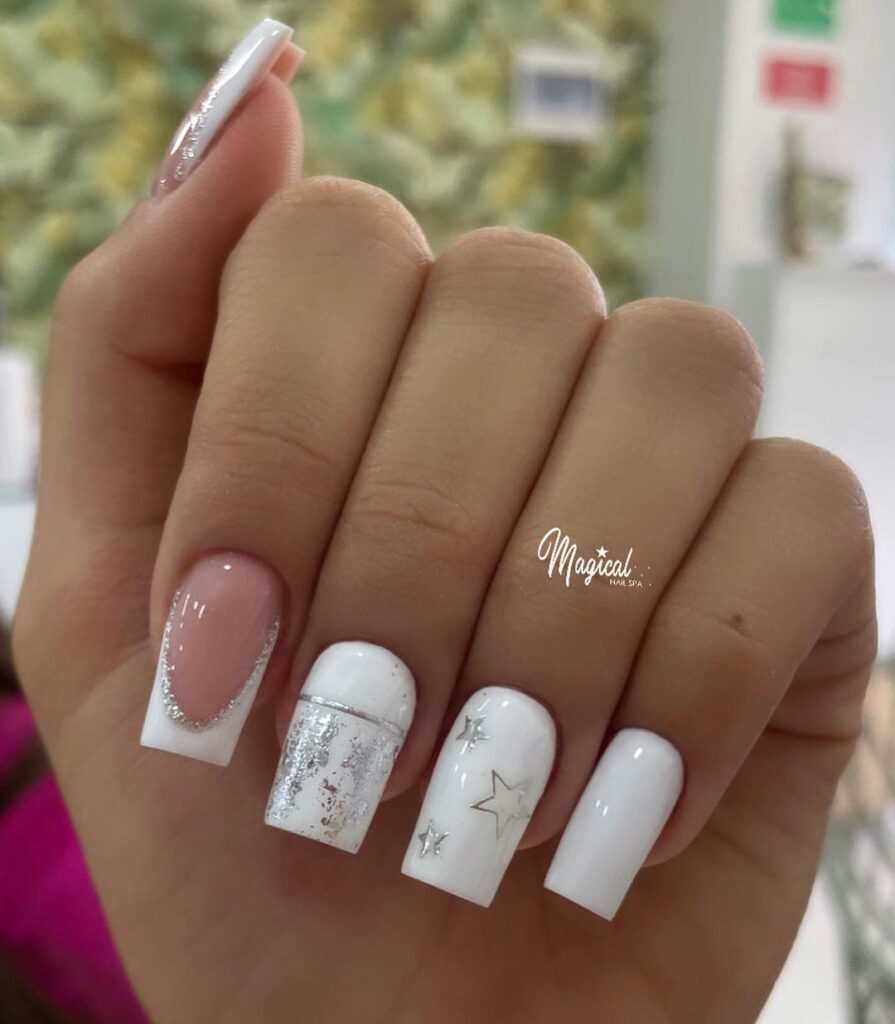
  • Consider incorporating glitter or metallic accents for a touch of glamour.

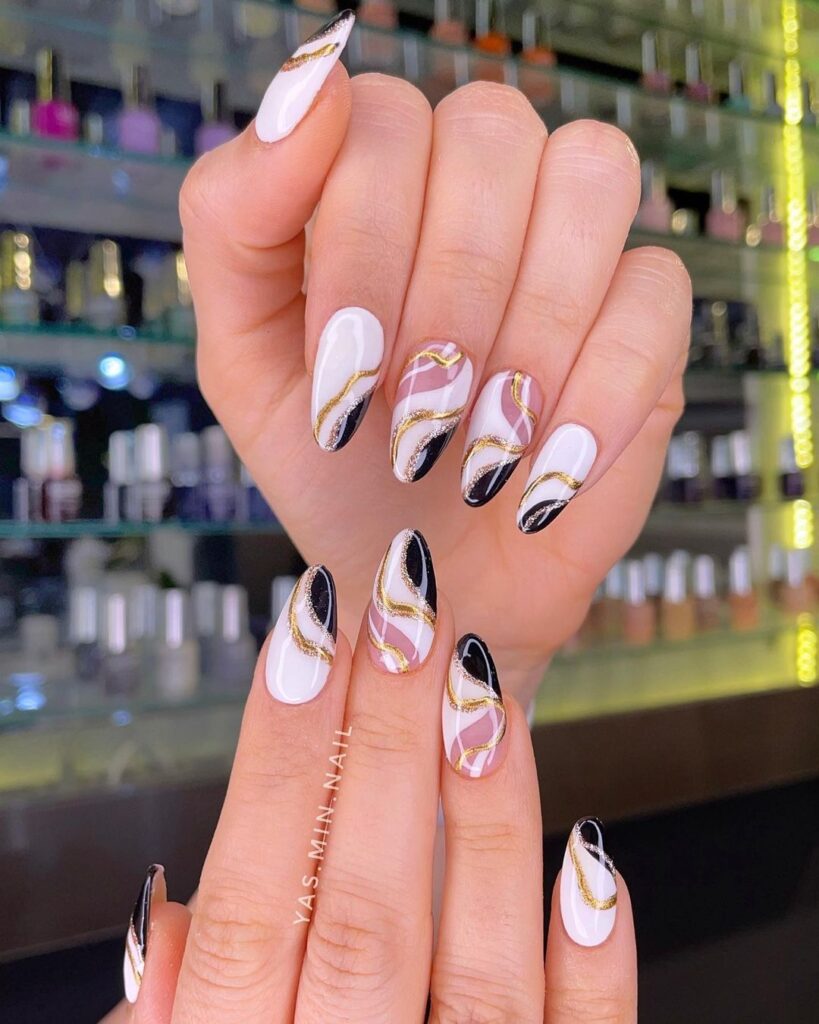
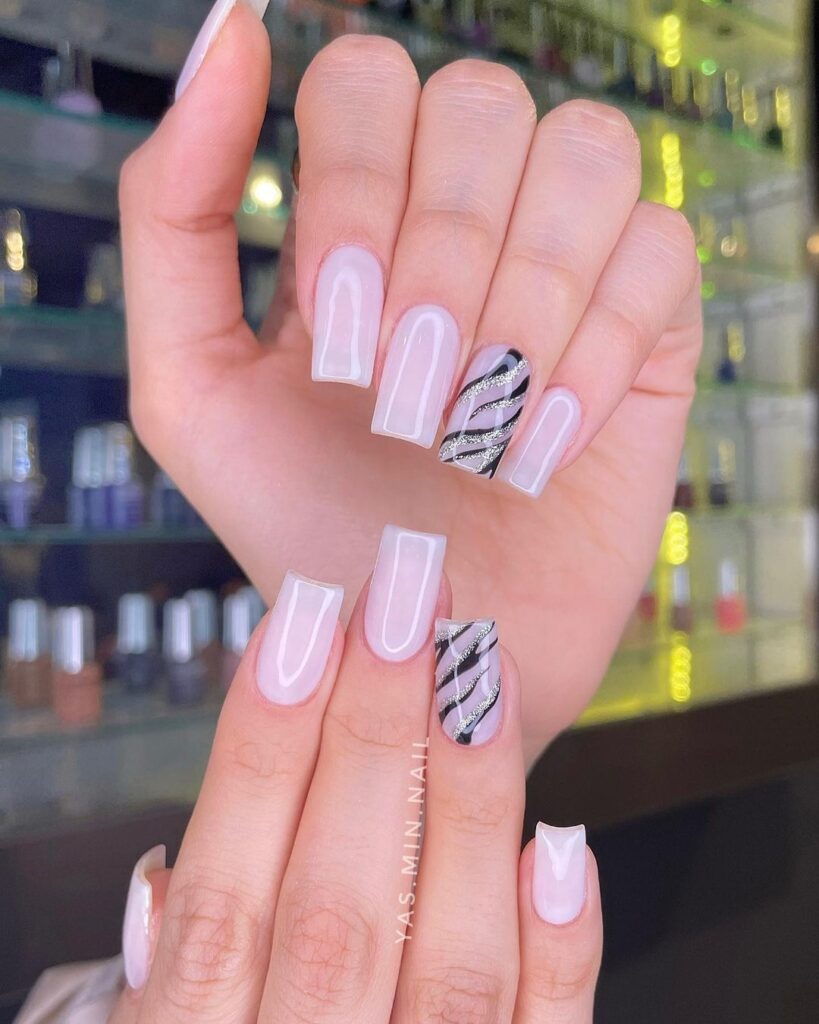
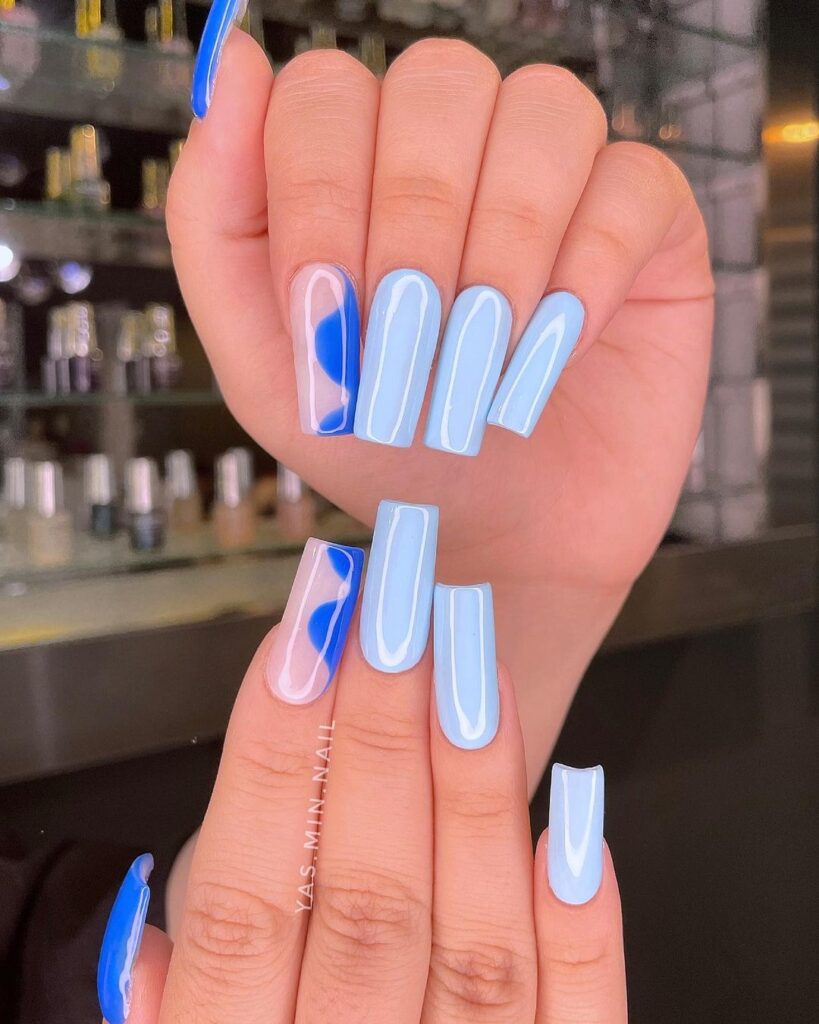
Abstract and Floral Pastels

Geometric Patterns

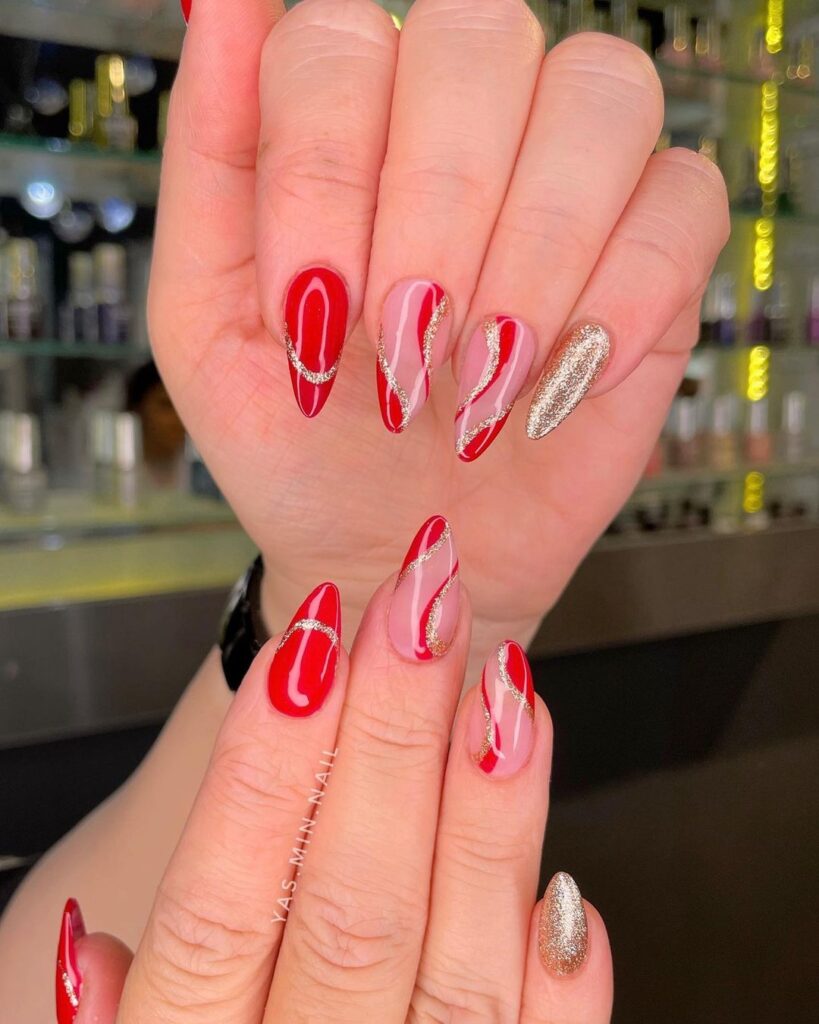
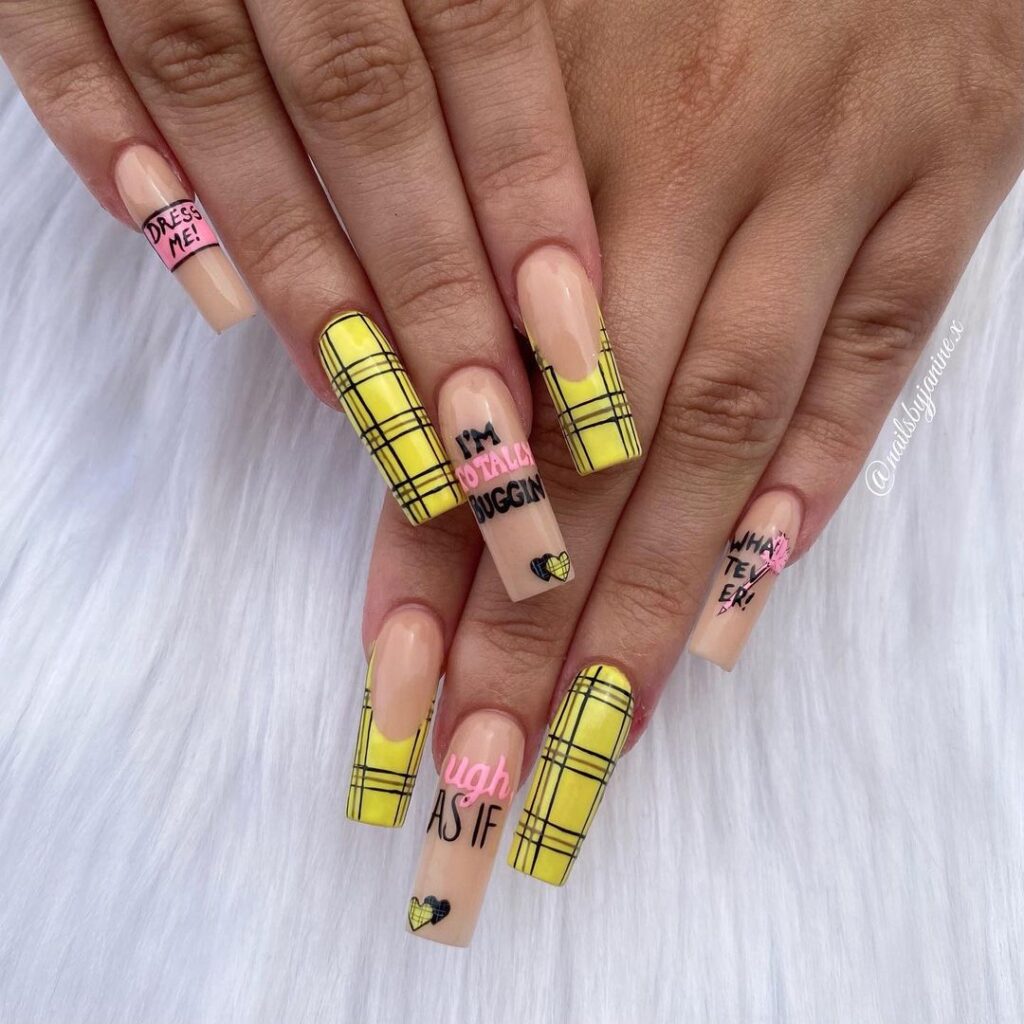
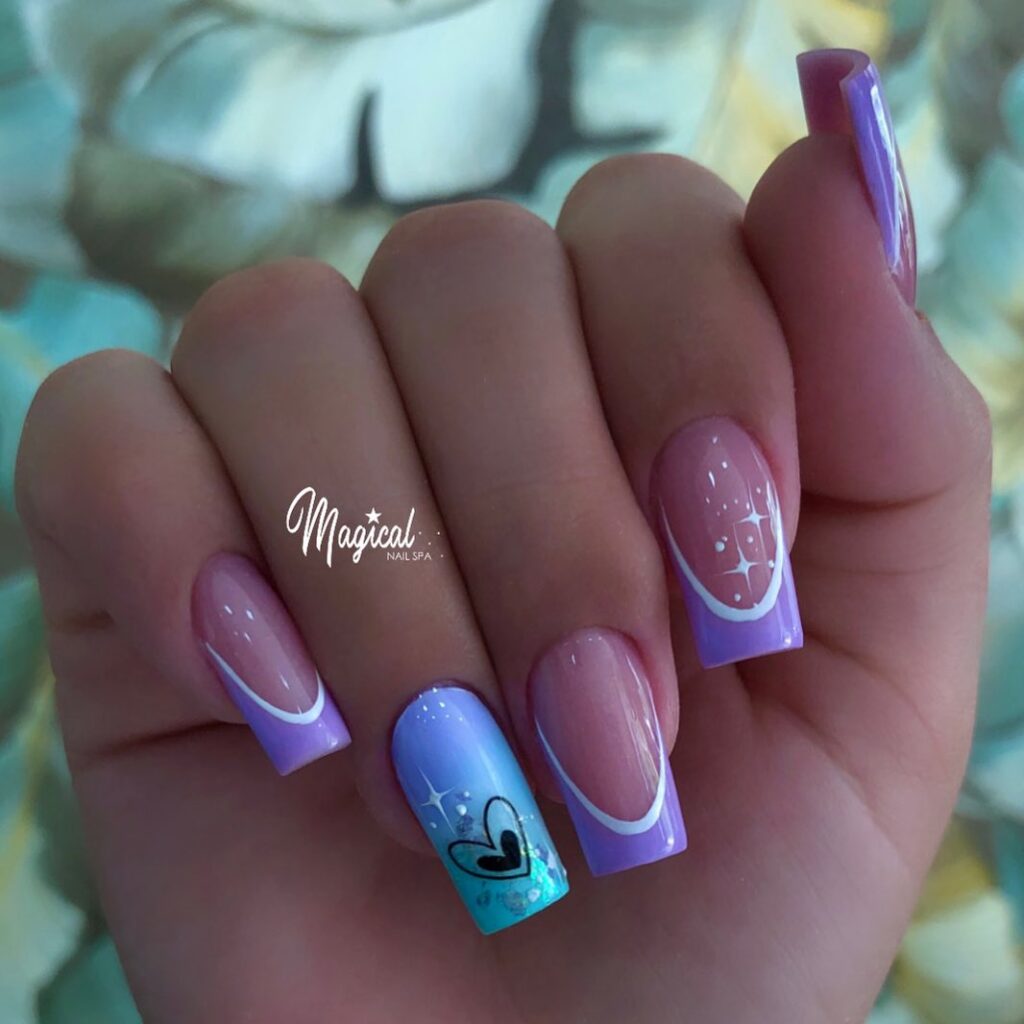
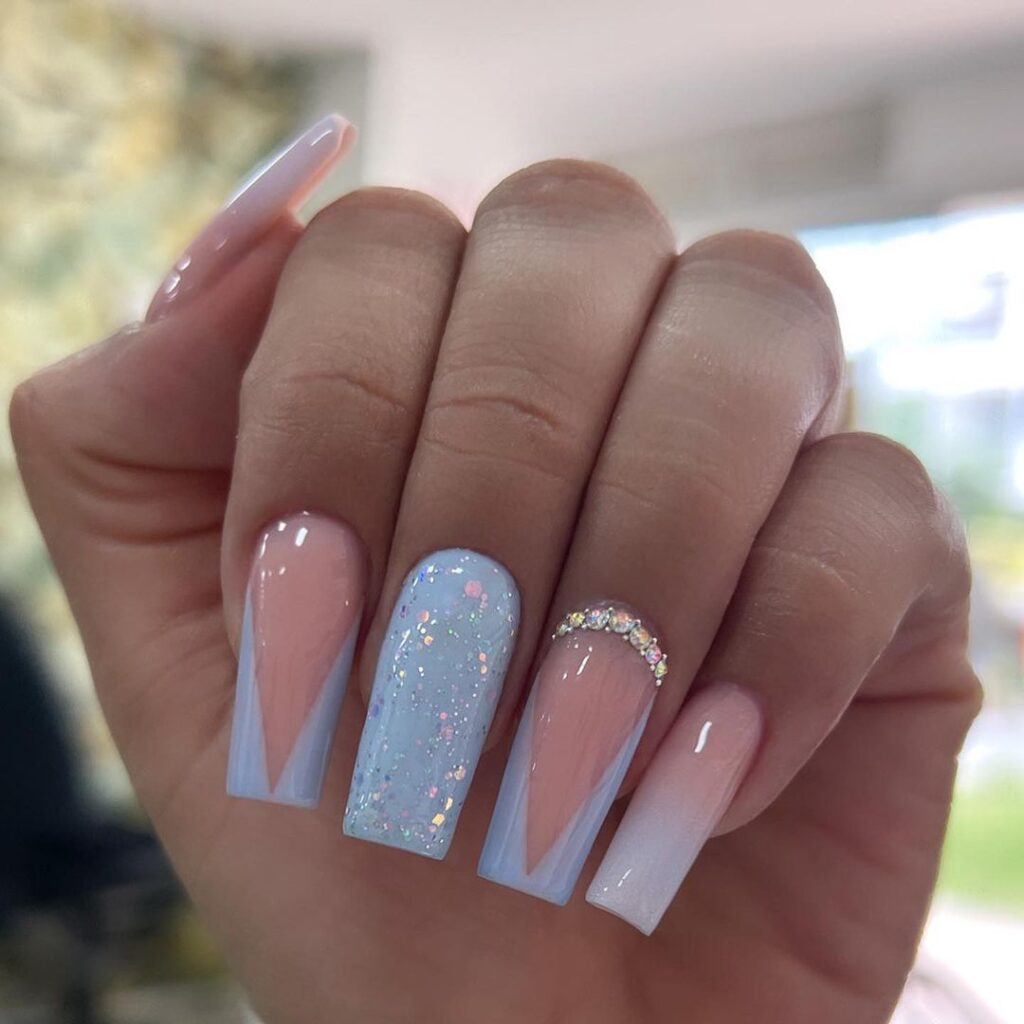
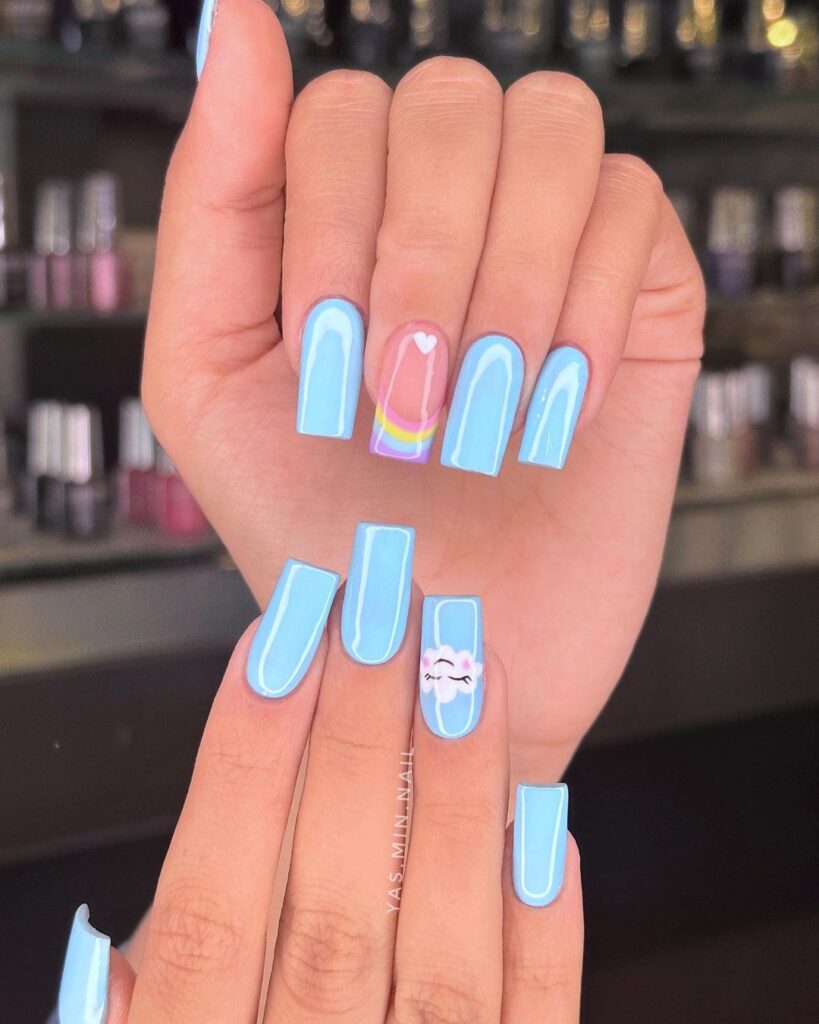
Abstract pastel nail art embraces geometric patterns, adding a modern twist to your nails. Try squares, triangles, or lines for a contemporary look. Experiment with pastel colors like baby blue, soft pink, or lavender to achieve a chic and trendy vibe.
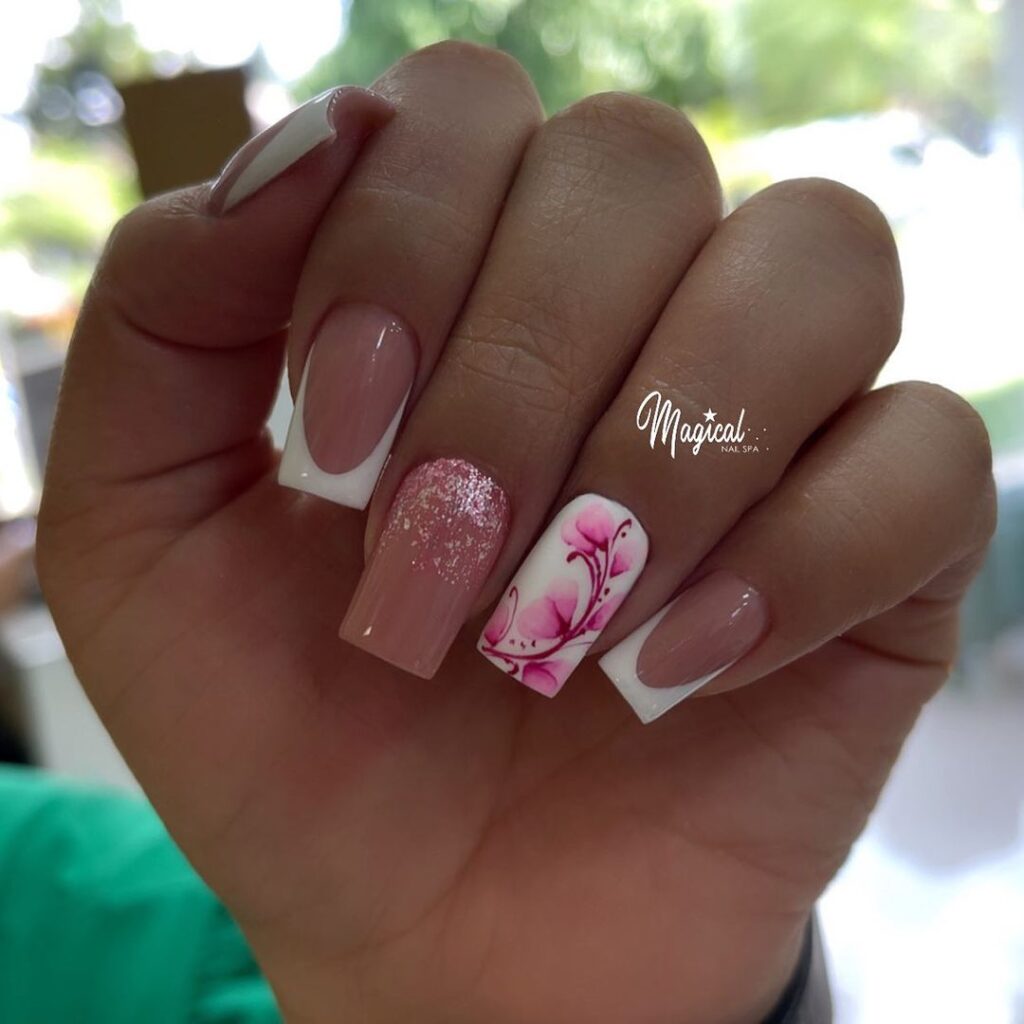
Feminine Florals

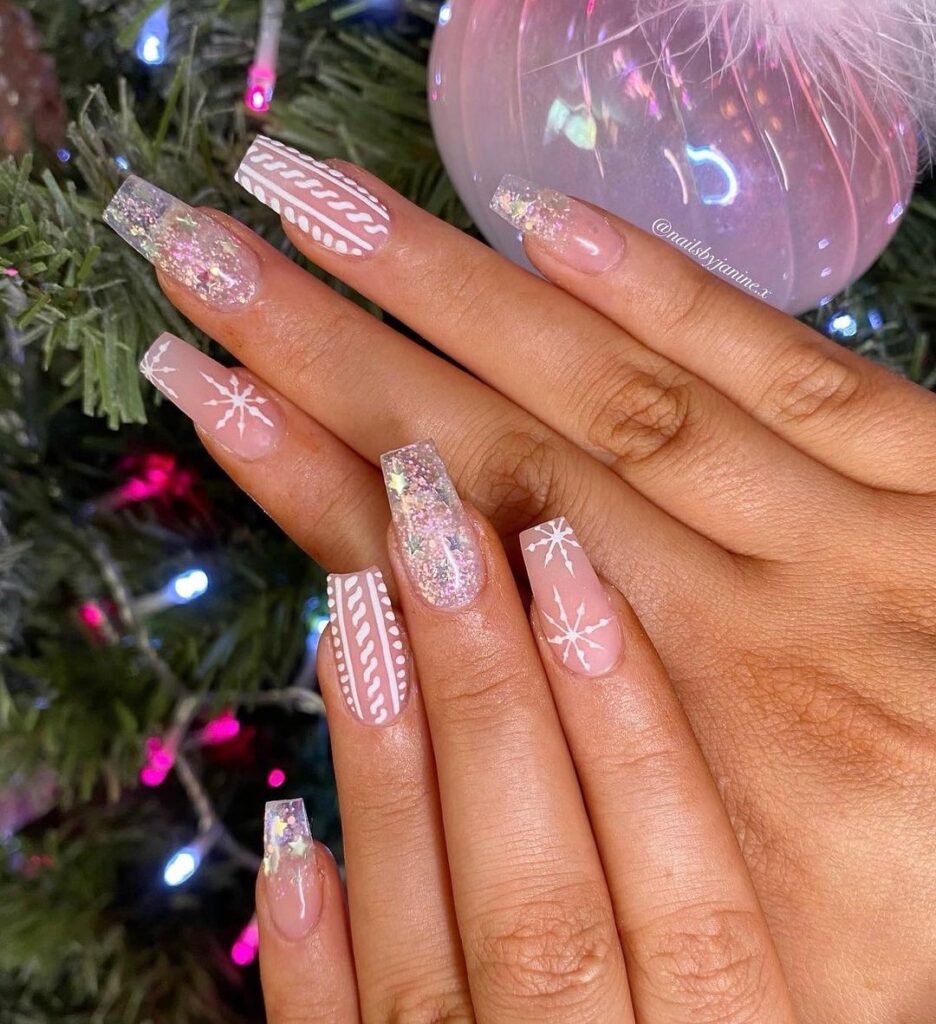
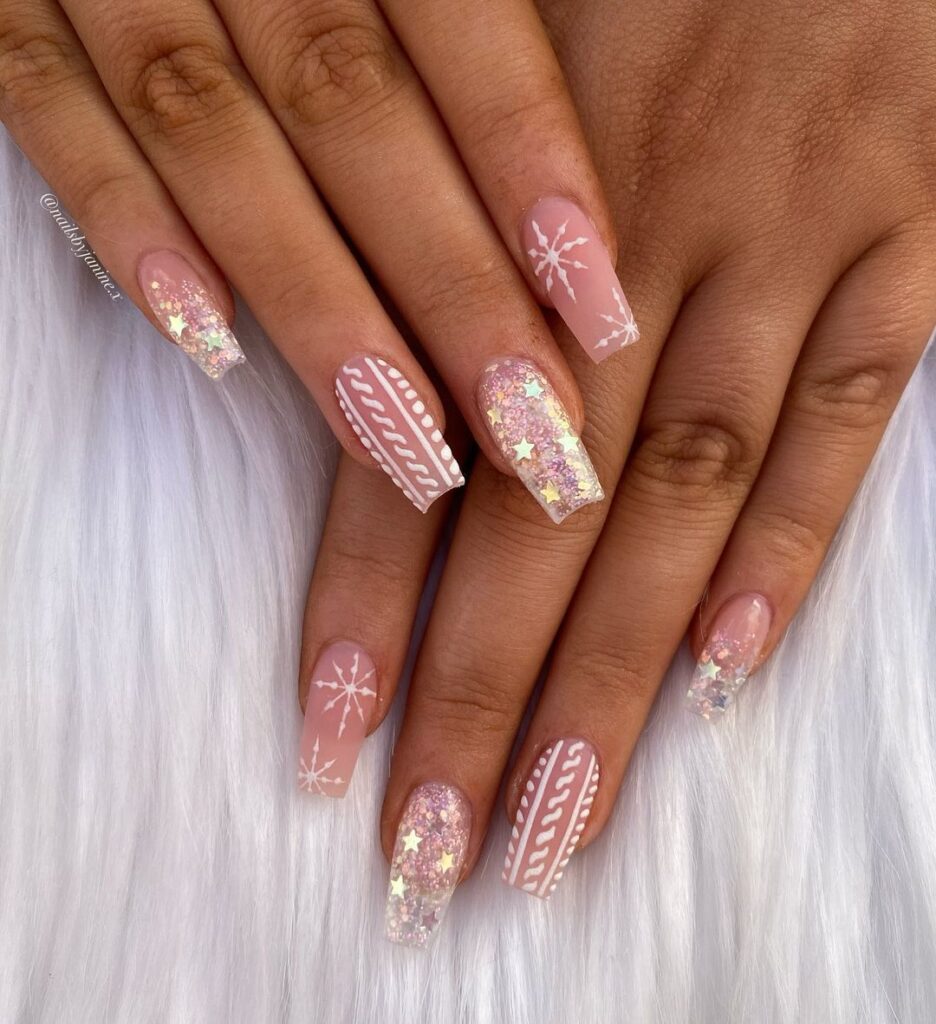
Infuse your nails with floral-inspired designs using delicate pastel hues. Opt for roses, daisies, or cherry blossoms for a soft and feminine touch. Incorporate pastel shades such as peach, mint green, or lilac for a romantic and elegant finish.

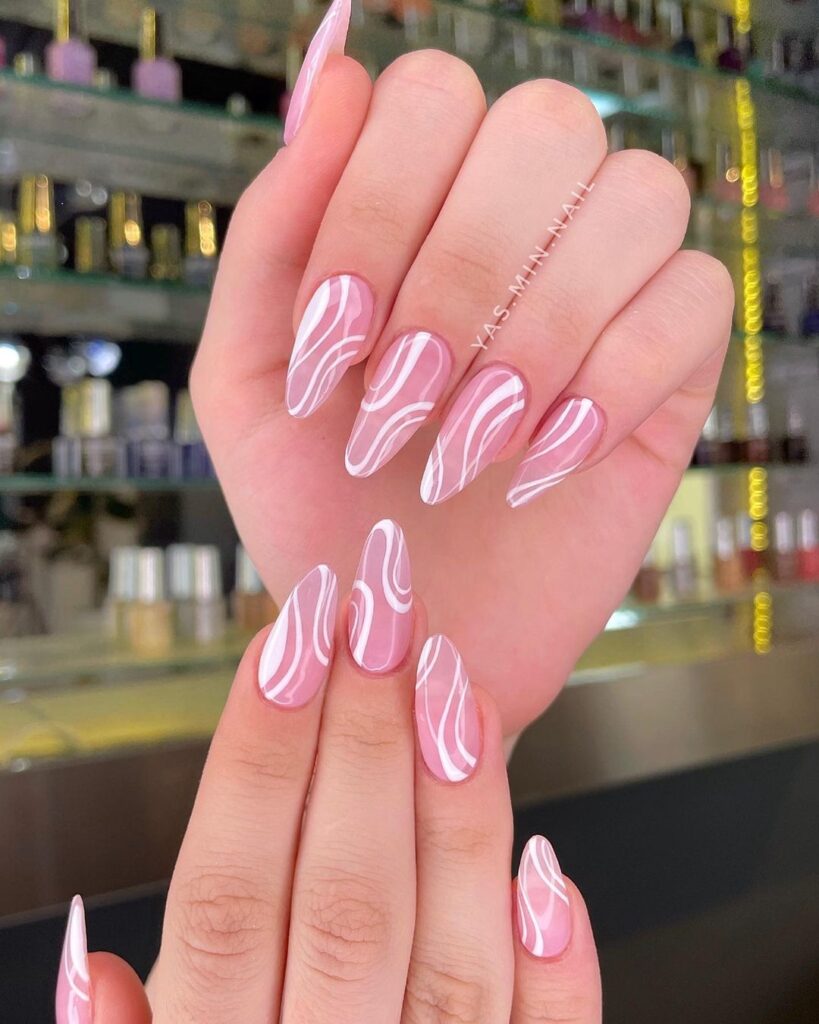
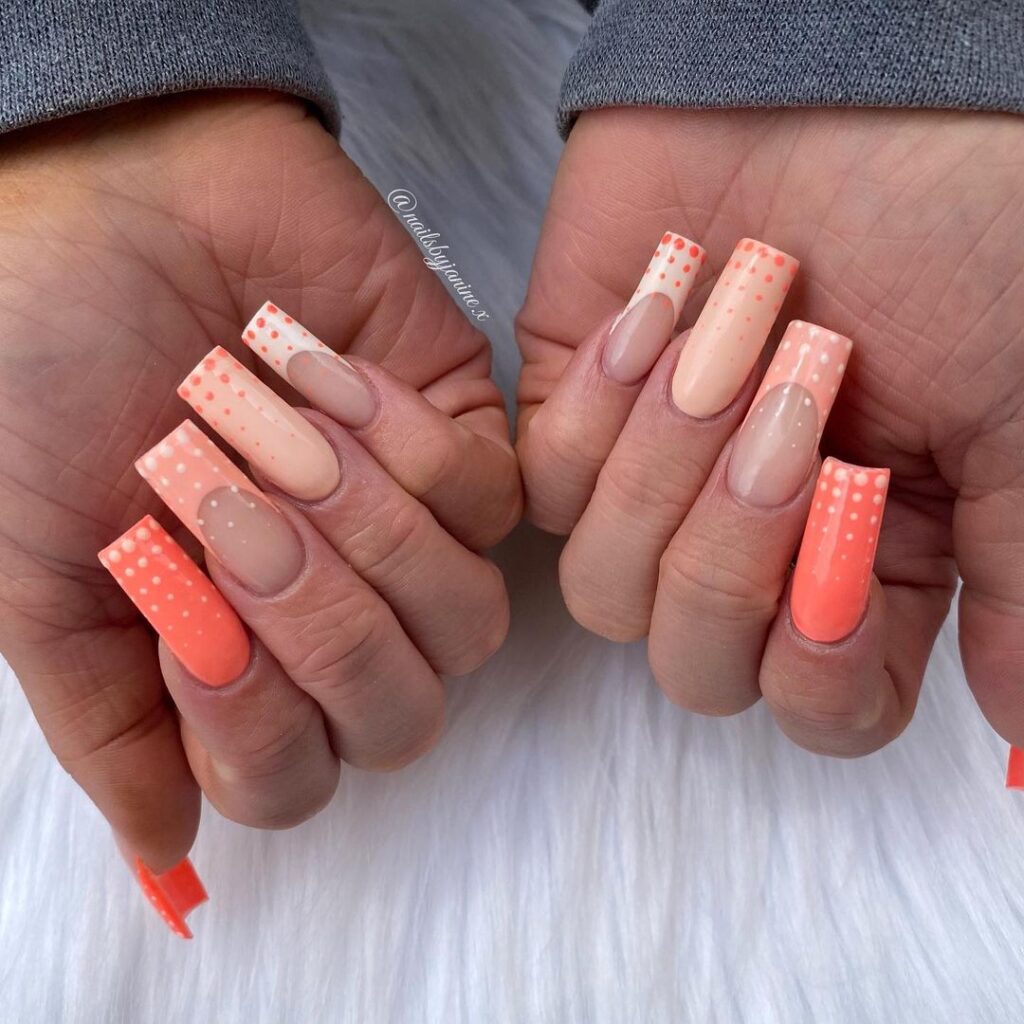
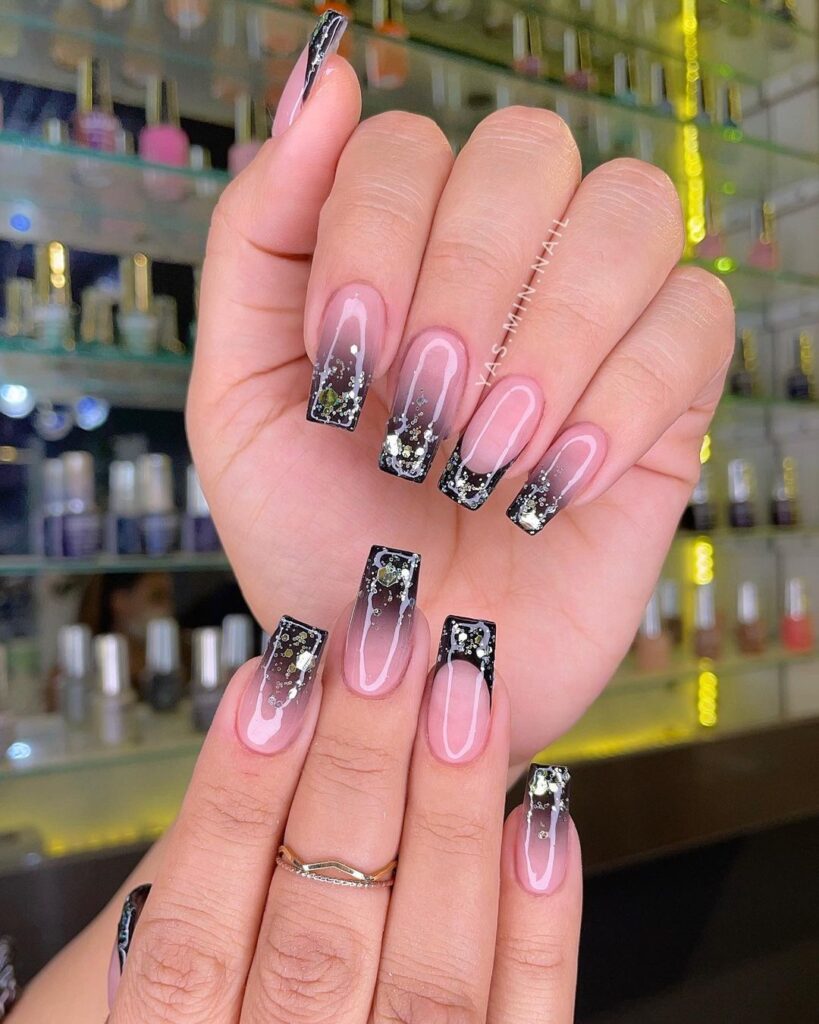
Negative Space Techniques

Utilize negative space techniques in your abstract pastel nail art to create depth and interest. Leave portions of your nails bare to showcase the natural nail color beneath the pastel layers. This technique adds a modern and minimalist flair to your overall nail design.

Elegant Pastel Techniques
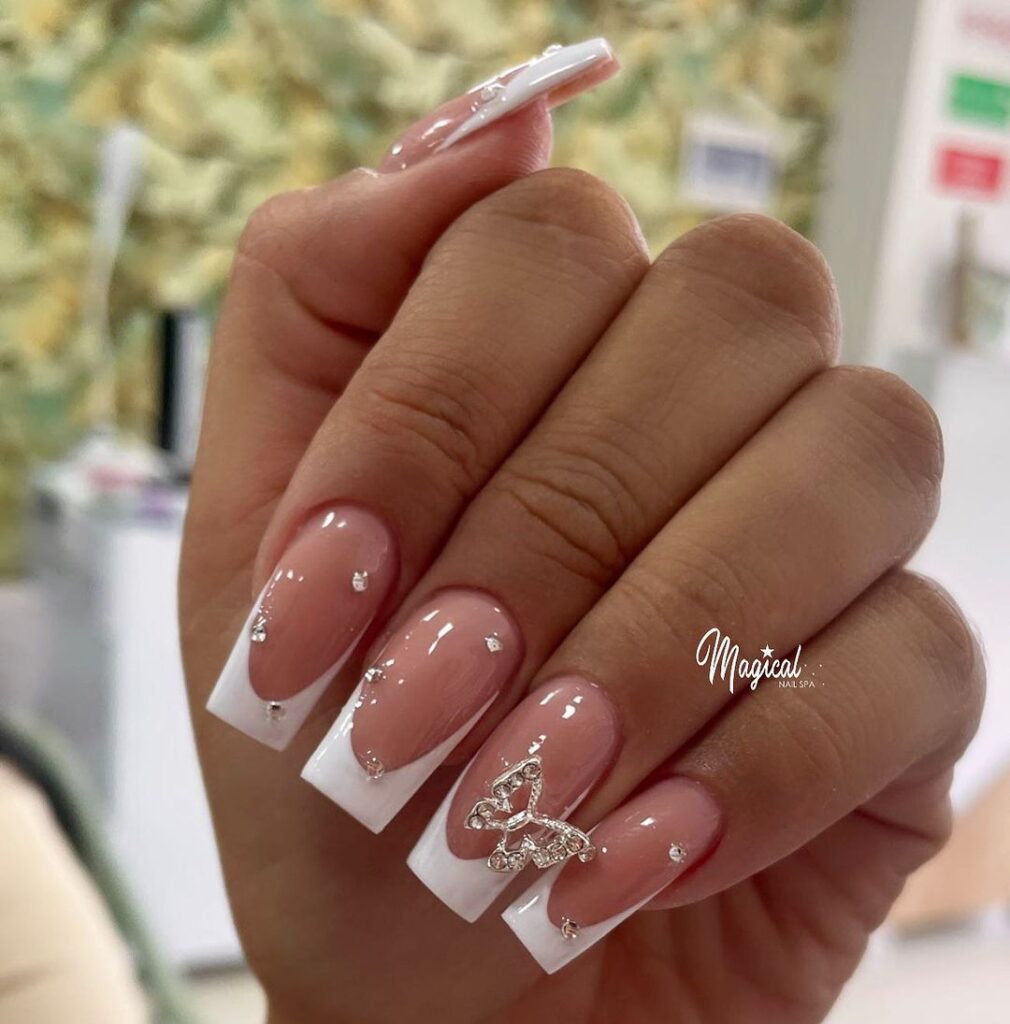
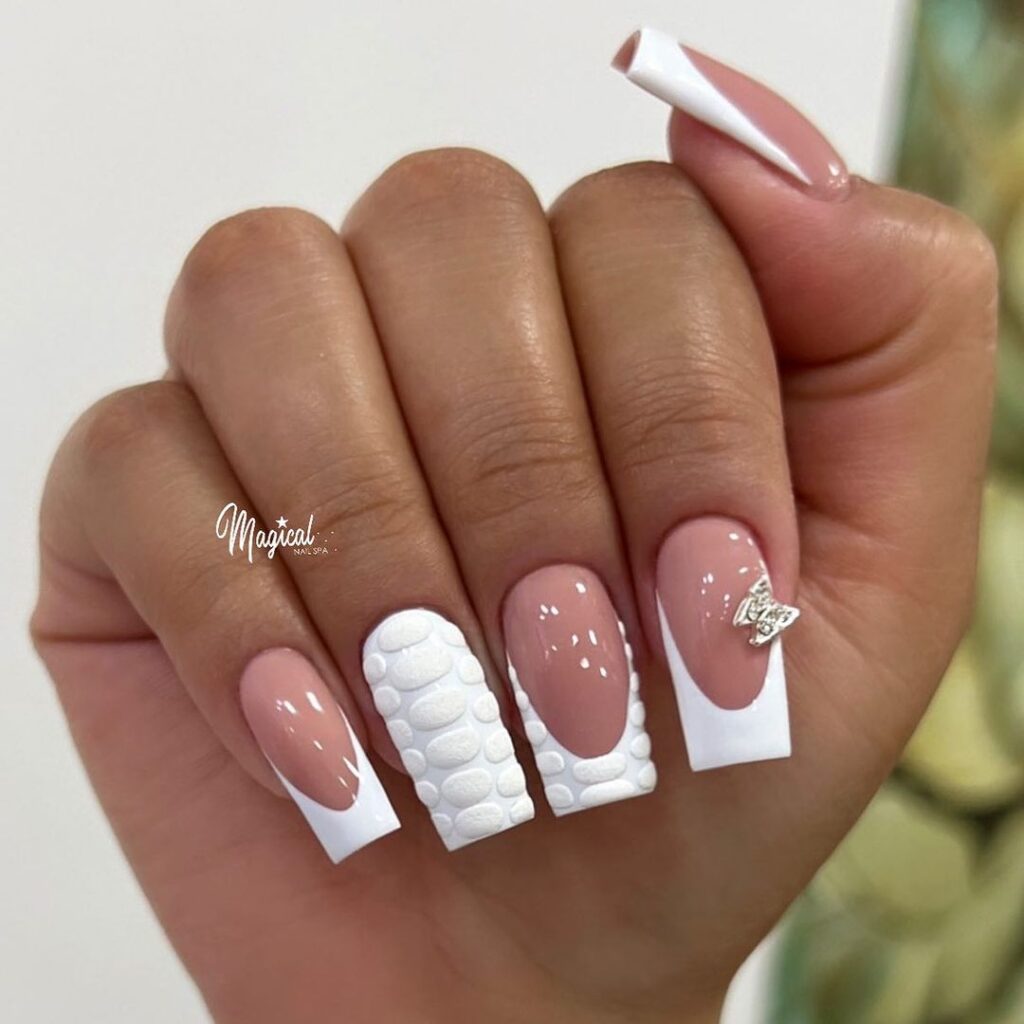
French Manicure

To create an elegant French manicure, opt for soft pastel shades like baby pink or light blue. Start by applying a sheer pastel shade as the base color, then delicately paint the tips with a white polish for a classic look.
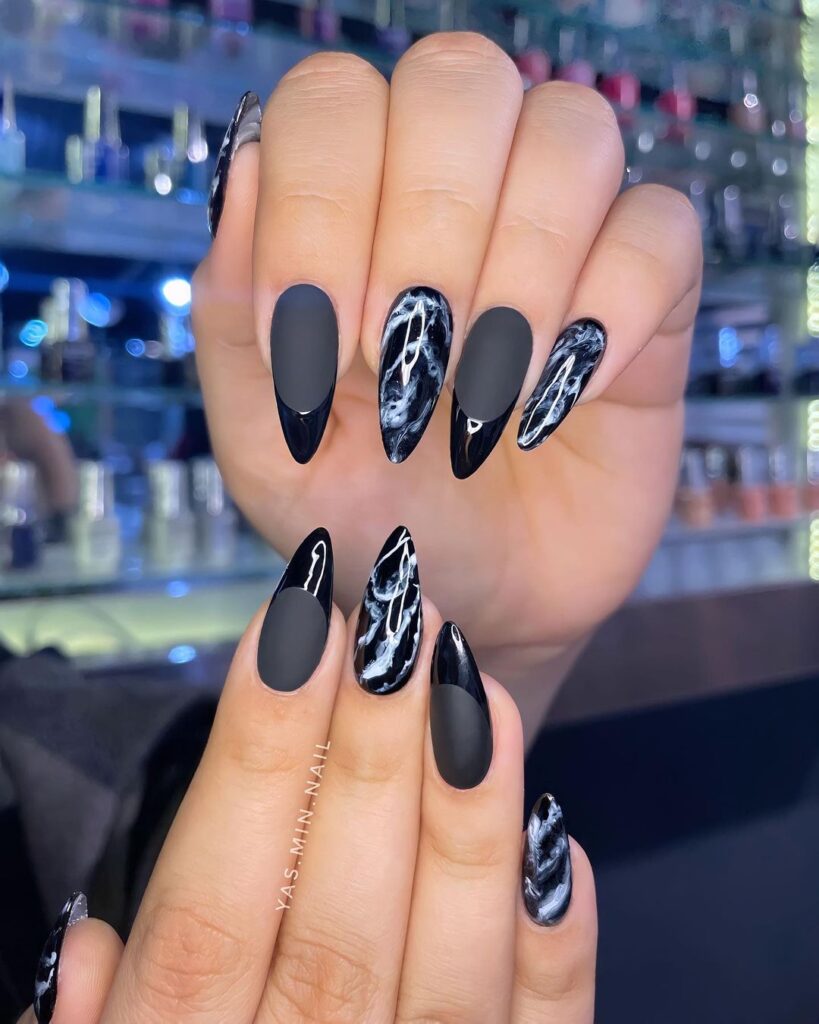
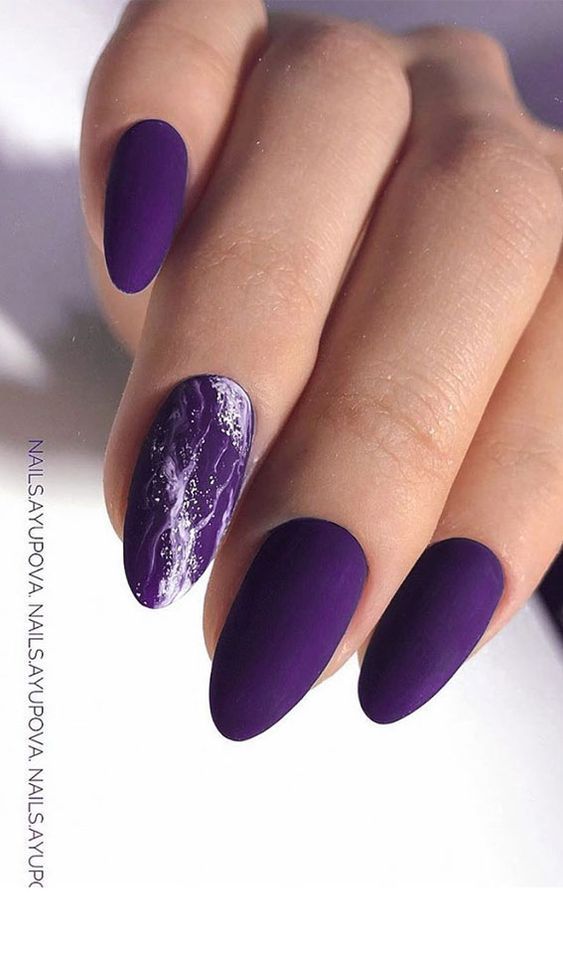
Marble Effect

Achieve a sophisticated marble effect on your nails using pastel colors. Begin by applying a light pastel shade as the base coat. Then, using a thin brush, swirl different pastel shades together to create a marble pattern. Finish with a top coat for a polished finish.

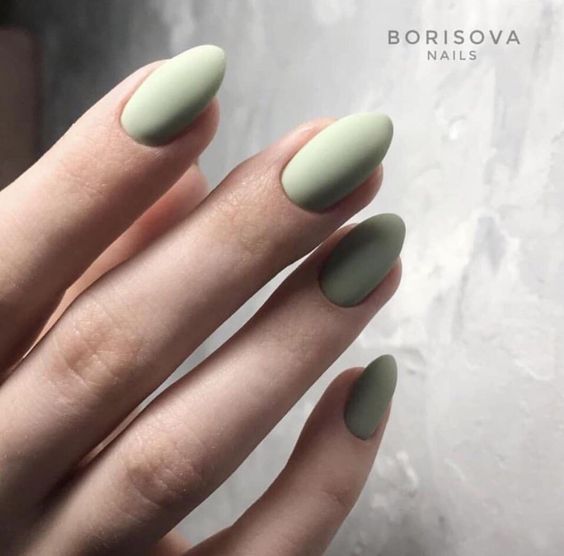
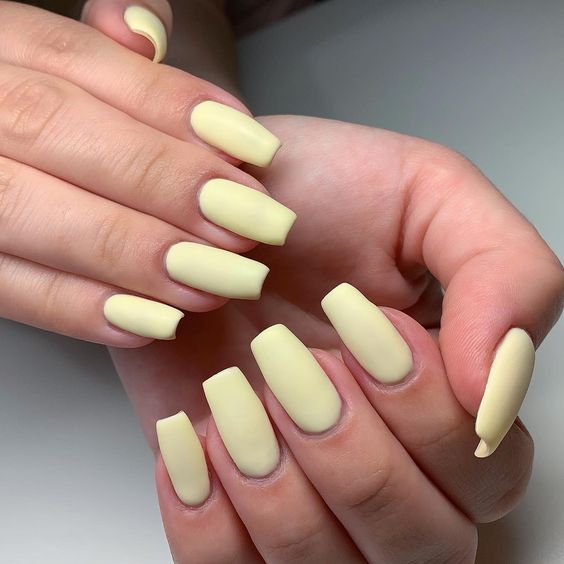
Minimalistic Designs

For a chic and minimalistic look, try creating simple pastel nail designs. Choose one pastel shade as the base color and add small geometric shapes or lines in complementary colors for a modern touch. Less is more when it comes to achieving an effortlessly stylish appearance.

Unique Pastel Trends

Holographic

Uncover the latest holographic pastel nail trends for a futuristic vibe. Embrace iridescent shades that shift and shimmer in the light. Experiment with holographic topcoats to elevate your pastel nails.
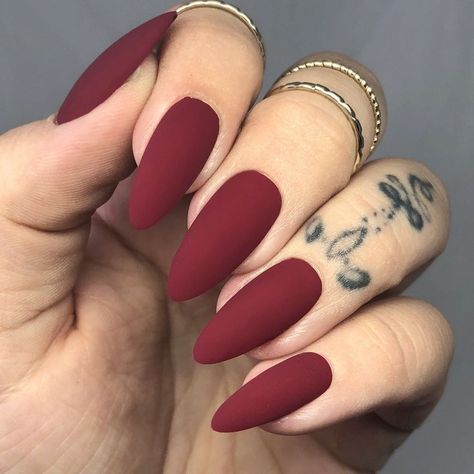
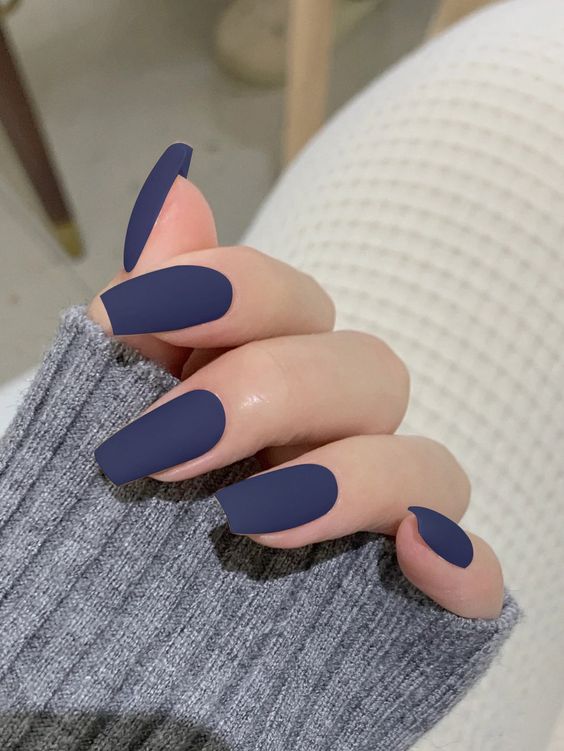
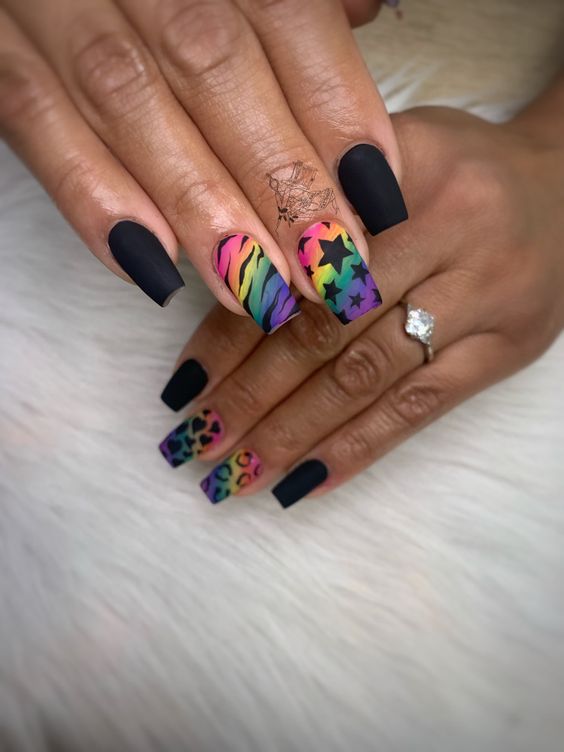
Matte

Discuss the rising trend of matte pastel nails for a modern twist. Opt for matte finishes in soft hues like lavender and baby blue. Achieve a sophisticated look with matte topcoats over your favorite pastel shades.
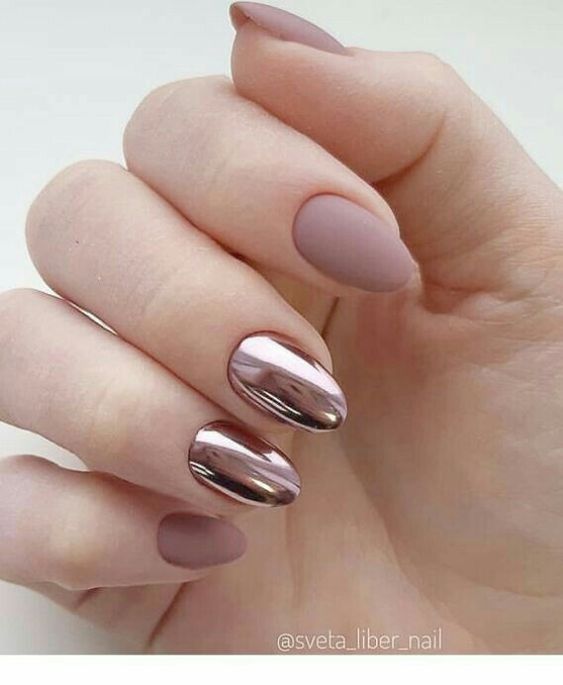
Chrome

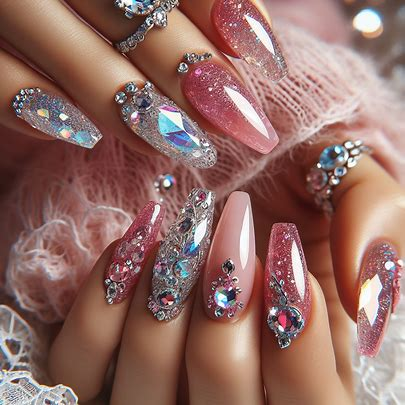
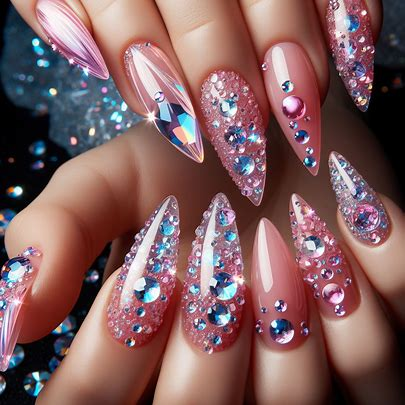
Explore the world of pastel chrome nails and their eye-catching appeal. Transform your nails with metallic pastel shades that exude elegance. Try different chrome powders to achieve a unique and striking finish.

Closing Thoughts

You’ve explored a spectrum of spring pastel nail ideas, from abstract designs to elegant techniques and unique trends. Embrace the soft hues that define the season and express your creativity through delicate pastel shades. Elevate your nail game with these inspiring designs and make a statement with your fingertips.

Now it’s your turn to pick a pastel design that resonates with you and try it out. Let your nails be the canvas for your artistic expression and enjoy the beauty of spring wherever you go. Get creative, have fun, and show off your stylish pastel nails with confidence!

Animal Print: Nails featuring patterns inspired by various animals like leopard, zebra, or snake.

0

Get ready to elevate your nail game with fierce and trendy animal print designs. From leopard spots to zebra stripes, animal print nails are all the rage. Embrace your inner wild child and add a touch of untamed flair to your look. Whether you prefer a subtle accent or a bold statement, animal print nails are versatile and eye-catching. Let your fingertips roar with style and sophistication. Step into the wild side of nail art and make a fierce statement with animal print designs that are sure to turn heads.

Exploring Animal Print Nail Art

History

Animal print nail art has a rich history dating back to ancient civilizations like the Egyptians and Babylonians.

The trend gained popularity in the 20th century, with celebrities embracing animal print nails for red carpet events.

Types

Leopard, zebra, and tiger prints are among the most popular animal prints used in nail designs.

Snake skin patterns and cheetah spots also add a wild touch to nail art creations.

Significance

Animal print nails have become a staple in the fashion and beauty industry, symbolizing boldness and individuality.

They offer a unique way to express personal style and make a statement without saying a word.

Step-by-Step Guides for Trendy Designs

Leopard Print

To create leopard print nails, begin with a base coat and apply a light nail polish color. Use a small brush to draw irregular spots in a darker shade. Outline the spots with black polish for definition. Finish with a top coat.

Zebra Stripes

For zebra stripes, start with a white base and let it dry completely. Using a thin brush, paint black stripes in a zig-zag pattern. Ensure the stripes are uneven for a realistic look. Seal with a glossy top coat.

Snake Skin Patterns

Mastering snake skin patterns involves painting your nails in a neutral color as the base. Then, create random squiggly lines using a dark color to mimic snake scales. Add dots along the lines for texture and finish with matte top coat.

Incorporating Styles with Animal Prints

Mixing Prints

Experiment with combining zebra stripes and leopard spots on different nails for a bold and unique look. This technique adds a wild side to your manicure, creating an eye-catching design.

Balancing with Solids

Pairing animal print nails with solid colors like black or nude can create a balanced and chic appearance. The contrast between the prints and solids adds depth to your overall nail look.

Coordinating Outfits

Coordinate your outfit with your animal print nails by choosing clothing in complementary colors. For example, if you have zebra print nails, wearing a black or white outfit can enhance the overall aesthetic.

Mixing animal prints on your nails allows for creativity and individuality in your style. By experimenting with various combinations, you can achieve a manicure that truly reflects your personality and fashion sense.

Tips and Tricks for Eye-Catching Manicures

Color Palette

When selecting colors for your animal print nails, opt for shades that complement each other. Experiment with combinations like black and gold for a classic look or mix bold colors for a vibrant style.

Nail Stencils

Utilize nail stencils to create intricate animal print designs effortlessly. Place the stencil on your nail, apply polish, then carefully peel off to reveal a flawless pattern.

Maintenance Practices

To ensure longevity for your animal print manicure, apply a clear top coat every few days to prevent chipping. Keep your nails hydrated by moisturizing cuticles regularly.

Summary

You’ve now mastered the art of animal print nails with our step-by-step guides, style tips, and tricks for stunning manicures. Embrace your creativity and express your unique style through these trendy designs that are sure to make a statement wherever you go. Incorporate zebra, leopard, or snake prints into your nail art to elevate your look effortlessly.

Now it’s time to unleash your inner nail artist and experiment with different animal print patterns. Show off your wild side and let your nails do the talking. Get ready to turn heads and receive compliments on your fierce and fabulous manicure creations!

Glitter Gradient: A gradual fade of glitter from the cuticle to the tip of the nail.

0

Did you know that searches for “glitter gradient” have skyrocketed by 300% in the past year alone? This dazzling nail art technique combines the allure of glitter with a seamless ombre effect, creating a mesmerizing finish that catches the eye.

Get ready to elevate your manicure game with this glamorous trend that adds a touch of sparkle to any look. Whether you’re a nail art enthusiast or looking to try something new, mastering the glitter gradient is sure to make your nails stand out from the crowd. Discover how to achieve this stunning style and unleash your creativity with every brush stroke.

Understanding Glitter Gradient Nails

Definition

Glitter gradient nail design involves blending two or more glitter shades on the entire nail, creating a fading effect from the tip towards the cuticle. This technique adds depth and dimension to the nails, giving them a glamorous and eye-catching finish.

Appeal and Versatility

Glitter gradients are popular among nail artists and enthusiasts due to their stunning visual impact. They offer a subtle yet striking look that suits various occasions, from everyday wear to special events. The versatility of glitter gradients allows for endless customization by choosing different colors and glitter sizes.

Types of Glitter Gradients

  • Vertical Gradient: In this style, the glitter is applied vertically on the nail, creating a cascading effect from top to bottom.
  • Horizontal Gradient: Here, the glitter is layered horizontally across the nail, producing a shimmering transition from one end to the other.
  • Ombre Glitter: This type blends two or more glitter colors seamlessly, creating a smooth transition from light to dark or vice versa.

Preparing for Your Gradient Design

Gather Materials

To create a stunning glitter gradient design, gather essential supplies like base coat, nail polish in desired colors, fine glitter, makeup sponge, and topcoat. These materials are crucial for achieving a flawless gradient effect.

Begin by shaping your nails to the desired length and filing them to create a smooth surface. Clean your nails thoroughly to remove any oils or residue that could affect the polish’s adhesion. Properly prepped nails ensure a long-lasting and professional-looking gradient design.

Choose Color Scheme

Selecting a color scheme that harmonizes with the glitter shades you intend to use is vital for a cohesive gradient look. Consider blending colors that complement each other well, such as light pink transitioning to silver glitter or blue merging into gold sparkles. Experimenting with different combinations can lead to unique and eye-catching gradient designs.

  • Pros:
    • Allows for creative expression
    • Offers endless color possibilities
  • Cons:
    • Requires precision and practice
    • Can be time-consuming

Step by Step Glitter Gradient

Base Coat

Apply a base coat before starting your glitter gradient to protect your natural nails from staining and damage. This step ensures a smooth application and helps the polish adhere better.

To begin, choose a base coat that suits your nail type – whether it’s strengthening, hydrating, or quick-drying. Apply a thin layer evenly across each nail and allow it to dry completely before proceeding with the gradient design.

Makeup Sponge

Utilize a makeup sponge to achieve the perfect gradient effect for your glitter nails. Cut the sponge into small pieces for easier handling and blending of colors.

Dab the glitter polish onto the edge of the sponge, ensuring full coverage but not excessive buildup. Gently press the sponge onto your nails in a rolling motion to transfer the glitter gradually for a seamless gradient transition.

Tips for Seamless Gradients

Smooth Blending

To achieve a flawless glitter gradient, start by blending the colors smoothly on your nails. Apply the lightest color at the base and gradually transition to the darker shade towards the tips. This technique creates a beautiful ombre effect that seamlessly merges the colors.

Clean Finish

After creating your glitter gradient, ensure a clean finish by tidying up any stray glitter particles around your nails. Use a small brush or tape to gently remove excess glitter for a polished and professional look. This step enhances the overall appearance of your manicure.

Top Coat Seal

Seal in your glitter gradient design with a top coat to not only add shine but also increase its longevity. The top coat acts as a protective layer, preventing the glitter from chipping and ensuring your gradient stays intact for an extended period. It enhances the sparkle of the glitter, giving your nails a dazzling finish.

Adding Creativity and Variety

Experimenting with Glitter Sizes and Shapes

Experiment with different glitter sizes and shapes to achieve unique effects in your glitter gradient nail art. By trying out various glitter options, you can create diverse looks ranging from subtle shimmer to bold sparkle. Mix and match fine, chunky, holographic, or iridescent glitters for a customized finish that suits your style.

Combining Techniques for Enhanced Designs

Combine your glitter gradients with other nail art techniques such as ombre or nail stamping to elevate the overall look of your manicure. Incorporating multiple techniques adds depth and dimension to your nails, making them stand out even more. This fusion of styles allows for endless creativity and ensures your nails are always on-trend.

Personalizing with Embellishments and Stickers

Personalize your glitter gradient nails further by adding embellishments or nail stickers. Whether you prefer rhinestones, pearls, or themed stickers, these additions enhance the visual appeal of your manicure. Use them strategically to accentuate certain areas of the design or create intricate patterns that complement the glitter gradient beautifully.

Summary

You now have a solid understanding of how to create stunning glitter gradient nails. By following the step-by-step guide, preparing adequately, and incorporating creativity, you can achieve flawless gradient designs. Remember to use the tips provided for seamless blending and experiment with different colors and textures to add variety to your nail art.

Now it’s your turn to unleash your creativity and nail those glitter gradient designs! Get your tools ready, pick your favorite glitter polishes, and start creating beautiful and unique nail looks. Don’t be afraid to try new techniques and colors – the possibilities are endless. Show off your fabulous nails with confidence and enjoy the dazzling results of your glitter gradient manicure!

Tie-Dye Nails: Swirled designs reminiscent of tie-dye fabric, usually in bright colors.

0

Get ready to elevate your nail game with the latest trend: tie-dye nails! Say goodbye to boring single-color manicures and hello to vibrant, eye-catching designs that are sure to turn heads. Whether you prefer subtle pastel swirls or bold psychedelic patterns, tie-dye nails offer a fun and unique way to express your style. Embrace the contrast of soft hues blending seamlessly or opt for a striking mix of bright colors for a statement look that pops. Transform your nails into mini works of art with this playful and trendy nail design.

Exploring Tie-Dye Nails

History

Tie-dye nails have a fascinating history, originating in the 1960s during the hippie movement. Bright and vibrant colors were used to create unique and psychedelic patterns on nails.

Techniques

Various techniques are used to achieve tie-dye nail designs. One popular method involves using a sponge to dab different colors onto the nails, creating a marbled effect. Another technique includes swirling colors together with a toothpick for a more intricate design.

Popularity

Tie-dye nails have surged in popularity in recent years, especially on social media platforms like Instagram. Beauty enthusiasts are experimenting with different color combinations and patterns, showcasing their creative nail art online.

DIY Tie-Dye Swirls Tutorial

Essential Tools

To create tie-dye swirls on your nails, you’ll need a few essential tools. Grab a base coat to protect your nails, followed by your chosen nail polish colors. Have some nail art brushes, a small sponge, and nail polish remover for clean-up.

Step-by-Step Guide

  1. Prepare your nails: Start with a clear base coat to protect your nails.
  2. Apply the base colors: Choose two or three nail polish colors for the tie-dye effect.
  3. Create the swirl design: Use a small sponge to dab each color onto your nails in a circular motion.
  4. Blend the colors: With a nail art brush, gently blend the colors together to create the tie-dye swirl effect.
  5. Add finishing touches: Clean up any excess polish around your nails using nail polish remover and seal in your design with a top coat.

Tips for Perfect Swirls

  • Keep the layers thin to prevent clumping and ensure quicker drying time.
  • Experiment with different color combinations for unique tie-dye patterns.
  • Practice on a nail wheel or paper before trying it on your nails for precision.

Tips for Perfect Tie-Dye Nails

Maintaining Tie-Dye Nails

To maintain tie-dye nails and ensure a vibrant, long-lasting look, apply a clear top coat every few days. This protective layer helps seal in the colors and prevents chipping. avoid harsh chemicals such as acetone-based nail polish removers, as they can fade the tie-dye effect.

For an extra pop of color and longevity, consider using UV gel polishes for your tie-dye designs. These polishes are known for their durability and resistance to fading, making them ideal for maintaining the vibrancy of your nail art.

Fixing Common Mistakes

If you encounter smudges or uneven patterns while creating tie-dye nails, don’t worry! Simply dip a small brush in nail polish remover and gently clean up any mistakes. For smudges, lightly dab a cotton swab in remover and carefully blend out the imperfections.

Top Coats and Nail Care Products

When it comes to top coats, opt for quick-drying formulas to prevent smudging and ensure a glossy finish. Look for products labeled as “fast dry” or “quick dry” for best results. Invest in a good quality cuticle oil to keep your nails hydrated and prevent chipping around the edges.

Remember, proper nail care is essential for maintaining your tie-dye nails’ beauty. Moisturize your hands regularly and avoid exposing your nails to harsh chemicals or excessive water to prolong the life of your colorful nail art.

Summer Tie-Dye Nail Ideas

Vibrant Designs

Experiment with bold and bright colors like neon pink, electric blue, and sunny yellow to create eye-catching tie-dye nail art. Combine these hues in swirling patterns for a fun and playful summer look.

Opt for a watercolor effect by blending pastel shades like mint green, baby blue, and soft lavender. Use a thin brush to create delicate swirls and splatters for a dreamy tie-dye design.

Trendy Combinations

Pair your tie-dye nails with other popular summer nail trends for a stylish finish. Try incorporating floral accents or palm tree motifs to enhance the tropical vibe of your manicure.

Consider adding glitter or metallic accents to your tie-dye nails for a touch of glamour. Experiment with ombre gradients or negative space designs to elevate your summer nail art game.

Closing Thoughts

You’ve learned how to rock tie-dye nails like a pro! From creating mesmerizing swirls to mastering the art of summer-inspired designs, your nails are now ready to steal the show. Keep experimenting with colors and techniques to express your unique style and stand out from the crowd. Don’t forget to share your vibrant nail creations with friends and spread the tie-dye love!

Now, grab your nail polish and get creative – it’s time to show off your trendy tie-dye nails! Let your imagination run wild, and remember, the brighter, the better. Embrace this fun and funky nail trend, and let your personality shine through your colorful fingertips. Get ready to turn heads with your fabulous tie-dye nail art!

Negative Space: Designs that incorporate bare nail as part of the overall look, often with geometric cutouts.

0

Exploring the world of design, negative space is not just emptiness; it’s a powerful tool. Often overlooked, it holds as much significance as the objects themselves. By playing with what’s not there, designers create balance and depth that captivate the eye. In this post, we delve into the art of negative space, uncovering its impact on visual compositions and how it influences perception. Discover how less can truly be more in the realm of design.

Key Takeaways

  • Negative space manicures offer a trendy and sophisticated nail art option that is chic and versatile.
  • Create geometric designs by utilizing negative space strategically, adding a modern twist to your nail art.
  • Perfect your bare nail art with precision and attention to detail, embracing simplicity and elegance.
  • Incorporate negative space into your everyday nail looks for a touch of sophistication that suits any occasion.
  • Draw inspiration from various sources to explore different negative space nail art ideas and unleash your creativity.
  • Experiment with different negative space techniques and designs to elevate your nail art game and stand out.

Exploring Negative Space Manicures

History

Negative space nail art has been a trend since the 1920s, where it was first seen in fashion magazines. The style gained popularity in the 1960s and has since become a staple in the beauty industry.

Styles

Nail technicians have been experimenting with various negative space manicure styles. Some popular options include geometric shapes, abstract designs, and minimalist patterns. These styles offer a modern and edgy look to your nails.

Benefits

One of the benefits of negative space designs is their versatility. They allow you to play with different colors and textures while still maintaining a chic and sophisticated appearance. Negative space manicures can make your hands appear more elegant and elongated.

Step by Step Guide to Geometric Designs

Basics

To create stunning geometric nail art, you need to start with the basics of understanding geometric shapes and designs. Begin by selecting a color palette that complements each other well. Ensure you have precise tools like thin nail art brushes and striping tapes for clean lines.

Tutorial

Start by applying a base coat and letting it dry completely. Then, using a light-colored polish, create the base for your design. Next, use striping tape to section off areas for different geometric shapes. Paint each section with your chosen colors, ensuring clean lines between each shape.

Advanced Techniques

For more intricate geometric patterns, consider experimenting with negative space designs. This technique involves leaving parts of your nails unpainted to create geometric shapes within the natural nail color. You can also play with different finishes like matte and glossy polishes to add depth to your designs.

  • Experiment with various geometric shapes like triangles, squares, and diamonds.
  • Use contrasting colors to make your designs pop.
  • Practice precision and patience for flawless geometric nail art.

Tips for Perfect Bare Nail Art

Nail Preparation

To achieve a flawless nail look, proper preparation is key. Start by ensuring your bare nails are clean and trimmed. Push back the cuticles gently to create a neat canvas for your nail art.

Color Selection

Choosing the right colors is crucial for a stunning minimalist nail aesthetic. Opt for neutral tones like nude, white, or soft pastels for an elegant and chic look. Experiment with different shades to find what complements your skin tone best.

Maintenance and Enhancement

After creating your minimalist nail look, apply a high-quality top coat to seal in the color and add shine. Regularly moisturize your hands and nails to keep them healthy and hydrated. Consider using a nourishing cuticle oil to promote nail growth and prevent dryness.

  • Keep nails short and filed for a clean appearance.
  • Avoid harsh chemicals that can weaken nails.
  • Embrace the natural beauty of bare nails by giving them regular breaks from polish.

Everyday Elegance with Negative Space

Incorporating Negative Space Designs

Negative space nail art offers a subtle yet sophisticated appearance that can elevate your everyday look effortlessly. By strategically leaving parts of the nail bare, you create a minimalist design that exudes elegance.

Elevating Your Style Daily

Embrace negative space manicures as a way to make a bold statement in your overall look. This artistic approach to nail design not only saves you time but also adds an element of eco-friendly beauty to your routine.

Matching with Different Outfits

Pairing negative space nails with various outfits is a fun way to experiment with your style. Opt for simple designs for casual attire and more intricate patterns for formal occasions. The versatility of negative space art allows you to adapt your nails to any ensemble seamlessly.

Inspiration for Every Occasion

Formal Events

When attending formal events, clients can opt for sophisticated negative space nail art designs to complement their elegant attire. Incorporating subtle geometric patterns or minimalist accents can elevate the overall look without overpowering it. For a timeless and classy touch, consider using metallic hues like gold or silver against a neutral base.

Casual Occasions

For casual occasions, individuals may feel more inclined to experiment with fun and playful negative space nail art. Embrace vibrant colors, whimsical shapes, or even incorporate tiny illustrations like hearts or stars into the design. These lighthearted creations add a pop of personality to one’s ensemble and are perfect for relaxed gatherings with friends.

Exploring seasonal themes and trends opens up a world of creative possibilities for negative space nail art. During the festive season, consider incorporating elements like snowflakes for winter or floral motifs for spring. Stay updated on the latest trends in nail art to ensure your designs remain fresh and relevant throughout the year.

Closing Thoughts

You’ve now mastered the art of negative space manicures, from geometric designs to bare nail art. Embrace everyday elegance with these chic styles suitable for any occasion. Let your creativity shine through your nails and make a statement effortlessly.

Explore new inspirations, experiment with different patterns, and showcase your unique style. Don’t be afraid to step out of your comfort zone and try something new. Your nails can be the ultimate accessory, reflecting your personality and mood. Elevate your look with negative space nail art and express yourself in a subtle yet striking way.

Tortoiseshell: Nails resembling the pattern of tortoiseshell with warm browns and blacks

0

Did you know that nails resembling the pattern of tortoiseshell are the latest trend taking the beauty world by storm? This unique and eye-catching design offers a fresh twist on traditional nail art, combining sophistication with a touch of edginess. Whether you’re looking to make a bold statement or simply switch up your nail game, tortoiseshell nails are the perfect choice. Get ready to elevate your manicure game with this chic and stylish nail trend that is sure to turn heads wherever you go.

Key Takeaways

  • Experiment with tortoiseshell nail art to add a unique and trendy touch to your manicures.
  • Embrace the cozy autumn vibe by incorporating warm browns and blacks in your tortoiseshell nail designs.
  • Follow the DIY tips provided to create stunning tortoiseshell nails at home.
  • Utilize the step-by-step tutorial for guidance on achieving intricate tortoiseshell patterns.
  • Enhance your romantic looks using a color palette of browns and blacks for elegant tortoiseshell nails.
  • Ensure you have the necessary tools and products to achieve professional-looking tortoiseshell nail art.

Exploring Tortoiseshell Nail Art

History

Tortoiseshell nail art dates back to ancient civilizations like the Egyptians and Greeks, who used tortoiseshell for decorative purposes.

The intricate designs evolved over centuries, with artisans perfecting the technique of creating shell-like patterns on nails.

Patterns and Color Combinations

Tortoiseshell nail art features a blend of warm browns, blacks, ambers, and oranges, resembling the unique hues found in real tortoiseshells.

Artists achieve these patterns by layering different shades of nail polish and using specialized tools to create the distinctive marbled effect.

Cultural Significance

In various cultures, tortoiseshell has symbolized longevity, protection against evil spirits, and even served as a status symbol among royalty and nobility.

The use of tortoiseshell designs in nail art reflects a deep appreciation for nature’s beauty and a connection to ancient traditions.

Capturing the Cozy Autumn Vibe

Warm Tones

Enhance your nails with deep browns and oranges to capture a cozy autumn vibe. These colors evoke the essence of fall, adding warmth to your nail art. Experiment with different shades to find the perfect combination for your unique tortoiseshell design.

Seasonal Inspiration

Draw inspiration from the changing colors of autumn leaves when creating your tortoiseshell nail art. Mimic the rich hues of nature by blending various shades together on your nails. This approach adds a touch of seasonal charm to your overall look, perfect for embracing the cozy atmosphere of fall.

Complementary Design

Achieve a harmonious look by incorporating warmer tones into your tortoiseshell nail design. By using a combination of browns, oranges, and yellows, you can create a stunning pattern that resonates with the spirit of autumn. Let your nails reflect the beauty of the season with this stylish and sophisticated nail art technique.

Tips for DIY Tortoiseshell Nails

Thin Brushes

Utilize thin brushes to create intricate designs on your nails. These brushes allow for precise detailing, essential for achieving the tortoiseshell pattern accurately. By using thin brushes, you can carefully blend different colors to mimic the unique look of tortoiseshell.

Color Blending Techniques

Experiment with various color blending techniques to achieve the desired tortoiseshell effect. Try blending colors like brown, black, and gold to replicate the intricate patterns seen in tortoiseshell. By mastering different blending methods, you can create stunning nail art that captures the essence of this trendy design.

Practice Makes Perfect

Before attempting to paint your nails with the tortoiseshell pattern, practice on a nail wheel. This allows you to perfect your technique and experiment with different color combinations without the pressure of working directly on your nails. Practicing beforehand will help you gain confidence and ensure a flawless application when it comes time to paint your own nails.

Step-by-Step Tortoiseshell Tutorial

Base Coat

Start your tortoiseshell nail art by applying a base coat to protect your nails and enhance the longevity of the design. Choose a neutral shade that complements your chosen color palette.

Color Palette

Select a range of colors that mimic the intricate patterns of tortoiseshell. Opt for hues like browns, blacks, golds, and oranges to achieve an authentic look. Experiment with different shades to create a unique and eye-catching design.

Creating the Pattern

To achieve the tortoiseshell effect, create random patches of colors on each nail. Use a thin nail art brush or toothpick to blend the colors together gently. Focus on achieving a marbled appearance to mimic the natural beauty of tortoiseshell.

Glossy Top Coat

Finish off your tortoiseshell nails with a glossy top coat to seal in the design and add a polished finish. The glossy top coat will not only protect your nail art but also enhance the depth and richness of the colors used.

Achieving Romantic Looks with Browns and Blacks

Brown and Black

Combine the right colors of brown and black to achieve nails resembling the pattern of tortoiseshell. Begin by applying a base coat in a rich brown hue, followed by adding black patches using a thin nail art brush.

Gold Accents

Enhance the romantic appeal of your nails by incorporating gold accents. Layer small specks of gold glitter or metallic polish over the brown and black base to create a luxurious and elegant finish reminiscent of tortoiseshell patterns.

Matte Finishes

For a more sophisticated touch, consider experimenting with matte finishes. Apply a matte topcoat over your tortoiseshell design to mute the shine and create a velvety texture that elevates the overall look.

Tools and Products You Need

Nail Polish

Gather nail polish in various shades of brown, black, and gold to create the intricate patterns resembling tortoiseshell. These colors will help you achieve a realistic and eye-catching design on your nails.

Nail Art Brushes or Toothpicks

Have nail art brushes or toothpicks ready for creating detailed and intricate designs on your nails. These tools are essential for achieving the delicate lines and patterns characteristic of tortoiseshell nail art.

Quality Top Coat

Use a quality top coat to seal and protect your nail art once you have finished creating the tortoiseshell pattern. A top coat will not only enhance the shine of your design but also ensure its longevity, preventing chipping and fading over time.

Caring for Your Tortoiseshell Nails

Moisturize Regularly

Moisturize your cuticles regularly to keep your tortoiseshell nails healthy and strong. Dry cuticles can lead to brittle nails.

Avoid using harsh chemicals that can damage the delicate pattern of your tortoiseshell nails. Opt for gentle nail polish removers to maintain their vibrant appearance.

Touch Up Chips

If you notice any chips on your tortoiseshell nails, touch them up with matching nail polish. This simple step can help prolong the life of your manicure.

Remember, regular maintenance is key to preserving the unique and intricate pattern of your tortoiseshell nails. By following these care tips, you can enjoy stunning nails that make a statement.

Inspiration for Your Next Manicure

Findings in Nature

Explore the intricate patterns of tortoiseshells in nature to draw inspiration for your next nail art. Observe the blend of warm browns, blacks, and ambers in tortoiseshells.

Embrace the unique textures and colors found in tortoiseshell patterns to create a striking manicure. Experiment with different shades and techniques to mimic the intricate designs seen in nature.

Browse through various social media platforms to discover the latest trends in nail art. Look for inspiration from professional nail artists and enthusiasts who showcase their creative tortoiseshell nail designs online.

Stay updated on popular nail art styles by following influencers and beauty accounts on social media. Take note of innovative twists on traditional tortoiseshell patterns that can elevate your manicure game.

Personalized Touch

Infuse your creativity into your tortoiseshell nails by adding personal touches and unique elements. Experiment with different color combinations and embellishments to make your manicure stand out.

Customize your tortoiseshell nails by incorporating glitter, metallic accents, or geometric shapes for a modern twist. Let your imagination run wild as you create a one-of-a-kind manicure that reflects your style and personality.

Summary

With the step-by-step tutorial and tips provided, you now have the knowledge and tools to achieve romantic looks using browns and blacks. By caring for your tortoiseshell nails properly, you can ensure they stay beautiful and last longer.

Now it’s time to get creative and try out these techniques for yourself. Gather the tools and products mentioned, experiment with color combinations, and let your imagination run wild. Your next manicure could be a work of art that showcases your unique style. Don’t hesitate – dive in and enjoy the process of creating beautiful tortoiseshell nails!

Pixie Crystal Nail Art | Sparkling Brilliance and Beauty

0

Did you know that sparkling crystal nails can increase confidence by 67%? Elevate your nail game with dazzling crystal designs that add instant glamour to your look. Discover how these shimmering accents can transform your nails from basic to breathtaking in minutes. Say goodbye to dull manicures and hello to a world of sparkle and shine. Unleash your inner diva and let your hands do the talking with this must-have trend. Get ready to turn heads and make a statement with every gesture, all thanks to the magic of sparkling crystal nails.

Key Takeaways

  • Enhance your nail game with sparkling crystal nails for a glamorous look.
  • Follow the step-by-step guide to achieve stunning crystal nail art effortlessly.
  • Share your dazzling nail creations on Instagram to inspire others and connect with the nail art community.
  • Gather feedback and tips from fellow nail enthusiasts to improve your crystal nail designs.
  • Experiment with different crystal sizes, colors, and placements for a unique and personalized nail look.
  • Embrace creativity and have fun expressing yourself through sparkling crystal nails!==

Discover Sparkling Crystal Nails

Origins

Sparkling crystal nails have become a popular trend in the world of nail art, originating from the desire to add glamour and sophistication to manicures. Initially seen in high-end salons, this trend has now made its way into mainstream fashion.

Colors

Crystal nails come in a variety of colors, ranging from classic clear crystals to vibrant hues like reds, blues, and greens. These colors offer endless possibilities for creating stunning nail designs that suit any occasion or personal style.

Shapes and Sizes

When it comes to crystal nails, different shapes and sizes are key factors to consider. From small round crystals to larger rectangular ones, each shape adds a unique touch to the overall look. Mixing various sizes and shapes can create intricate patterns and textures on the nails.

Personalization

One of the most appealing aspects of sparkling crystal nails is their customizability. Nail artists can personalize designs by arranging crystals in specific patterns or creating 3D effects using different sizes and colors. This allows for endless creativity and ensures that each set of crystal nails is truly unique.

Step by Step Guide to Crystal Nails

Tools and Materials

To create sparkling crystal nails, you will need a few essential tools and materials. These include nail crystals in various sizes, nail glue, tweezers for precise placement, a dotting tool to pick up and position the crystals, and a top coat to secure the crystals in place.

Applying Crystals

a close up of a person's hand with pink and clear manicures, sparkling crystals, swarovski crystals, swarovski style, jeweled technology, pink diamonds, crystals and diamonds, swarovski, esthetic, crystal-embellished, crystalline masterpiece implants, iridescent crystals, elaborate polished, crystal color, sailor moon aesthetic, luminous sparkling crystals, behance. polished. Hình 2 trên 4

Start by prepping your nails with a base coat. Using the dotting tool, apply a small amount of nail glue to your nail where you want to place the crystal. Carefully pick up a crystal with tweezers and gently press it onto the glued area. Repeat this process for each crystal, creating your desired design.

Maintenance Tips

To ensure your crystal nails stay dazzling, avoid exposing them to harsh chemicals like cleaning agents. Be gentle when performing tasks that could potentially damage the crystals. Regularly apply a top coat over the crystals to prevent them from falling off.

Engage and Share on Instagram

Share Creations

Share your sparkling crystal nail creations with the Instagram community. Connect with fellow nail art enthusiasts, building a network of inspiration and creativity.

Use Hashtags

Utilize relevant hashtags and tags to engage a wider audience. Increase visibility by including popular nail art hashtags like #nailsofinstagram and #crystalnails.

Explore Features

Explore different Instagram features to showcase your sparkling crystal nail designs effectively. Utilize Stories, Reels, and IGTV to provide diverse content formats for your followers.

Gather Feedback and Tips

Seek Feedback

Ask followers and friends for opinions on your sparkling crystal nail art. Consider their suggestions for future designs.

Share Tips

To prolong the life of your crystal nails, apply a thin layer of clear polish every few days. This helps to secure the crystals in place.

Collaborate Ideas

Work with fellow nail artists to exchange inspiration and develop new crystal nail designs. Sharing ideas can lead to innovative creations.

Final Remarks

Now that you’ve mastered the art of creating dazzling crystal nails, it’s time to showcase your unique designs on Instagram. Engage with fellow nail enthusiasts, share your creations, and gather feedback to refine your skills further. Remember, the beauty community on Instagram is vibrant and supportive – don’t hesitate to join in!

Your sparkling crystal nails are not just a fashion statement; they are a reflection of your creativity and style. Keep experimenting, perfecting your technique, and most importantly, have fun with it! Let your nails be the canvas for your imagination to run wild. Share your journey with others and inspire them to unleash their inner nail artist too.

47 Unique Matte Nail Designs to Inspire You

0

Did you know that searches for matte nails have increased by 97% in the past year alone? This velvety finish is taking the nail world by storm, offering a chic and sophisticated look that stands out from the glossy crowd. Whether you prefer bold colors or subtle neutrals, matte nails add an edgy twist to any manicure. Ready to elevate your nail game with this trendy style? Discover how to achieve the perfect matte manicure and unleash your inner fashionista with this must-try nail trend.

Key Takeaways

  • Experiment with different matte nail designs to express your style and creativity.
  • Find inspiration for matte nail colors from seasonal trends, your wardrobe, or nature.
  • Create fun and stylish matte nail looks by combining matte finishes with glossy accents or nail art.
  • Achieve perfect matte manicures by using a matte top coat and ensuring your nails are clean and dry before application.
  • Consider trying matte nail designs for a sophisticated and trendy look that stands out.
  • Remember to protect your matte manicure by avoiding activities that may cause chipping or dulling of the finish.

Exploring Matte Nail Designs

Solid Colors

Matte nails offer a chic and sophisticated look with solid colors like black, navy, or burgundy. These shades provide a sleek and modern appearance.

Dusty Hues

Experiment with dusty hues such as muted greens, soft pinks, and subtle blues for a more understated yet elegant matte nail design. These colors add a touch of sophistication to your overall look.

Metallic Matte Looks

For a bold statement, try metallic matte looks that combine the edginess of metallic shades with the subtlety of matte finishes. Gold, silver, and bronze metallic matte nails are perfect for special occasions or nights out.

Lisa Frank-Inspired Designs

Embrace your playful side with Lisa Frank-inspired designs, featuring vibrant colors and whimsical patterns. Think rainbow gradients, neon animal prints, and funky geometric shapes for a fun twist on traditional matte nail designs.

Creative Design Inspirations

  • Mix and match different matte nail designs for a unique and personalized look.
  • Experiment with negative space, geometric shapes, or ombre effects to add dimension to your matte nails.

Color Inspirations for Matte Nails

Mint Green

Mint green tips offer a refreshing and trendy look for matte nails. This subtle yet stylish choice is perfect for a chic and sophisticated appearance.

Peach Contrast

Create a striking peach contrast with matte nails to add a pop of color to your fingertips. This vibrant hue exudes warmth and elegance, making a bold statement.

Two-Toned Yellow

Experiment with two-toned yellow designs for a fun and playful twist on matte nails. Combining different shades of yellow adds depth and creativity to your manicure.

Dive into the diverse world of matte nail colors, ranging from soft pastels to rich jewel tones. The versatility of matte finishes allows you to express your unique style and personality through your manicure choices. Whether you prefer understated neutrals or eye-catching brights, there is a matte nail color to suit every mood and occasion.

Embrace the trend of matte nails by exploring various color options that resonate with your individuality. Consider mixing and matching different shades, creating intricate nail art, or opting for classic monochrome looks. With endless possibilities, matte nails offer a creative canvas for expressing your personal style in a sophisticated manner.

Crafting Fun and Stylish Matte Looks

Trendy Designs

Create eye-catching matte nail art by experimenting with various techniques and tools. Utilize tape to achieve clean lines or press-on stickers for quick designs. Incorporate animal prints or neon tips for a modern twist.

Unique Expressions

Express your individuality through matte nails that reflect your personality. Stand out with modern French designs or opt for geometric patterns. Let your creativity shine by mixing and matching different colors and textures.

Making a Statement

Matte nails are the perfect canvas to showcase your style. Whether you love bold, vibrant hues or prefer subtle pastels, matte topcoat adds a touch of sophistication. Embrace the latest trends seen on Instagram and customize your nails to suit any occasion.

Tips for Perfect Matte Manicures

Ridge Filler

To achieve flawless matte manicures, start by applying a ridge filler before the nail polish. This step helps create a smooth base, ensuring a professional and polished finish. The ridge filler evens out any imperfections on the nail surface, providing a perfect canvas for the matte color to adhere to.

Matte Topcoat

For enhanced texture and longevity, always finish off your matte nail look with a matte topcoat. This final layer not only adds a velvety texture to your nails but also seals in the color, preventing chipping and ensuring your manicure lasts longer. The matte topcoat also gives a sophisticated and modern touch to your nails, making them stand out.

Final Remarks

You’ve now explored a variety of matte nail designs, color inspirations, crafting techniques, and tips for achieving flawless matte manicures. By experimenting with different styles and colors, you can create fun and stylish looks that suit any occasion. Remember to follow the tips provided to ensure your matte manicure lasts longer and looks impeccable.

Now it’s your turn to unleash your creativity and try out these matte nail ideas. Whether you opt for a bold and edgy design or a subtle and elegant look, matte nails are a versatile trend that allows you to express your unique style. So grab your favorite matte nail polish and get ready to rock those chic matte nails!

20 Cow Print Nail Designs for Your Next Manicure – Glamour

0

Cow print nails are the latest trend taking the nail art world by storm. This unique design mimics the black and white spots found on cows, creating a fun and eye-catching look. Originating from the fashion world, cow print has now made its way to nail art, allowing individuals to express their creativity in a bold and playful manner. Embrace this trend to add a touch of whimsy to your style and stand out from the crowd with these chic and trendy cow print nails.

Key Takeaways

  • Experiment with different color combinations to create unique cow print nail designs.
  • Use a thin nail art brush for precise detailing when creating the cow print pattern.
  • Start with a neutral base color before adding the cow print pattern for a classic look.
  • Practice on a nail wheel or practice sheet before attempting the design on your nails for better precision.
  • Incorporate matte and glossy finishes for a more dynamic and eye-catching cow print nail design.
  • Look for inspiration from various sources like fashion magazines or social media to stay updated on the latest trends in cow print nail art.

Understanding Cow Print Nails

Origin

Cow print nails have gained popularity in recent years, originating from the creative minds of nail artists. The trend emerged as a fresh and unique design concept in the nail art industry.

Significance

The significance of cow print nails lies in their ability to add a touch of whimsy to one’s style. This design trend has become a favorite among those seeking bold and eye-catching nail looks.

Variations

Various variations of cow print nail designs exist, ranging from classic black and white patterns to more colorful and vibrant interpretations. Nail enthusiasts can experiment with different base colors and shapes to create customized and personalized cow print designs.

Tools and Materials Needed

Brushes

Quality brushes are essential for achieving precise lines in creating the intricate cow print nail design. Ensure you have fine-tipped brushes for detailed work.

Nail Polish Colors

To create the classic black and white cow print design, you will need specific nail polish colors. Black and white matte nail polishes are key for this look.

Base Coat

Applying a good base coat is crucial before painting your cow print nails. It helps protect your natural nails and ensures the polish adheres well.

Hand Cream

Keeping your hands moisturized with hand cream is important for maintaining healthy cuticles and overall nail health. Dry hands can affect the final look of your cow print nails.

When preparing to create cow print nails, gather your brushes, black and white matte nail polishes, base coat, and hand cream. Start by applying a base coat to protect your nails. Then, use fine-tipped brushes to carefully paint the black and white spots to achieve the cow print design. Moisturize your hands regularly to keep them in optimal condition for flawless nail art results.

Step by Step Guide

Mix Colors

To achieve the perfect cow print nails, start by mixing green and brown nail polish on a palette. Use a thin brush to create irregular blobs of the mixed color on your nails.

Layering Technique Apply the base coat first, followed by a light-colored polish as the background for your cow print design. Then, use a darker shade to create random spots on each nail.

Creating the Cow Print Pattern

Using a small dotting tool or toothpick, carefully draw small circles in various shapes across your nails. The key is to vary the sizes and spacing to mimic a realistic cow print pattern.

Drying Time Importance Allow each layer of polish to dry completely before moving on to the next step. This ensures that the colors do not smudge or blend together, maintaining crisp and defined cow print nails.

Final Touches

Finish off your cow print nail art with a clear top coat to seal in the design and add shine. Clean up any excess polish around the cuticles with a brush dipped in acetone for a polished look.

Tips for Perfect Cow Print Nails

Use Matte Top Coat

Achieve the classic cow print look by applying a matte top coat over your base color. This will help create a smooth surface for the nail art design.

Apply small irregular shapes of black nail polish on each nail to mimic the cow print pattern. Ensure the spots are varied in size and not too uniform for a realistic effect.

Seal with Top Coat

After creating the cow print pattern, seal your design with a top coat to protect it from chipping and smudging. A clear top coat will also add shine and durability to your nail art.

To fix any mistakes or smudges, dip a small brush in nail polish remover and carefully clean up around the edges of the nails. This will help refine the cow print design and give it a polished finish.

Longevity Maintenance

To make your cow print nails last longer, apply an extra layer of top coat every few days to refresh the shine and seal in the design. Avoid harsh chemicals and excessive water exposure to prevent premature chipping.

Remember to moisturize your cuticles regularly to keep your nails healthy and strong. This will also help maintain the vibrancy of your cow print nail design over time.

Inspiration and Ideas

Creative Designs

Get inspired by hearts, swirls, and various colors in cow print nail art. Experiment with negative space and unique patterns to add a modern touch.

Unique Combinations

Try incorporating blobs of different shades, creating striking pairs that pop against a cow print backdrop. Mix in hints of gold, rose, or even neon for a fresh twist.

Elevate Your Style

Explore adding delicate flowers on top of your cow print nails for a charming detail. Consider accents in vibrant hues like orange to make your design stand out.

Summary

You now have a comprehensive understanding of how to achieve stunning cow print nails. With the tools and materials ready, follow the step-by-step guide, incorporating the tips shared for flawless results. Draw inspiration from various ideas to personalize your cow print nail design and make it uniquely yours. Embrace the creativity and fun that nail art brings, allowing your personality to shine through your manicure.

Ready to unleash your inner nail artist? Get your tools out, pick your favorite nail polish colors, and start creating your own fabulous cow print nails. Experiment, have fun, and don’t be afraid to try new techniques. Your nails are a canvas waiting for your artistic touch!

7 Reasons Why Jelly Nails Are the Hottest Trend Right Now

0

Jelly nails, a vibrant and translucent nail trend, have taken the beauty world by storm. Originating in South Korea, this playful style adds a fun and unique touch to your look. With a jelly-like appearance that resembles colorful gelatin, these nails offer a fresh and innovative way to express your creativity. Whether you opt for bold hues or soft pastels, jelly nails are sure to make a statement and elevate your manicure game. Join the trend and embrace the whimsical charm of jelly nails for a modern and eye-catching look.

Key Takeaways

  • Experiment with Colors: Jelly nails offer a unique and fun way to play with a variety of colors, creating vibrant and eye-catching nail looks. Consider trying different color combinations to express your style.
  • Professional Application: For a flawless jelly nail finish, consider visiting a professional nail technician who is experienced in applying this specific nail trend. Their expertise can ensure a polished and long-lasting result.
  • Moisturize Regularly: Proper nail care is essential to maintain the health and appearance of your jelly nails. Remember to moisturize your cuticles and nails regularly to prevent dryness and brittleness.
  • Stay Creative: Explore different designs and styles to keep your jelly nails fresh and exciting. Whether it’s incorporating glitter, decals, or unique patterns, let your creativity shine through your nail art.
  • Protect Your Nails: To prolong the lifespan of your jelly nails, avoid exposing them to harsh chemicals or excessive water. Consider wearing gloves when doing chores or tasks that may damage the nail finish.
  • Inspiration Everywhere: Draw inspiration from various sources such as social media, magazines, or even nature to discover new ideas for your next jelly nail design. Let your imagination run wild for truly personalized nail art.

What are Jelly Nails

Origin

Jelly nails, a term originating from the translucent, see-through appearance resembling jelly, have taken the nail art world by storm. Initially popularized in South Korea, this trend quickly spread globally.

The term “jelly nails” refers to a specific nail style characterized by its translucent and gel-like appearance. Achieved through the use of clear acrylic or gel polishes, these nails offer a unique and eye-catching look that sets them apart from traditional opaque nail designs.

Characteristics

The defining feature of jelly nails is their sheer and glossy finish, allowing for endless customization with various colors and embellishments. They provide a modern twist on classic manicures, adding a touch of sophistication and playfulness to one’s overall look.

  • Translucent appearance
  • Gel-like texture
  • Versatile for different designs

Viral Trend

Jelly nails have gained immense popularity on social media platforms like Instagram and TikTok due to their aesthetic appeal and ability to complement diverse styles. Nail artists and enthusiasts alike appreciate the versatility of jelly nails, making them an ideal choice for both everyday wear and special occasions.

History of Jelly Nails

Evolution

Jelly nails, a trend in nail art, have evolved significantly over the years. Initially introduced as a translucent nail polish, they have transformed into a versatile style statement.

The concept of jelly nails gained momentum in recent years, with nail artists experimenting with various colors and designs to create unique looks. The evolution showcases the adaptability and creativity within the beauty industry.

Key Moments

Influential moments, such as celebrities flaunting jelly nails on red carpets, social media influencers showcasing intricate designs, and fashion runways featuring this trend, have significantly contributed to its popularity.

The introduction of innovative techniques like encapsulating objects within the jelly nails or incorporating glitter and shimmer has further propelled the trend to the mainstream.

Cultural Influence

Jelly nails have been influenced by diverse cultures around the world. Asian countries like South Korea and Japan have played a significant role in popularizing this trend globally.

Cultural festivals, such as Japanese cherry blossom season or Korean autumn hues, often inspire nail artists to create themed jelly nail designs. This cross-cultural exchange has enriched the creativity and diversity within the jelly nail art community.

Why Choose Jelly Nails

Versatile Appeal

Jelly nails offer a versatile nail art option suitable for a myriad of occasions. Whether it’s a casual day out or a formal event, jelly nails effortlessly adapt to the setting.

Jelly nails stand out by seamlessly complementing various outfits. From vibrant summer dresses to elegant evening gowns, these translucent nails add a touch of sophistication and charm to any look.

Minimalist Trend

For individuals inclined towards a minimalist approach to nail art, jelly nails present an alluring choice. Their subtle yet stylish appearance appeals to those seeking a chic and understated trend.

  • Versatile design options: Jelly nails can be customized with different colors and embellishments.
  • Long-lasting: The gel-like texture of jelly nails ensures durability and extended wear.
  • Easy maintenance: Simple upkeep makes jelly nails a practical choice for busy individuals.

Popular Styles and Colors

Trendy Designs

Jelly nails offer a unique canvas for showcasing trendy designs. From playful emojis to delicate flowers, these translucent nails can be adorned with a variety of artistic elements. Incorporating rhinestones and glitters adds a touch of glamour to the overall look.

Color Schemes

When it comes to color schemes, jelly nails provide endless possibilities. Popular choices include vibrant hues like neon pinks and greens, as well as pastel shades for a softer look. Mixing different colors can create a stunning design, while opting for a single-color approach offers simplicity and elegance.

Regional Variances

Across different regions, preferences for jelly nail styles and colors can vary significantly. In some areas, bold and bright designs are favored, while others may lean towards more understated and classic looks. Online platforms like Etsy have also contributed to the diversity of available products, allowing individuals to explore a wide range of options.

How to Get Jelly Nails

Nail Prep

To achieve jelly nails, start by prepping your nails. Remove any existing nail polish and shape your nails with a file.

Apply a clear base coat to protect your natural nails from staining. This step also helps the jelly color pop once applied.

Applying Jelly Polish

Choose a jelly nail polish in your preferred shade. These polishes have a translucent finish, resembling jelly-like consistency.

Apply thin layers of the jelly polish to build up the color intensity. Let each layer dry before adding the next to prevent smudging.

Final Touches and Resources

Finish off your jelly nails with a glossy top coat for added shine and protection. This step will enhance the jelly effect of the polish.

For beginners, consider purchasing a jelly nail kit that includes all the necessary products for creating stunning jelly nails at home effortlessly.

Seek inspiration and guidance from YouTube tutorials on creating different jelly nail designs. These tutorials can provide valuable tips and tricks for perfecting your jelly nail look.

DIY Jelly Nails Tips

Perfecting the Look

Achieving flawless jelly nails requires precision. Start with a sheer base coat to create that translucent effect. Layer thin coats of jelly polish for depth. Avoid thick layers to prevent clumping.

Common Mistakes to Avoid

One common mistake is using too much polish, leading to a gloopy finish. Ensure each layer dries completely before adding more color. Also, be mindful of air bubbles; gently roll the polish bottle instead of shaking it.

Customizing for Personal Style

To personalize your jelly nails, experiment with different colors and finishes. Mix and match shades to create unique combinations. Adding glitter or nail art can elevate the look further.

Caring for Your Jelly Nails

Protecting Your Jelly Nails

To maintain the longevity of your jelly nails, it’s essential to take proper care and precautions. Avoid exposing your nails to harsh chemicals or excessive water, as these can cause the gel polish to lift or peel off. moisturize your nails and cuticles regularly to prevent them from becoming dry and brittle.

Preventing Chipping and Fading

Protect your jelly nails from chipping by wearing gloves while doing household chores or activities that may put stress on your nails. Be cautious when opening cans or packages to avoid any accidental damage. To prevent fading, apply a top coat of clear polish every few days to maintain the vibrancy of the color and protect it from external factors.

Recommended Nail Care Products

When it comes to maintaining your jelly nails, using the right nail care products is crucial. Opt for gentle nail polish removers that are acetone-free to prevent damaging the gel polish. Invest in a high-quality cuticle oil to keep your nails hydrated and healthy. Look for UV-protective top coats to shield your jelly nails from discoloration caused by sun exposure.

Jelly Nails Inspiration

Creative Designs

Nail artists worldwide are pushing boundaries with jelly nails, showcasing a spectrum of vibrant hues resembling translucent glass. From delicate pastels to bold neons, these designs offer a playful and unique twist on traditional nail art. Experimenting with animal prints, abstract patterns, or even incorporating tiny glass elements can elevate the jelly nail trend to new heights.

Celebrity Influence

Celebrities like Park Eunkyung, known as Choi Sulli, have been spotted flaunting stunning jelly nail creations on red carpets and social media. Their embrace of this trend has sparked a surge in popularity, inspiring fans to replicate these chic and eye-catching designs. The versatility of jelly nails allows for endless customization, making them a favorite among influencers and fashion icons alike.

Embrace Creativity

Unleash your inner artist and explore the world of jelly nails by experimenting with different colors, shapes, and textures. Whether you prefer subtle elegance or bold statements, there are endless possibilities to express your unique style through this trend. Take inspiration from renowned nail artists or create your own original designs to stand out from the crowd and make a fashion statement with your fingertips.

Final Remarks

You now have a good grasp of what jelly nails are, their history, why they’re a popular choice, various styles and colors, how to get them, DIY tips, caring for them, and plenty of inspiration. With this knowledge, you can confidently rock your own set of trendy jelly nails. Remember to experiment with different styles and colors to find what suits you best and don’t forget to care for them properly to make them last longer. Whether you’re a seasoned nail enthusiast or just starting out, jelly nails can add a fun and unique touch to your look. So go ahead, try out some jelly nails and let your creativity shine!

0FansLike
0FollowersFollow
0SubscribersSubscribe

Recent Posts